Tenant Member
In the SSO.ID system, the Tenant member section holds significant importance, so it's crucial to have a clear understanding of it. There are two primary methods for adding new users to SSO.ID. The first method involves the registration process, where users register themselves individually and then log in to SSO.ID independently. The second method is through the user management section, where administrators can easily create new users by clicking on the "create" button. These users are appropriately displayed and can be managed within the user management section. It is essential that all users present in the user management section are also part of the tenant member section. In the tenant member section, each user is assigned a tenant role based on their specific roles and responsibilities. It's crucial to emphasize that in this section, we're dealing with tenant members and tenant roles, not application members or application roles. Please avoid confusing these concepts. Tenant roles grant access to the tenant, and to achieve this, users must be part of the tenant member section.
Add Members
We can add members in two ways.
- Add Existing
- Add New
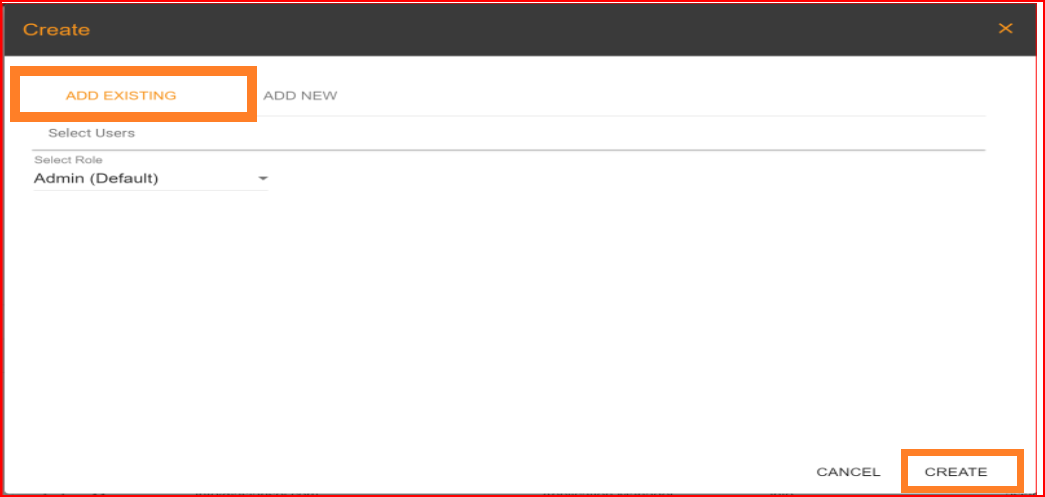
Add Existing
In the "Add Existing" method, we add tenant members who already exist in the user management section but are not yet part of the tenant members. To do this, navigate to the tenant member section and click on the "Create" button, then open the "Add Existing" tab. Here, you can search for the member you wish to add to the tenant member section, and these users are selected from the user management section's important to note that duplicate members cannot be added. Firstly, you should select the users you want to include, and secondly, choose a role from the role list that corresponds to the behavior you expect from these tenant members within the SSO.ID system. Afterward, click on the "Create" button. Now, a user who already exists in the user management section will also become a part of the tenant member section with the assigned role.
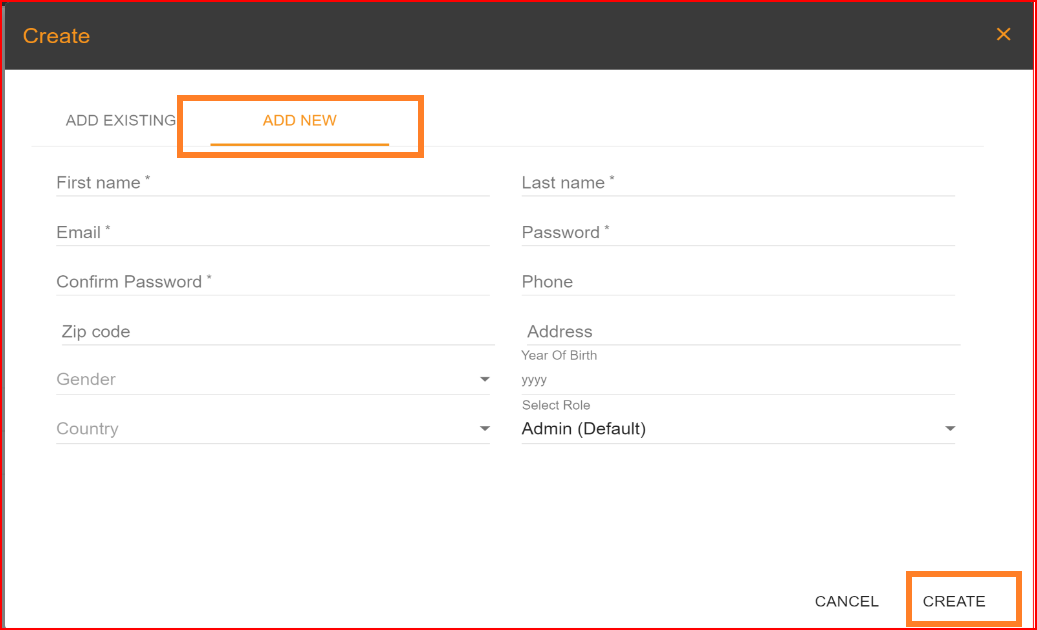
Add New
If a user doesn't exist in the "Add Existing" section, you can create a new user in the "Add New" tab. When you select this option, a create form will open, and it will contain several fields that need to be filled out carefully. You should provide your email address, password, phone number, gender, country, and, most importantly, specify the role. The role you select from the available list will be displayed in your profile settings, and your access within the tenant will be determined based on this role. Additionally, these new members are also included in the user management section. They can log into the system using the email and password that you set in the "Add New User" form to become a new tenant member.
Handling tenant members
Search
The search bar feature is present in nearly every section, including the tenant member section. Its primary purpose is to create a user-friendly interface for clients, making it easy to search for specific records using various criteria. You can search for records by email, first name, last name, and role title.

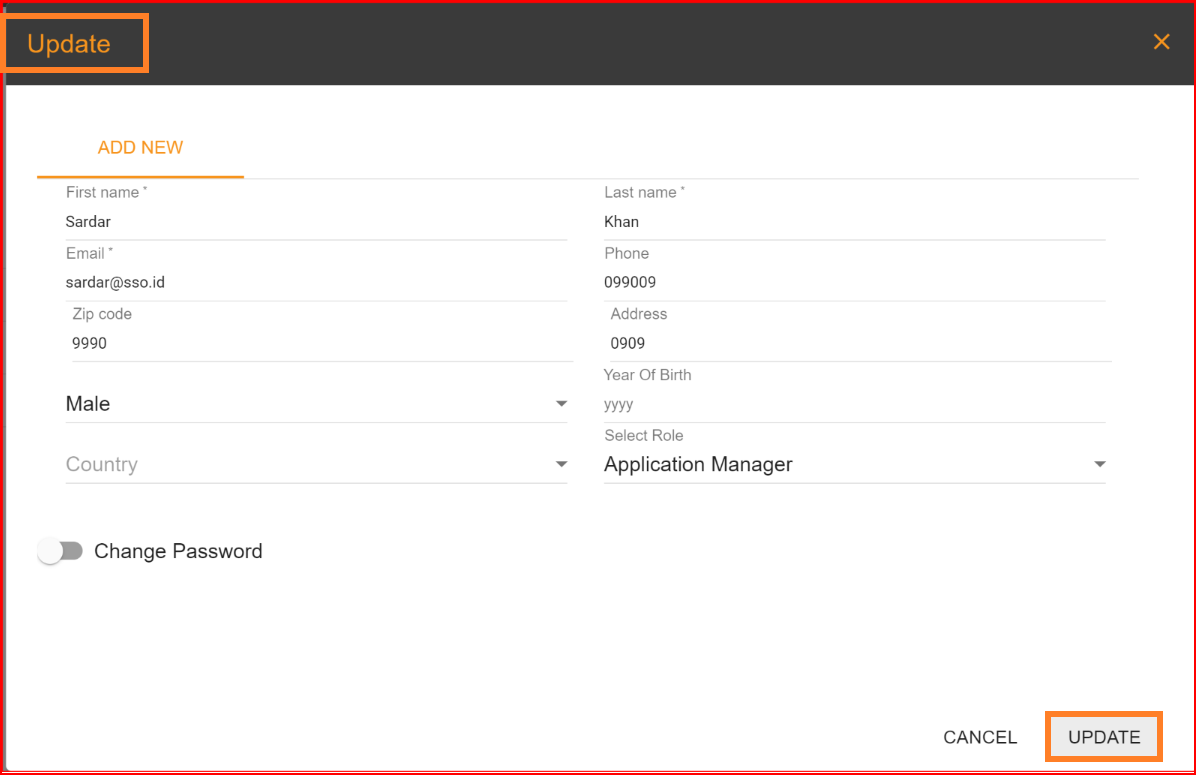
Update
SSO.ID offers the capability to update information for any tenant member, which can be performed by administrators. In addition, each member has the option to update their first name, last name, gender, and role. However, it's important to note that for email updates, the system will check if the email already exists in the system. If it does, an error message will be generated, indicating that the "email already exists".
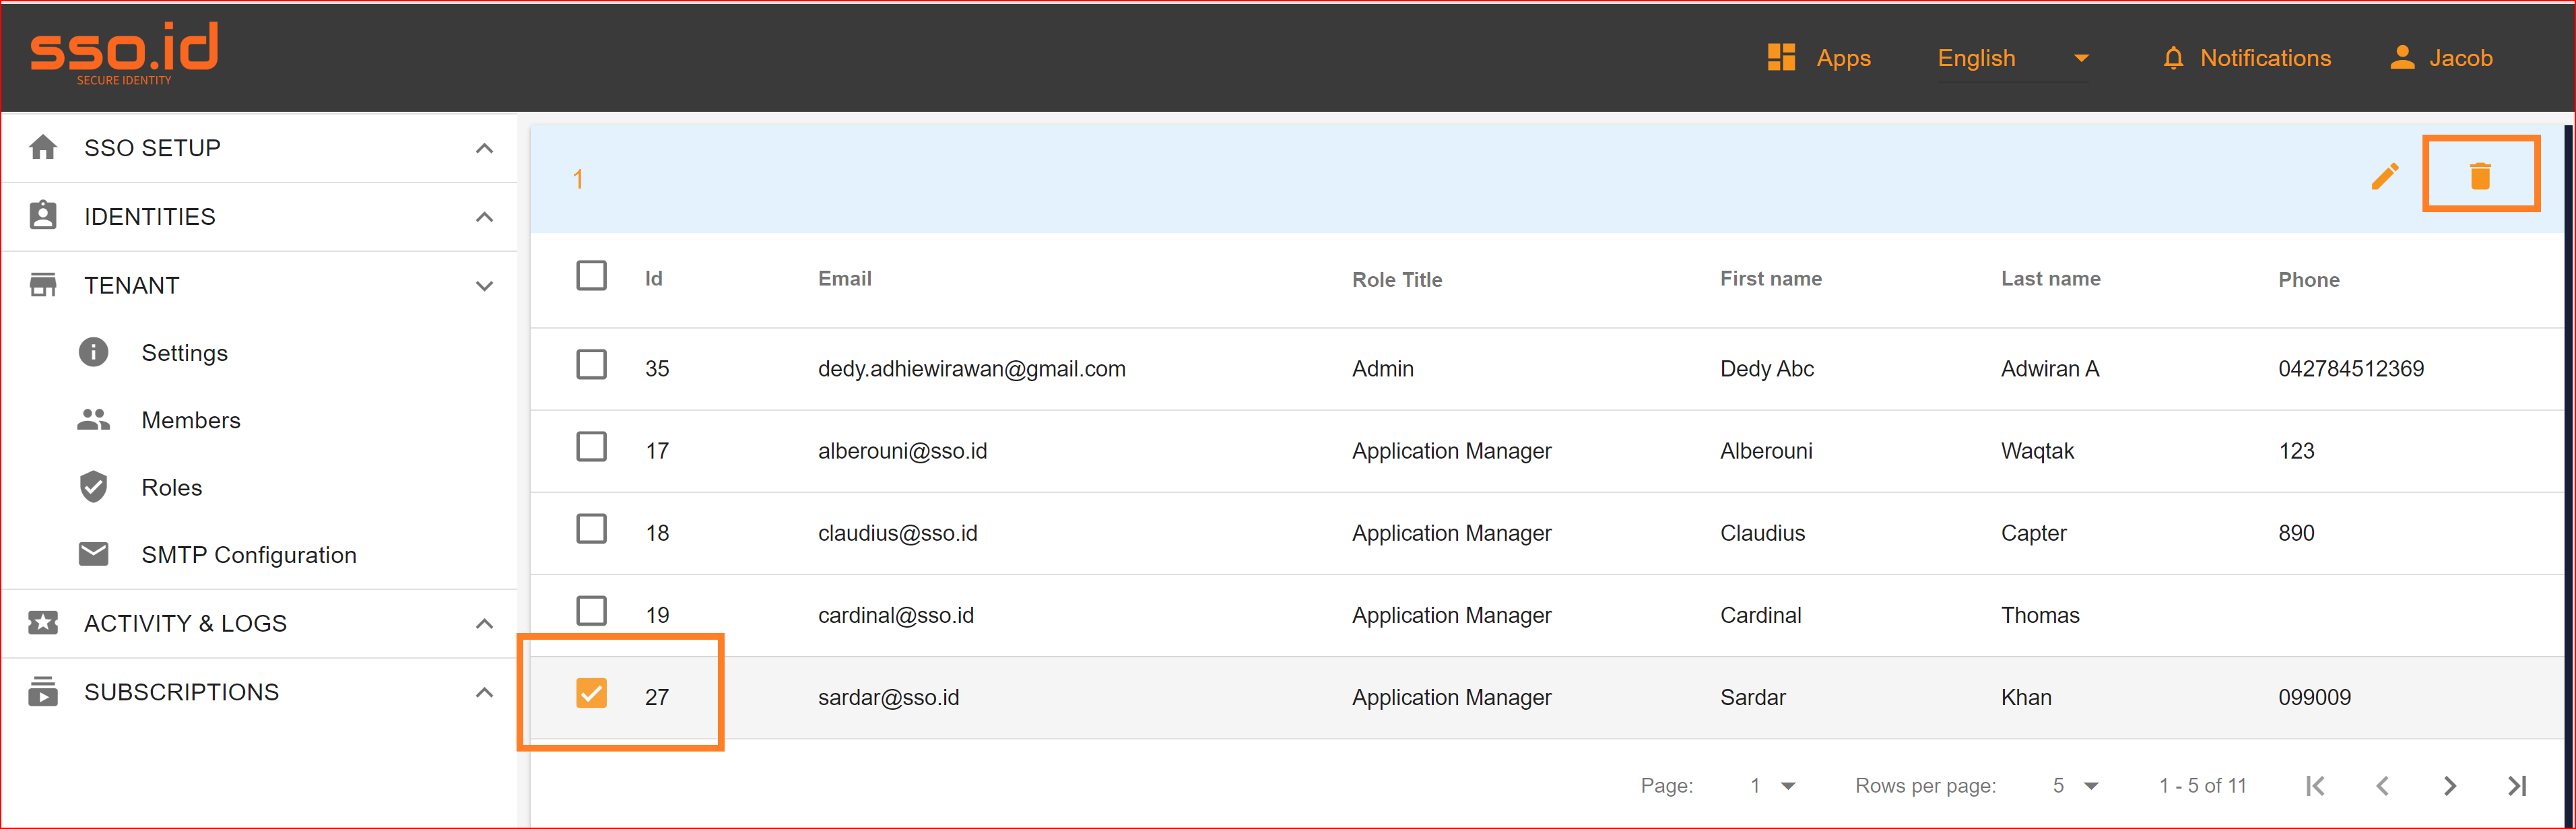
Delete
The delete option is available in nearly every section, and its purpose is to remove any unnecessary or redundant entities from the system. When an entry is deleted, it is permanently removed from the system, so it's important to exercise caution when using this feature. Deleting an entry is a straightforward process. Simply select the record you wish to delete, click on the delete button, and the record will be successfully removed from the SSO.ID system.