SSO.ID (Single Sign-On Identity)
- Version: 1.0
- Author: Asian Solution
- Created: 2023-10-20
- Update:
Single Sign-On
Make things safer, and simpler to handle accounts, and speed up getting new apps and using them.
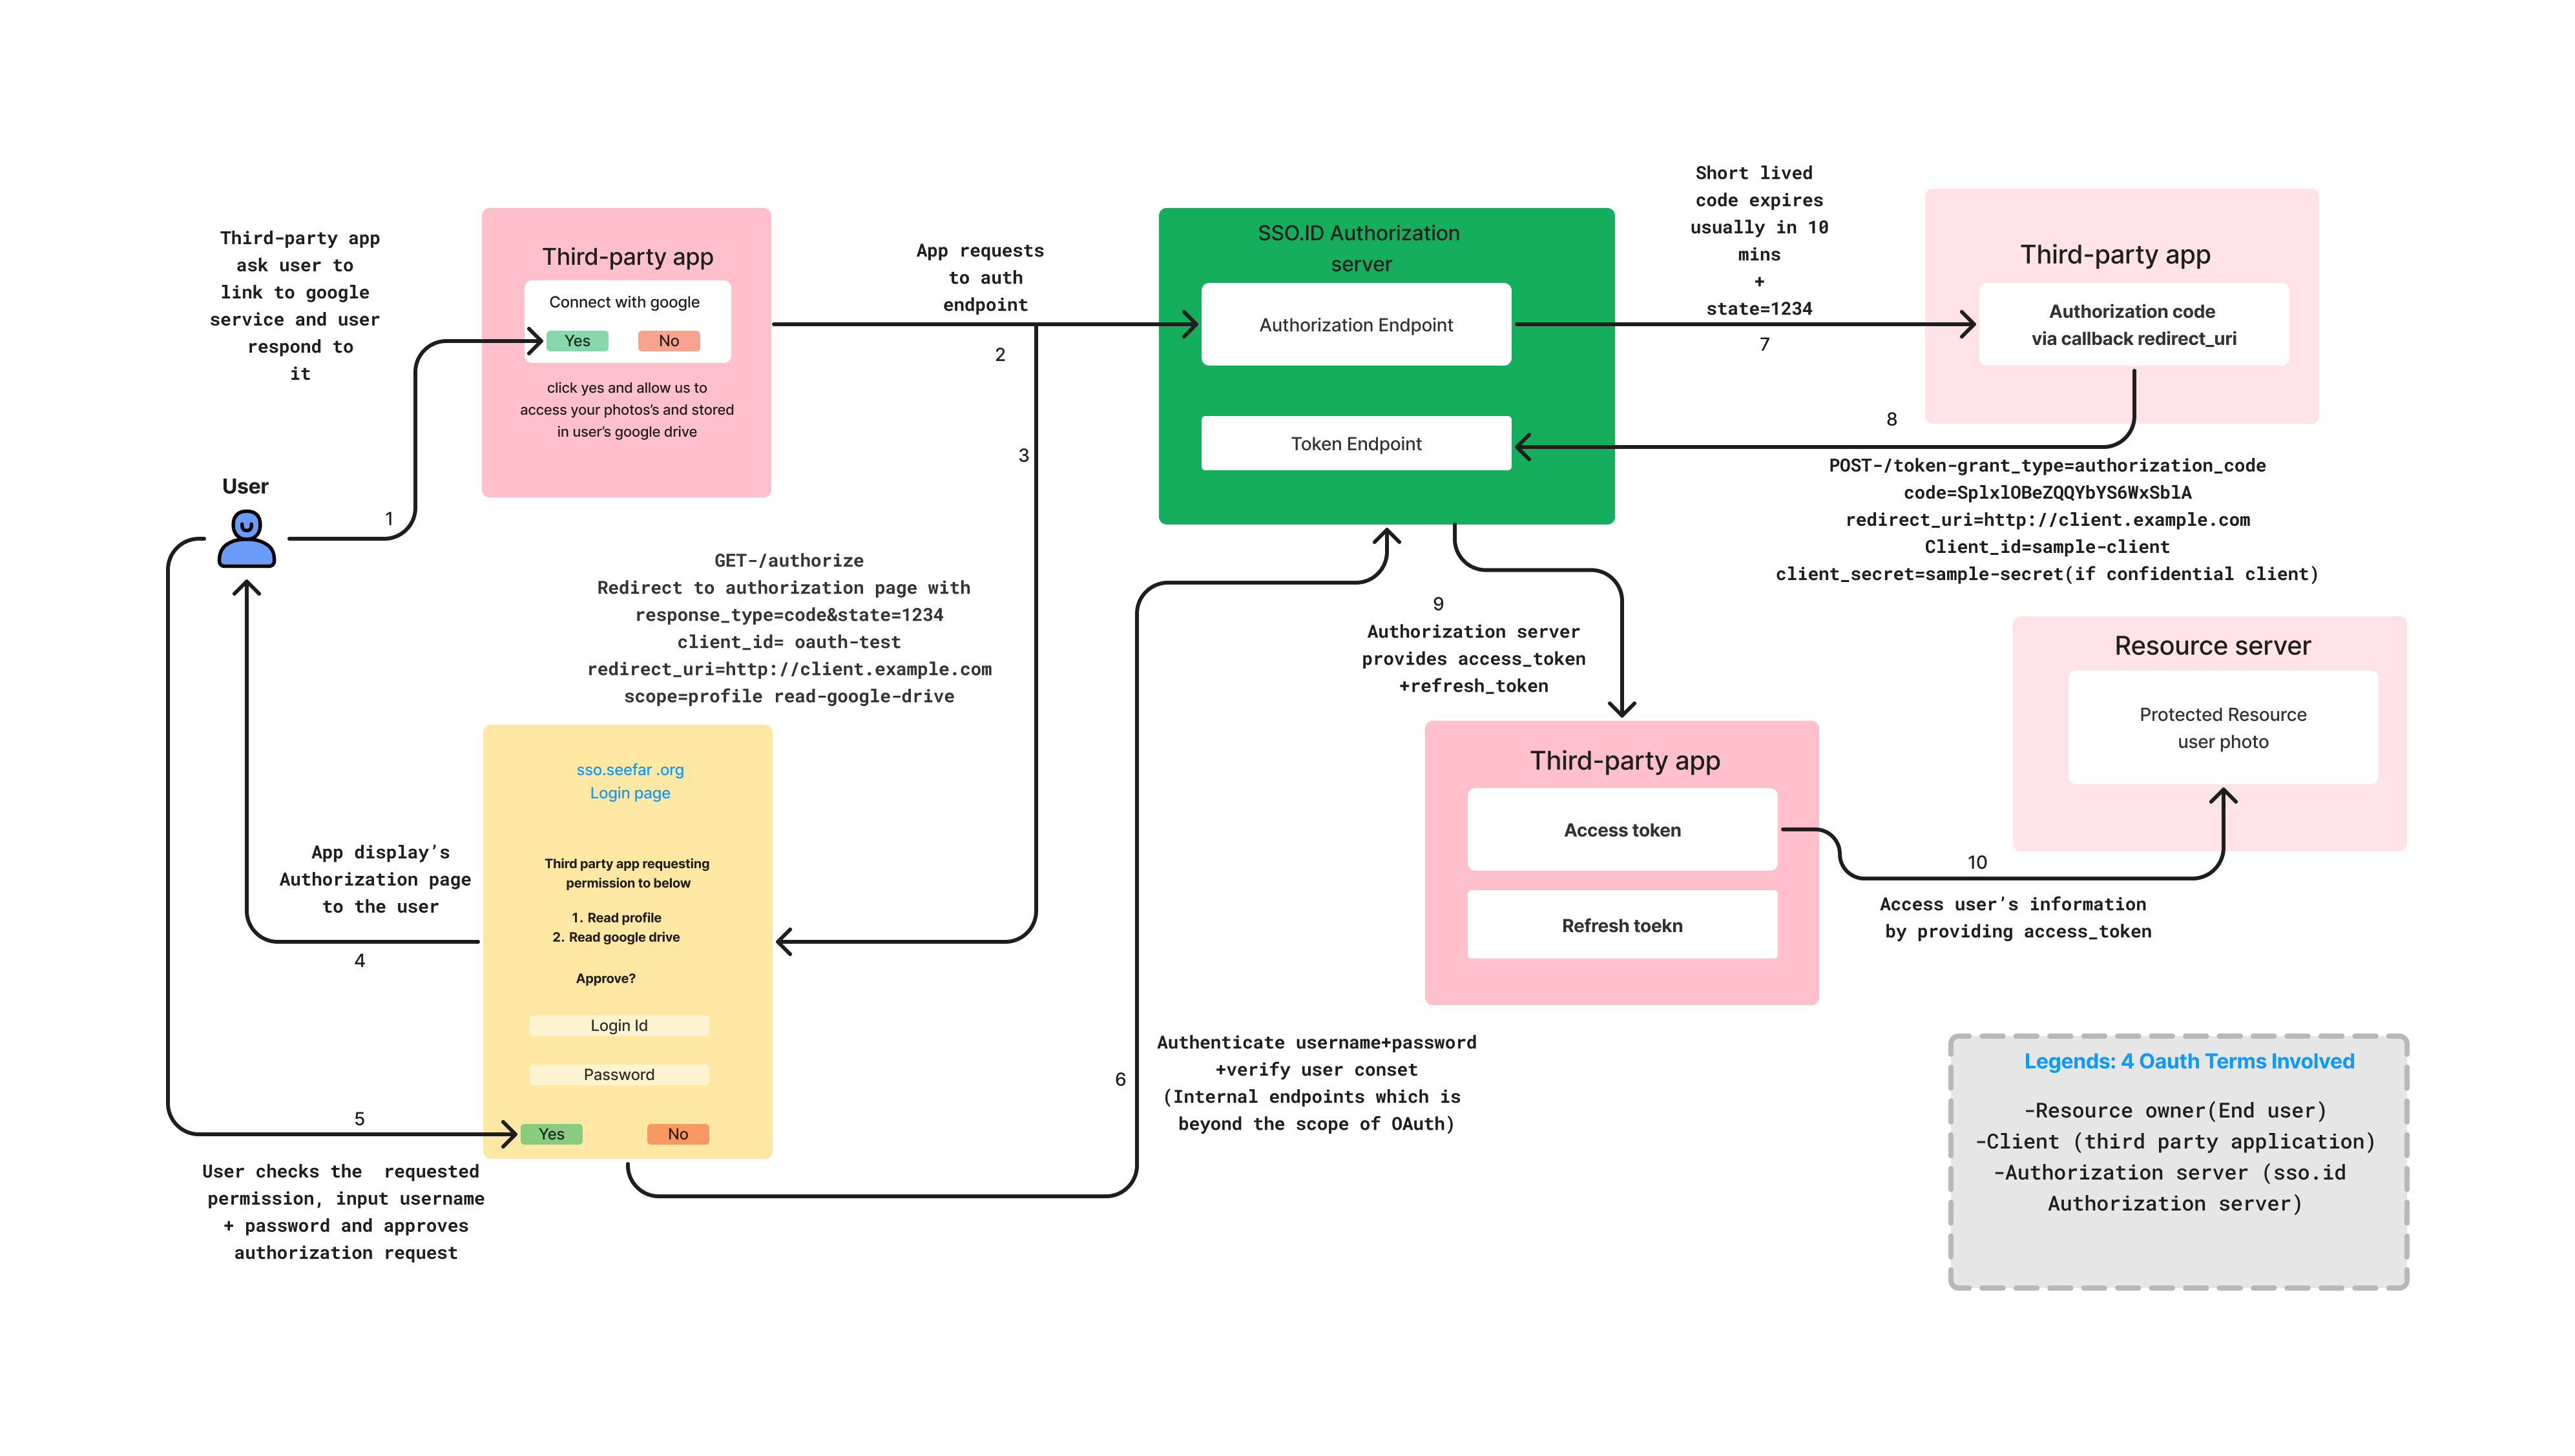
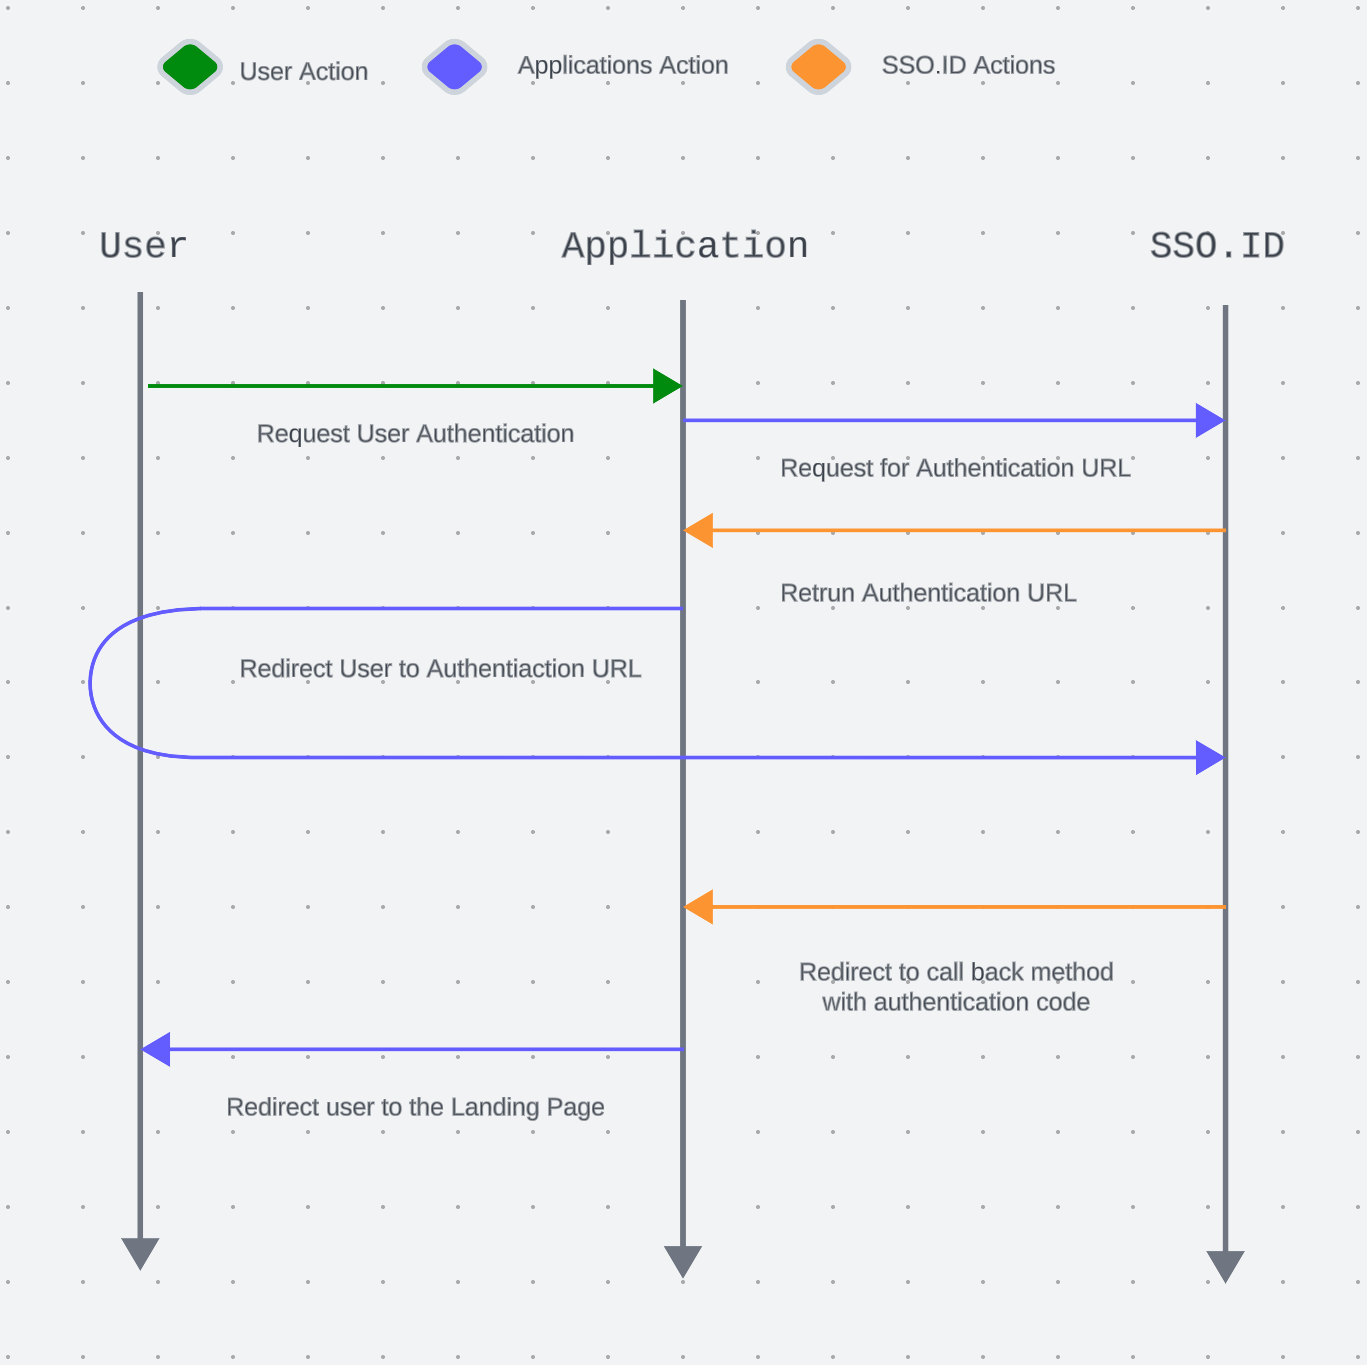
Architecture diagram
Introduction
Single Sign-On (SSO.ID) is a vital concept for simplifying how users log in to various applications and services. It lets users use one set of credentials, usually a username and password, to access multiple applications without having to log in separately for each one. In essence, SSO.ID makes the login process more convenient and secure. With SSO.ID, when a user logs in once to a central authentication system, known as the Identity Provider (IdP), they can access various connected applications without re-entering their credentials. This not only reduces the hassle of managing multiple usernames and passwords but also improves security by reducing the risk of password-related issues. Additionally, SSO.ID supports various authentication protocols like OAuth, OIDC (OpenID Connect), and SAML (Security Assertion Markup Language), making it compatible with a wide range of applications and systems.
Before You Begin
To fully benefit from this guide, you will need. A SSO.ID account. An IDP account from an Identity Provider that is compatible with SSO.ID.
Apps create in SSO.ID
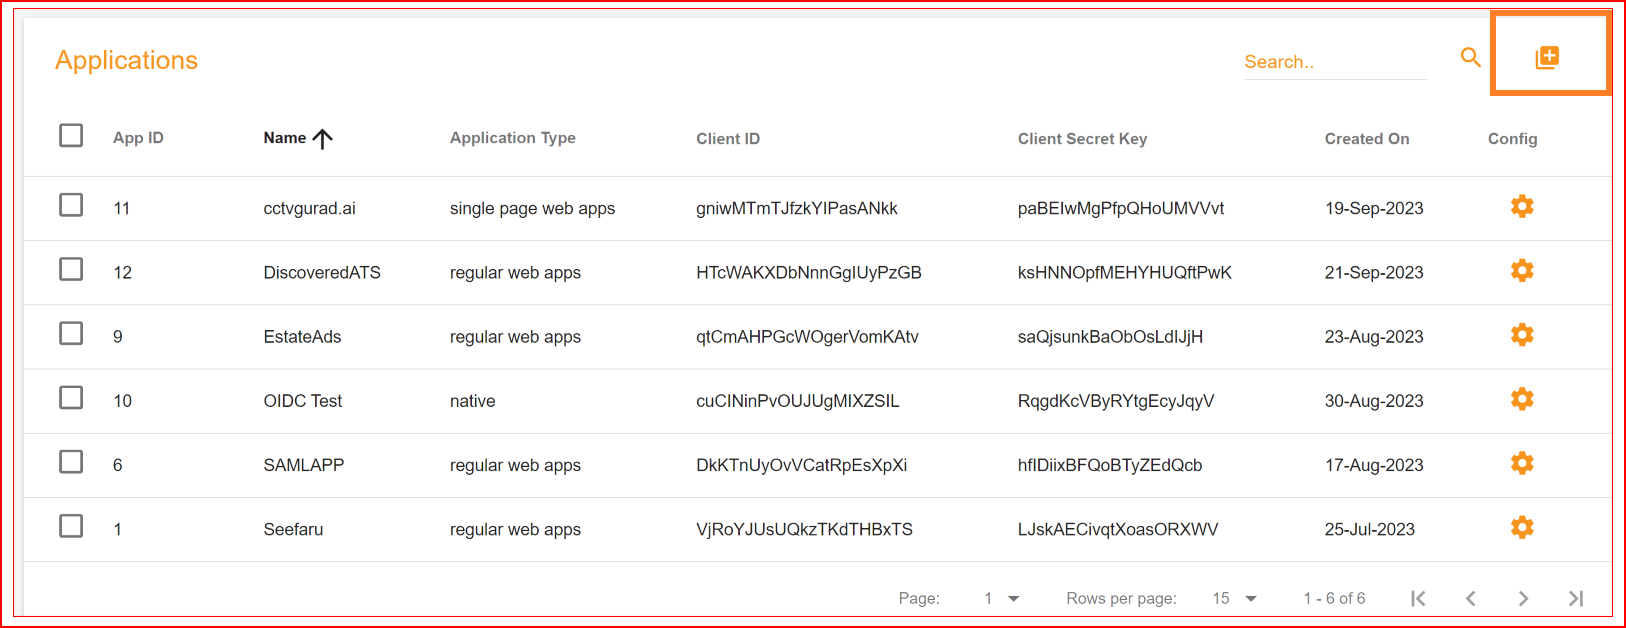
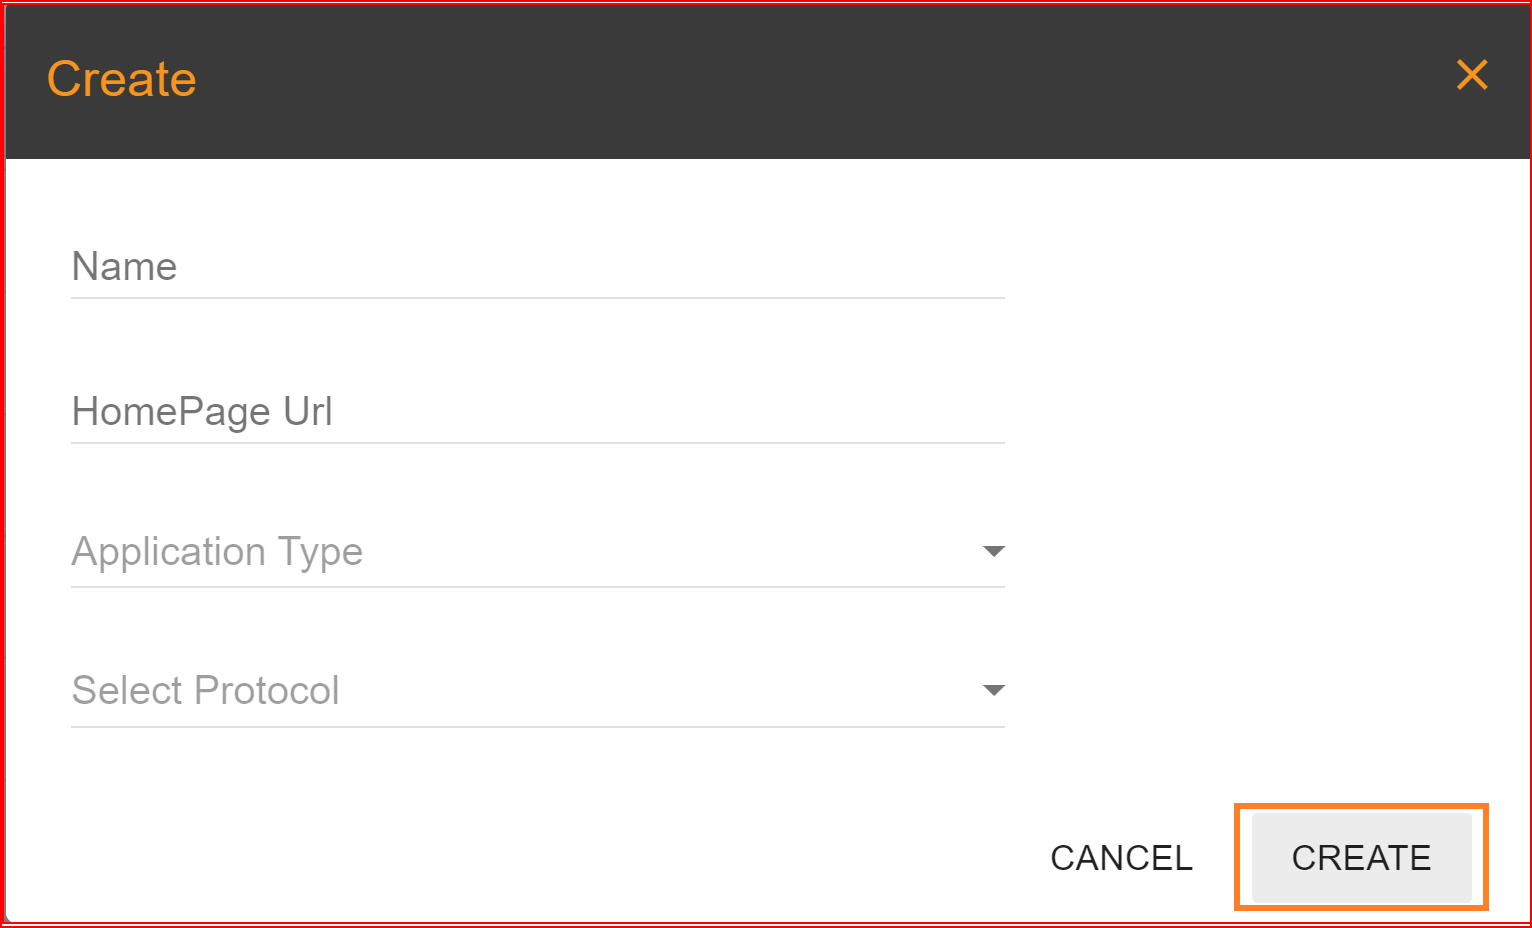
Once you've completed the registration and login process, you'll be able to access the SSO.ID interface. The first step is to set up your application in SSO.ID. To do this, click on the "Create" button to configure your application. When you click on the "Create" button, a dialog box will open with four parameters.
Select the protocol
In the process of creating an application, you need to choose a protocol that fits your application's requirements. In this guide enter the actual name of your application. Please copy your complete application or website homepage URL and choose the type of application that best fits your needs. Select the protocol for your application from the list of available protocols. Once you've selected the protocol, proceed by clicking the "Create" button.
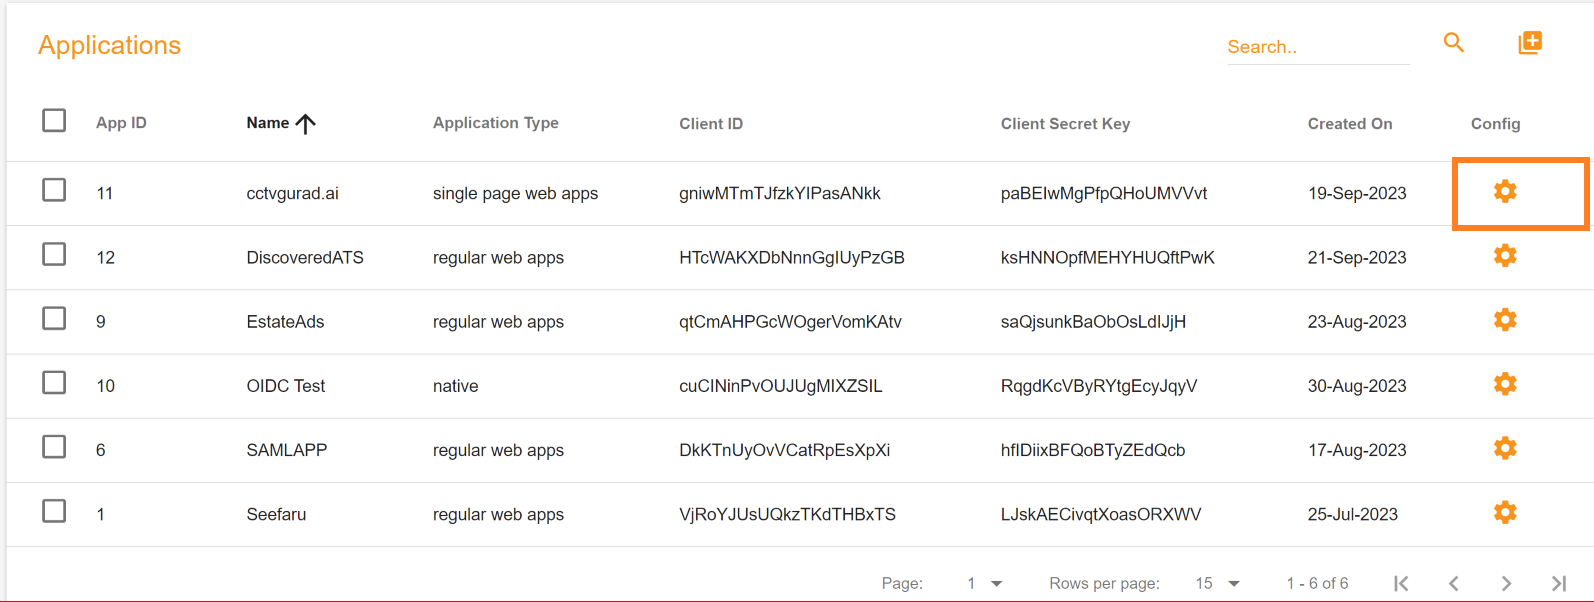
Redirect URI configure in SSO.ID
To set up your redirect URI in SSO.ID, follow these steps: Go to the "Applications" section. Find your application and click on the "Config" button next to it. A configuration dialog will appear on your screen.
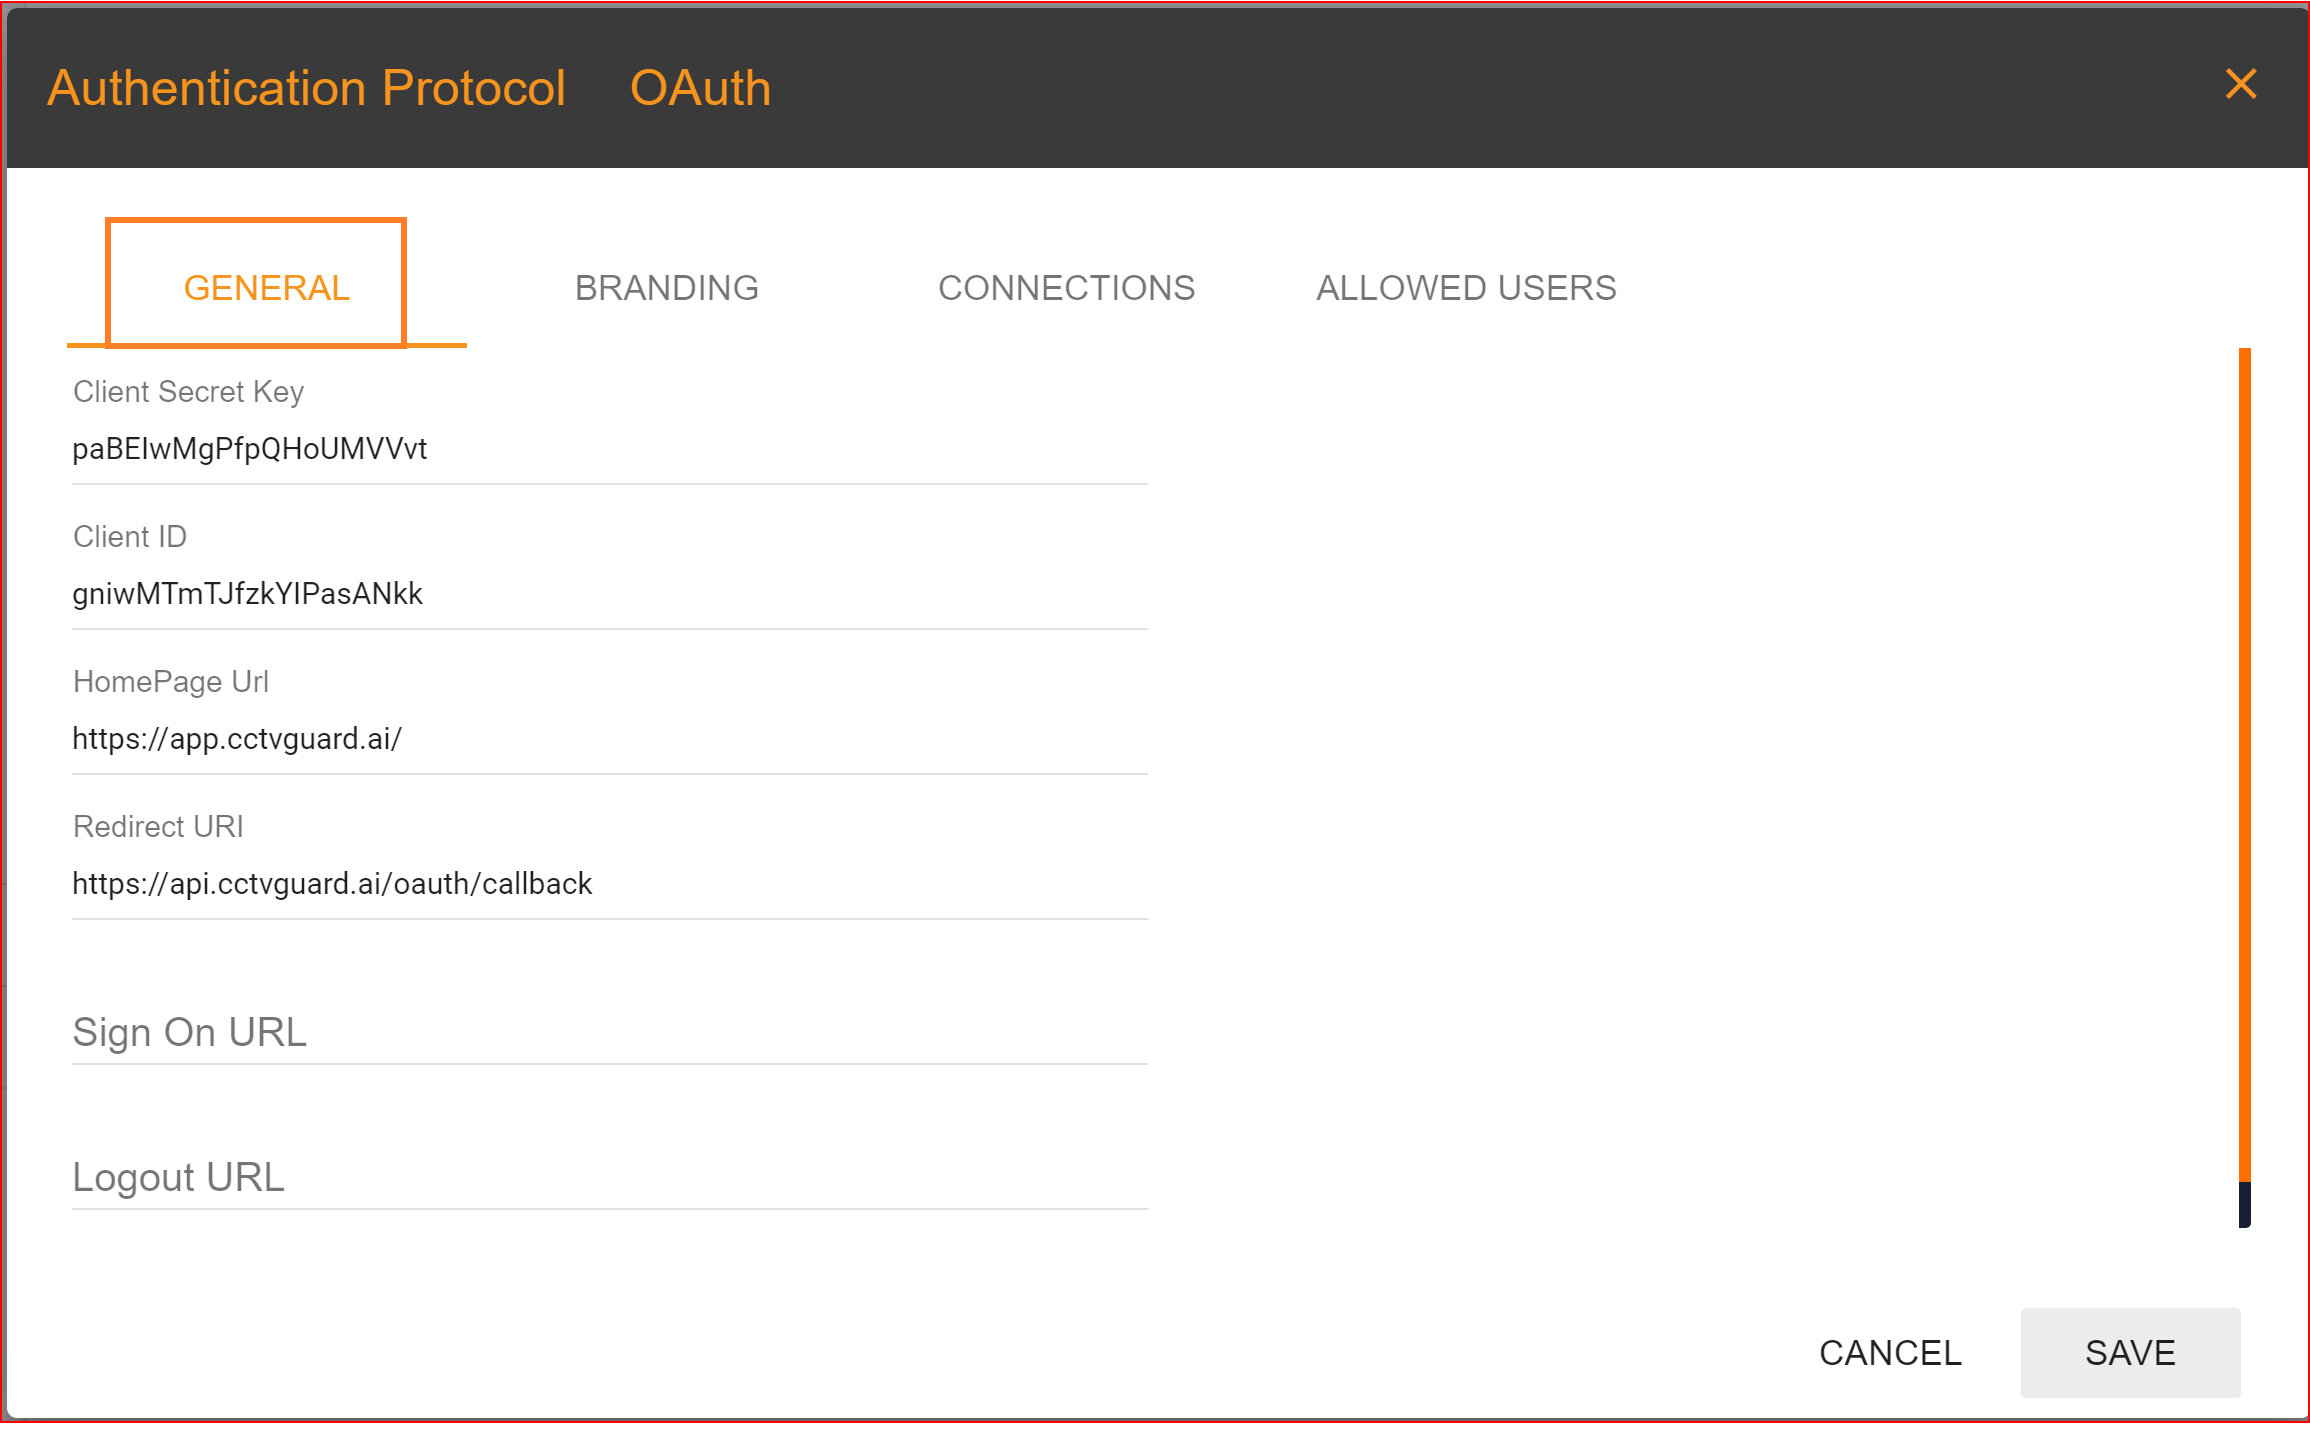
On the "GENERAL" tab, you will find the "Redirect URI" field. Please enter your application's complete redirect URI in this field.
How to configure connections in SSO.ID apps
Establishing connections in SSO.ID is straightforward and simple. You just need to provide your social application's Client ID and Client Secret, and your connection will be established. To establish a new social connection and log in to your application on the connections page, you should click on the "Create Connection" button.
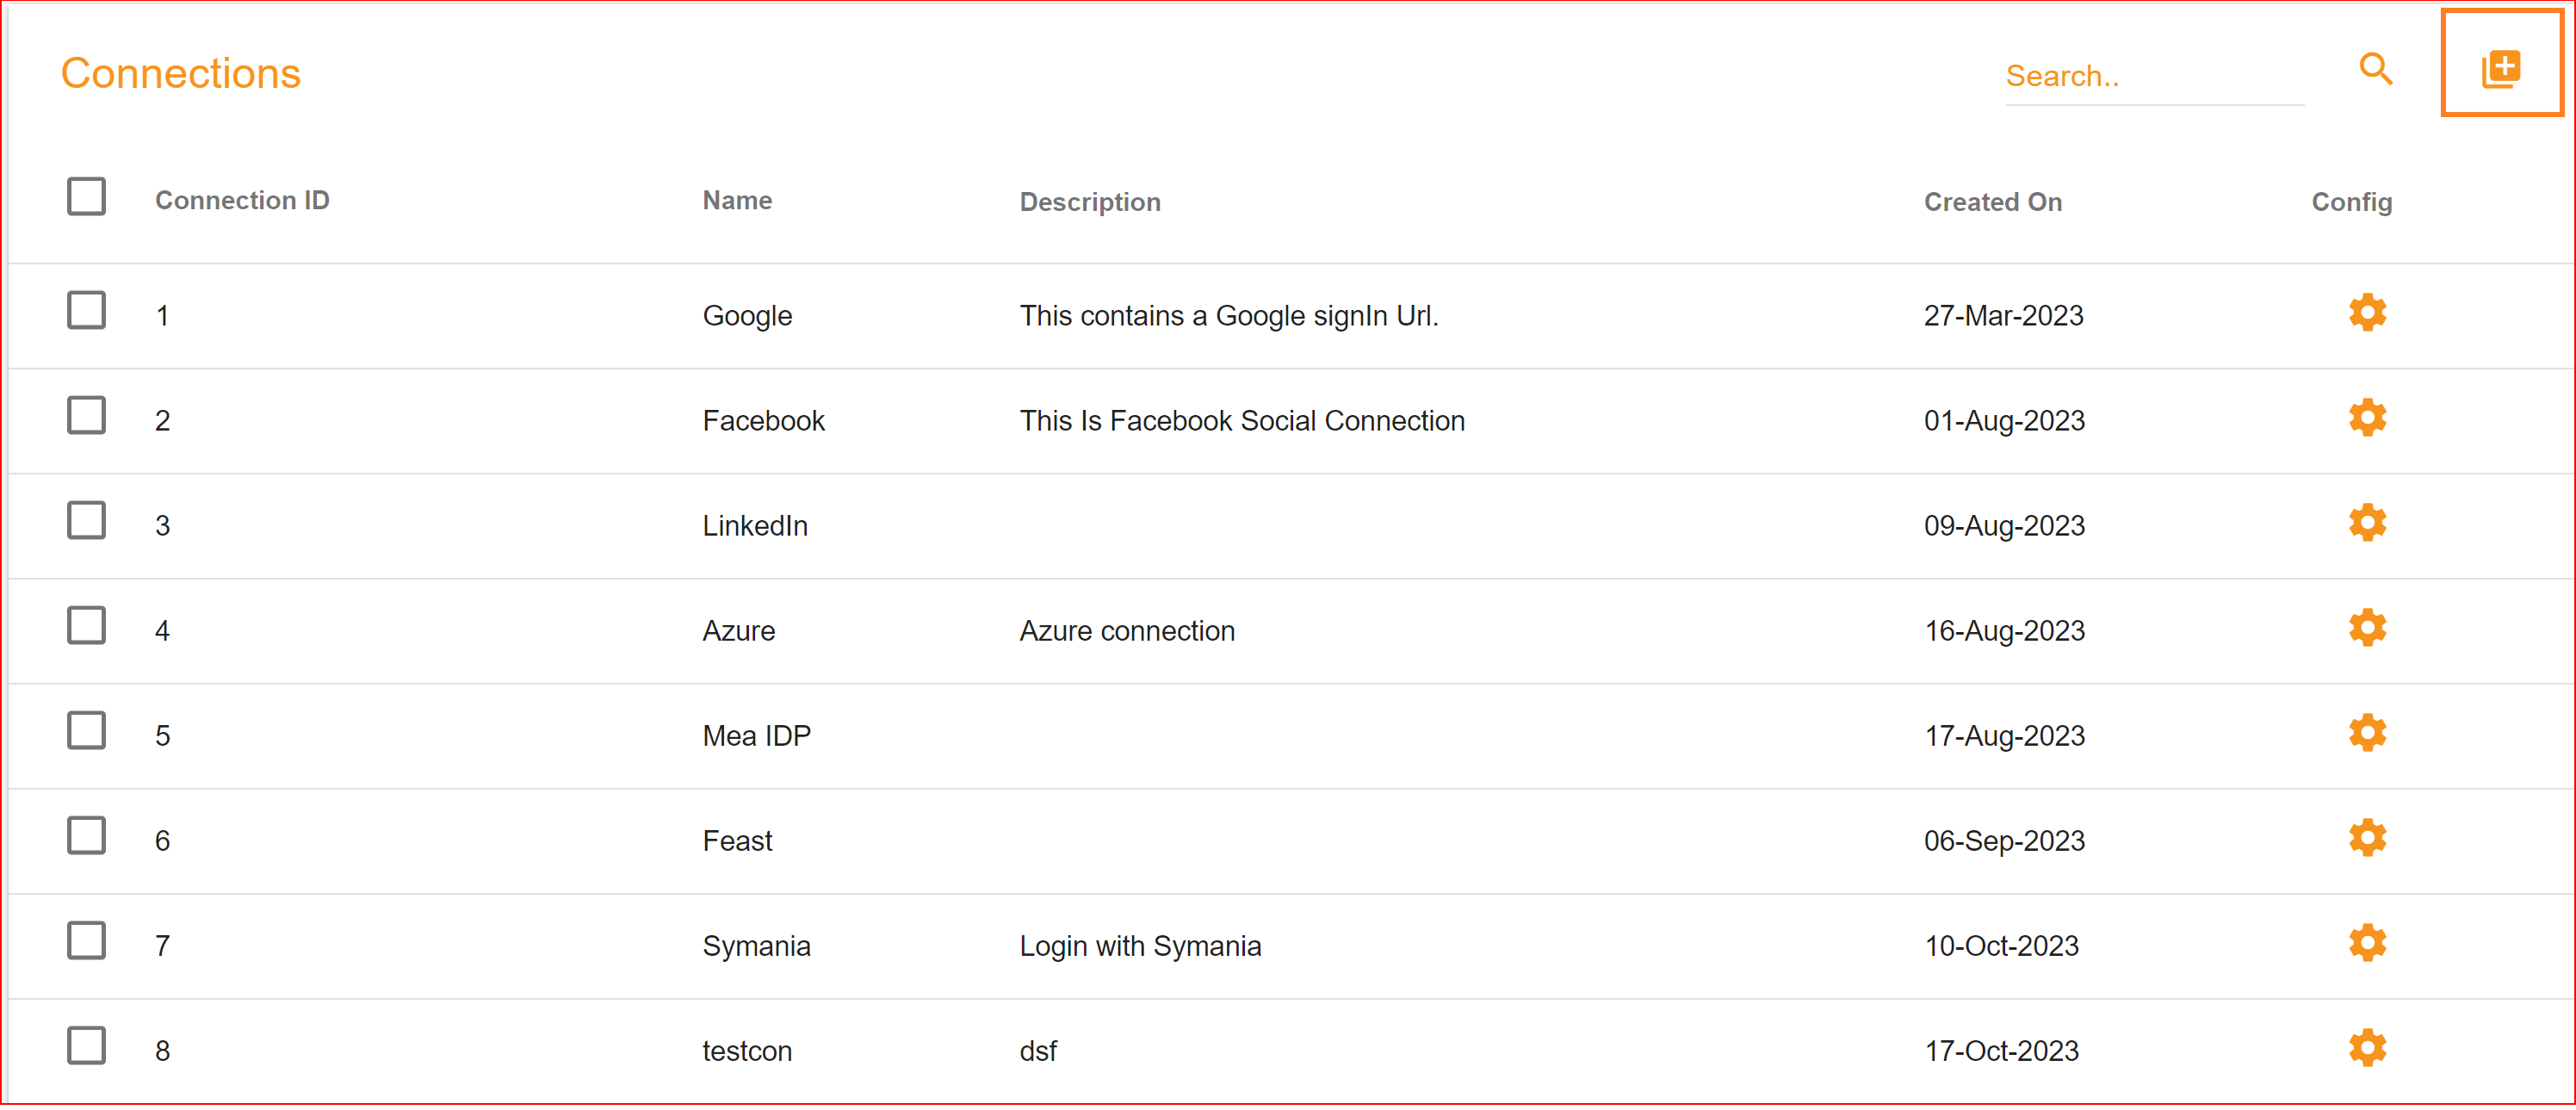
SSO.ID offers two types of connections: social and enterprise. If you opt for social connections, we currently provide three types of social connections. Additionally, we plan to offer more social connection options in the future. The three available social connections are as follows.
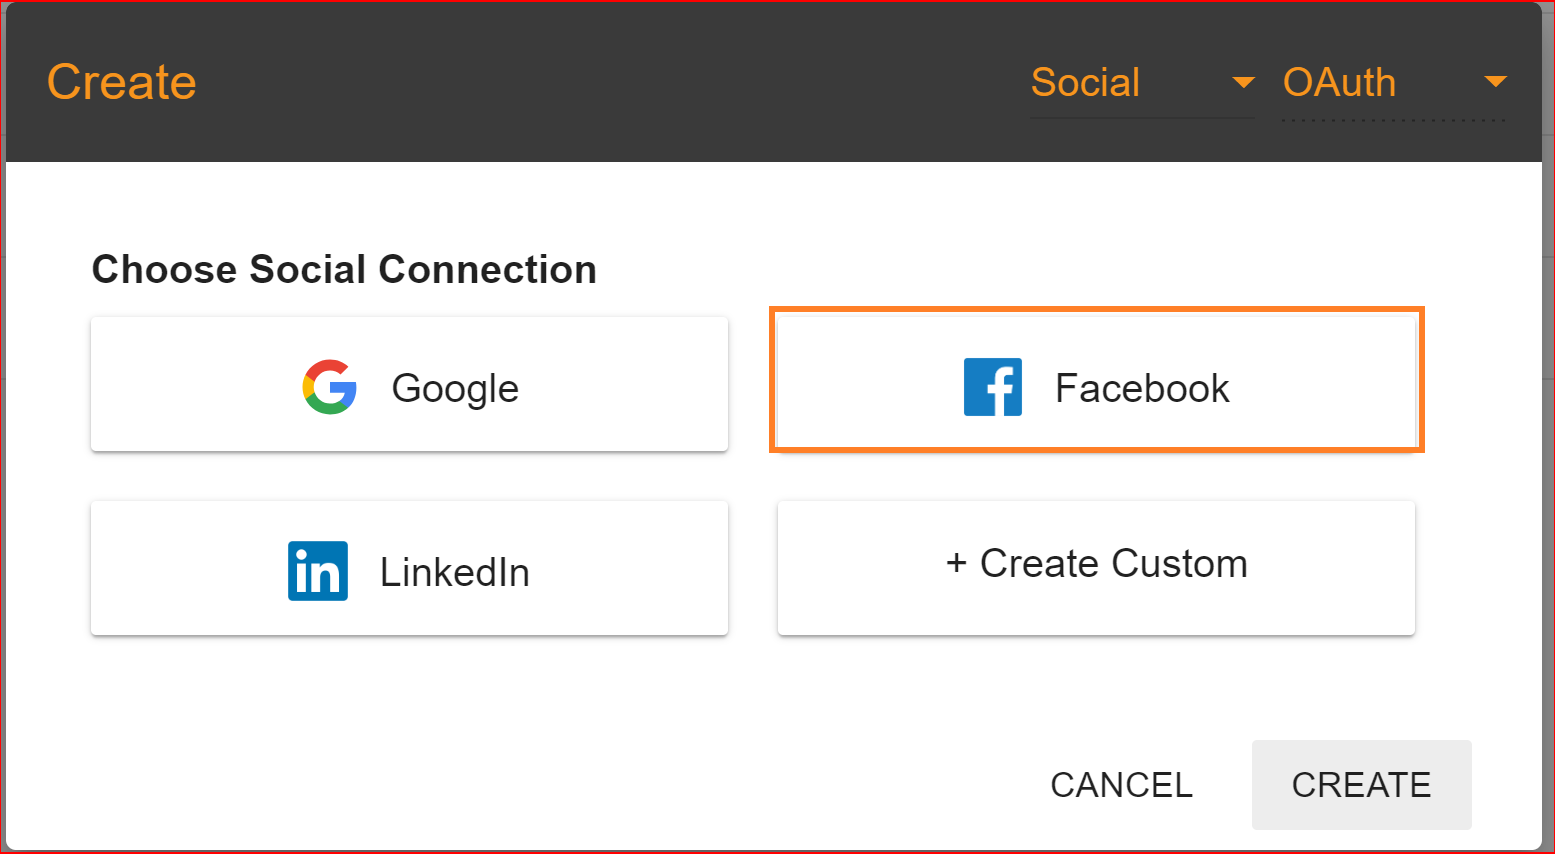
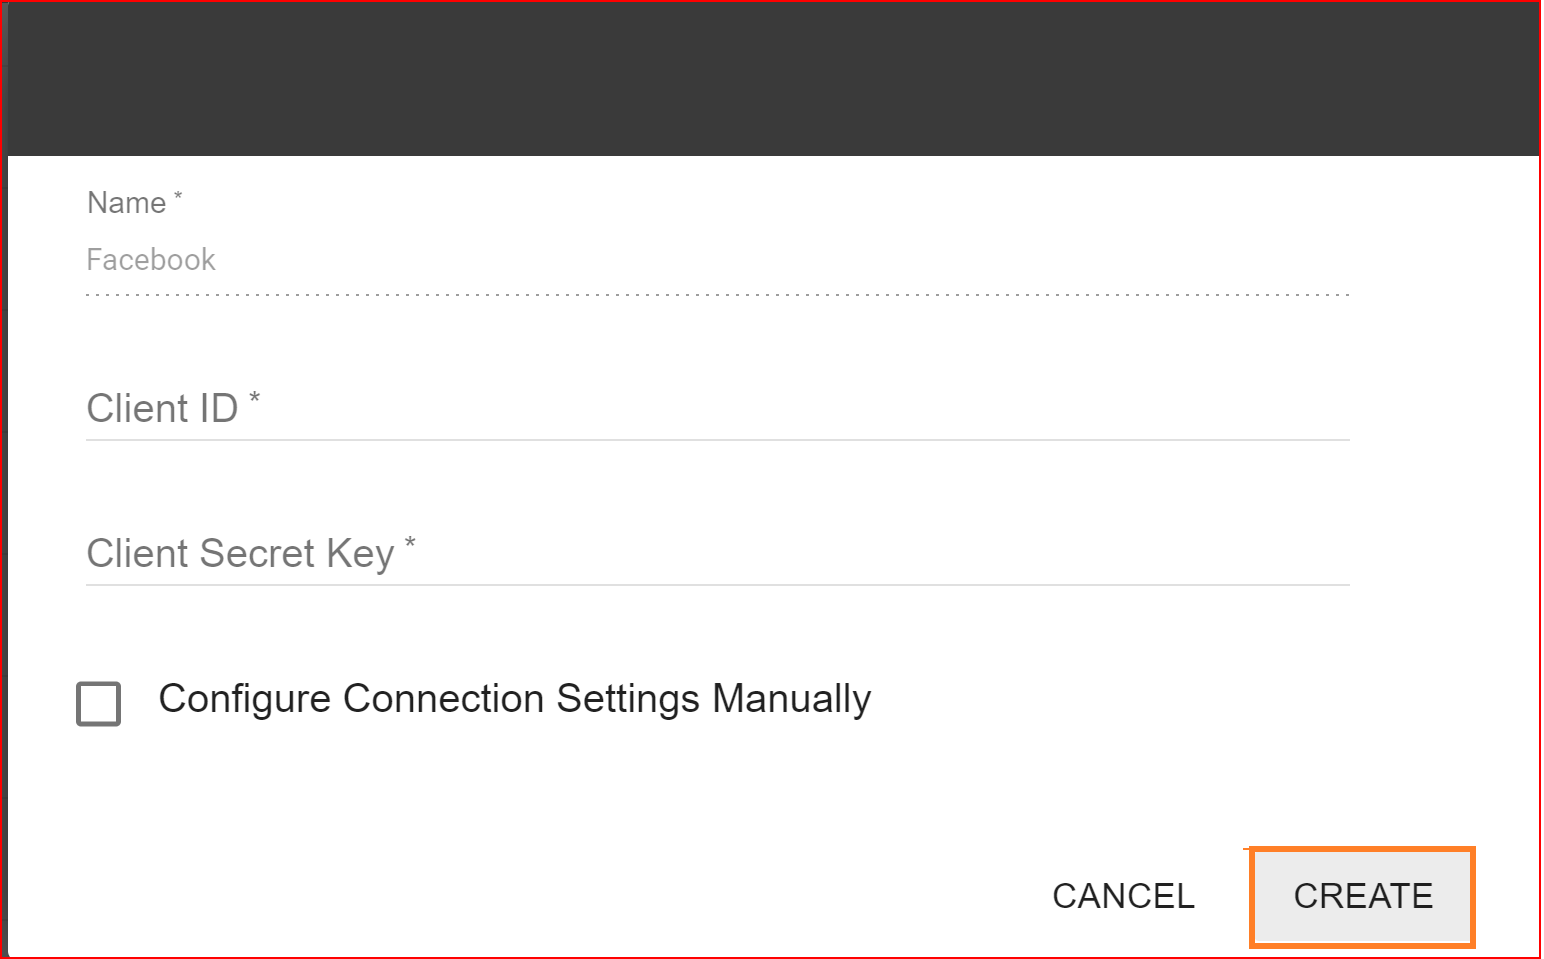
To set up the Facebook connection in the SSO.ID app, follow these steps.
- Click on the "Facebook" social connection.
- A dialog box will appear on your screen.
- Enter your Facebook application's Client ID and Client Secret in the provided fields.
- Your connection will be established.