CONNECTIONS
In the context of Single Sign-On Identity (SSO.ID), "connections" typically refer to the integrations or configurations that allow an identity provider (IdP) to communicate with service providers (SPs) or applications. SSO.ID is a mechanism that enables users to log in once and gain access to multiple applications or services without needing to enter their credentials for each one separately. To make this possible, SSO.ID systems need to establish connections or configurations between the components.
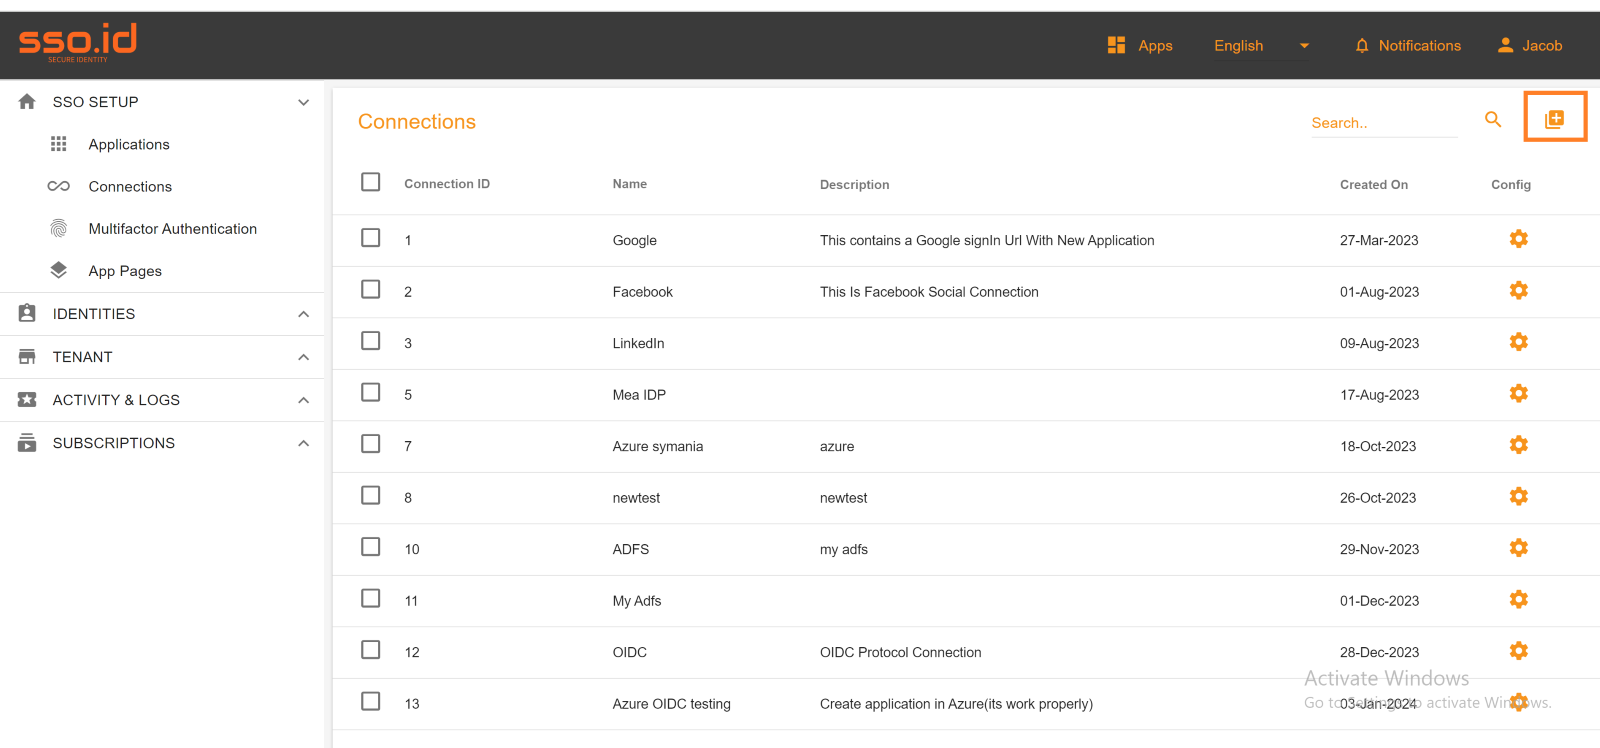
Create Connections in SSO.ID
Create connections in SSO.ID is straightforward and simple. You just need to provide your social application's Client ID and Client Secret, and your connection will be create. To create a new social connection and log in to your application on the connections page, you should click on the "Create Connection" button.
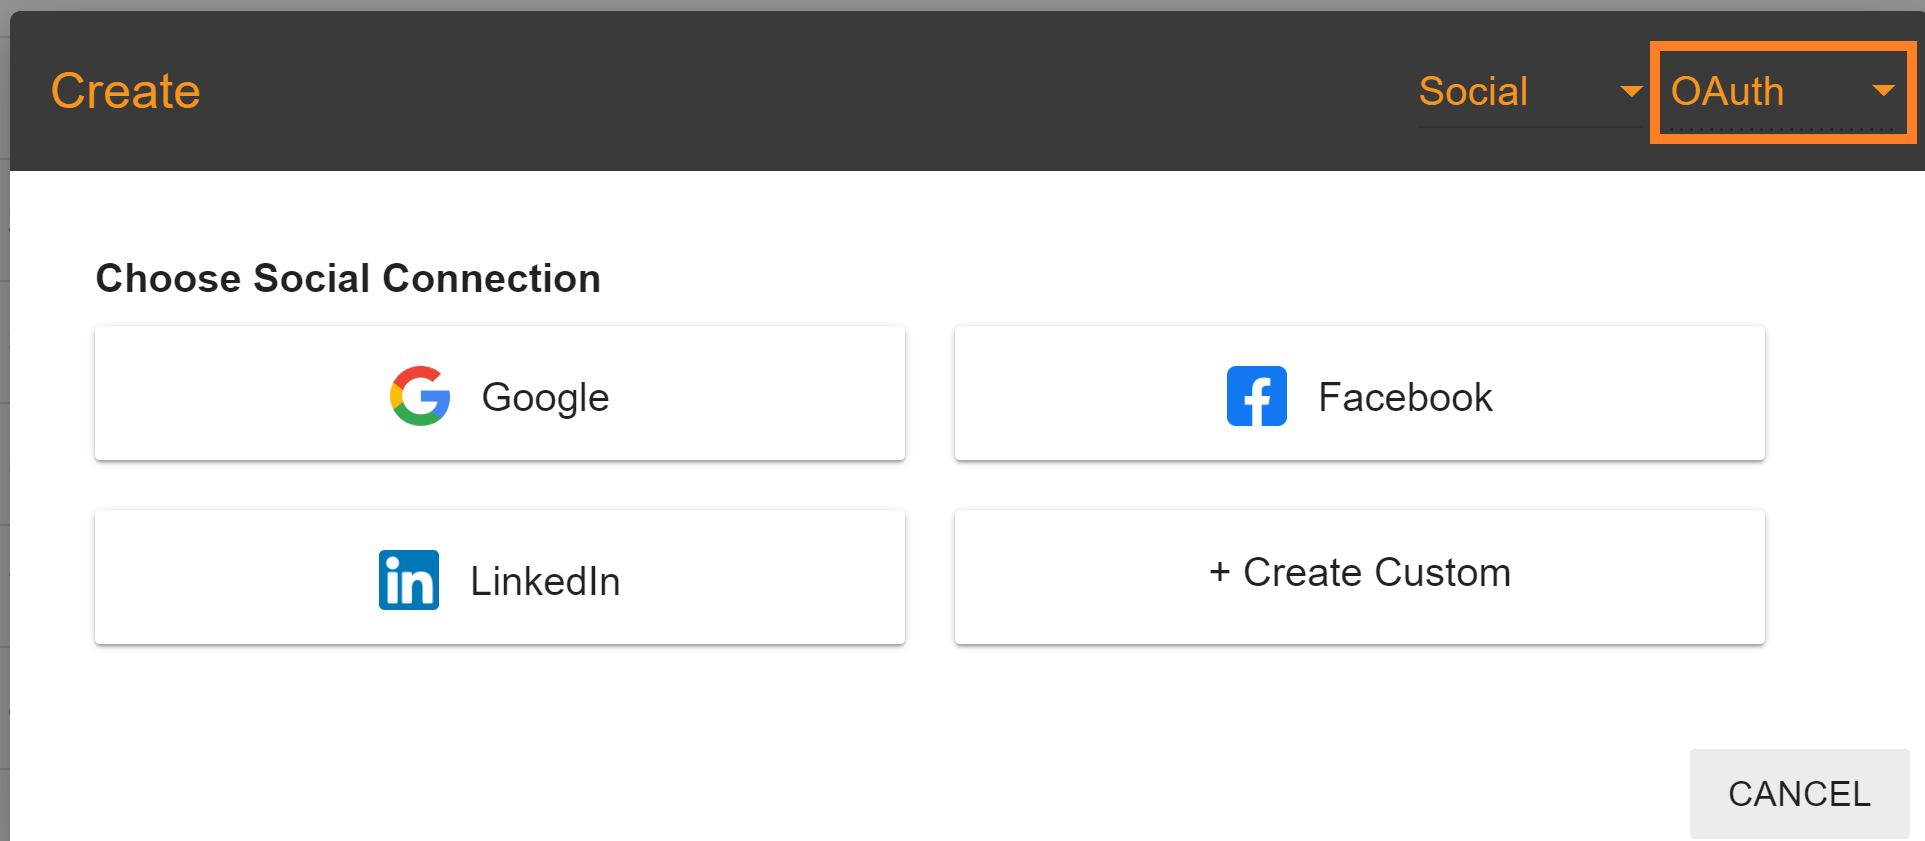
SSO.ID offers two types of connections: social and enterprise. If you opt for social connections, we currently provide three types of social connections, and one custom connection tab. Additionally, we plan to offer more social connection options in the future. The four available social connections are as follows. OAuth Connections
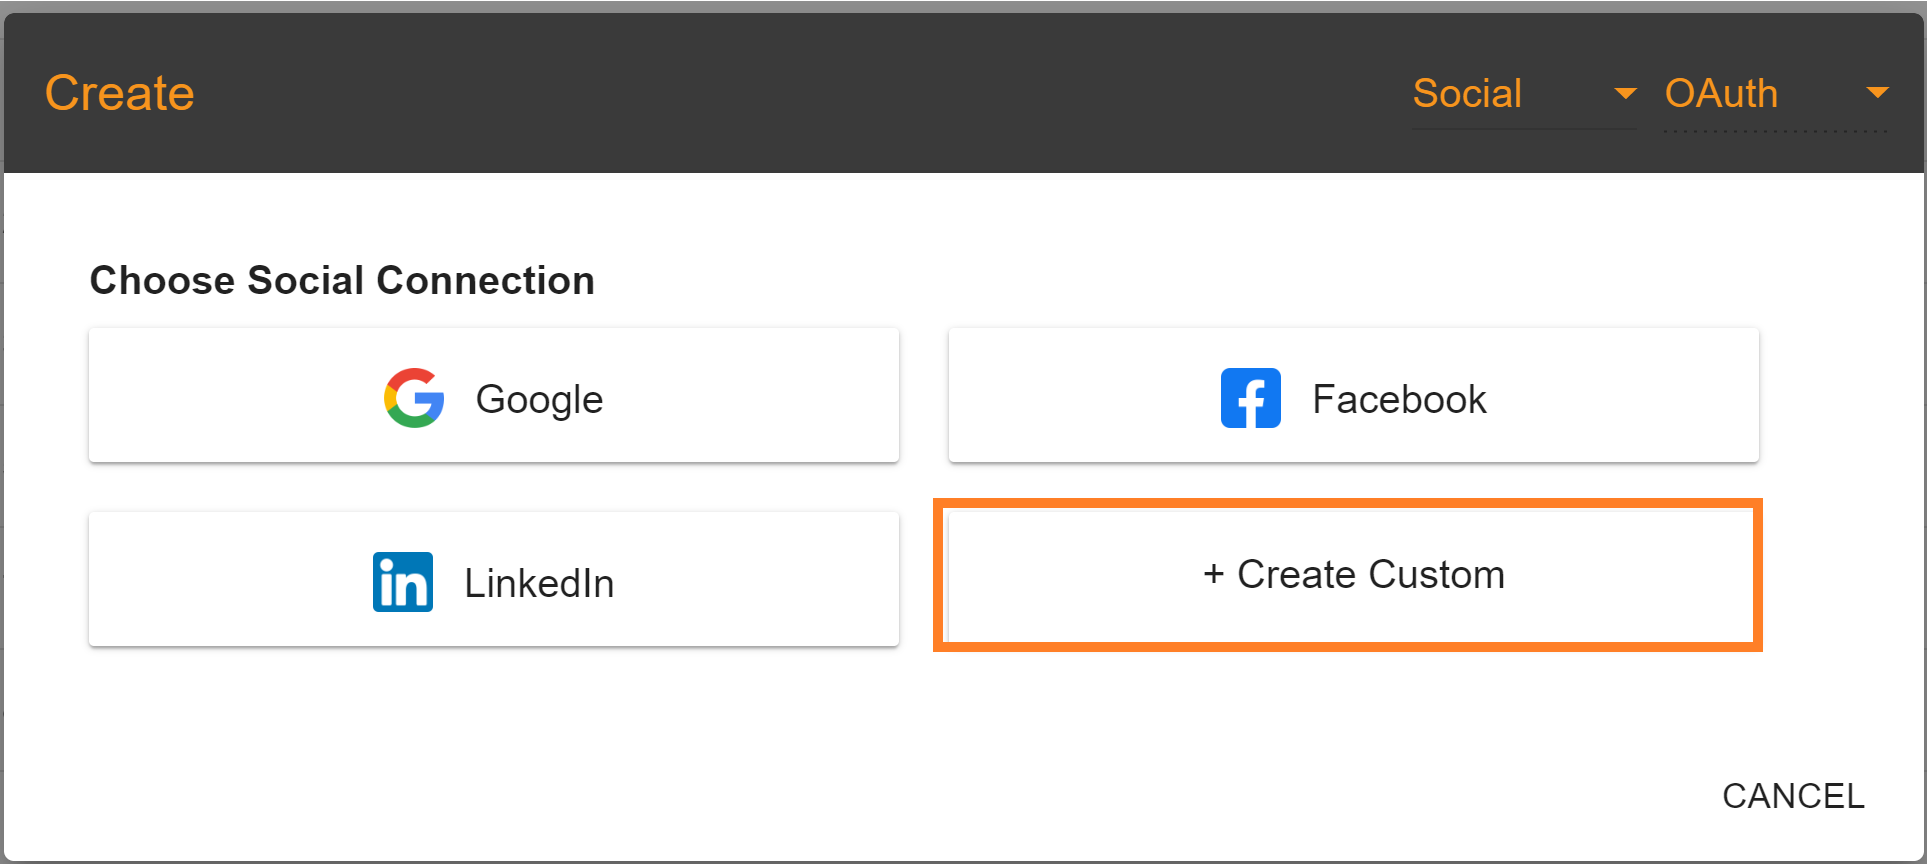
- Create Custom
Create Custom Endpoint
If you wish to establish another custom connection utilizing the OAuth protocol, please select the "Create Custom" tab and input all valid endpoints. Ensure that all mandatory fields are completed.
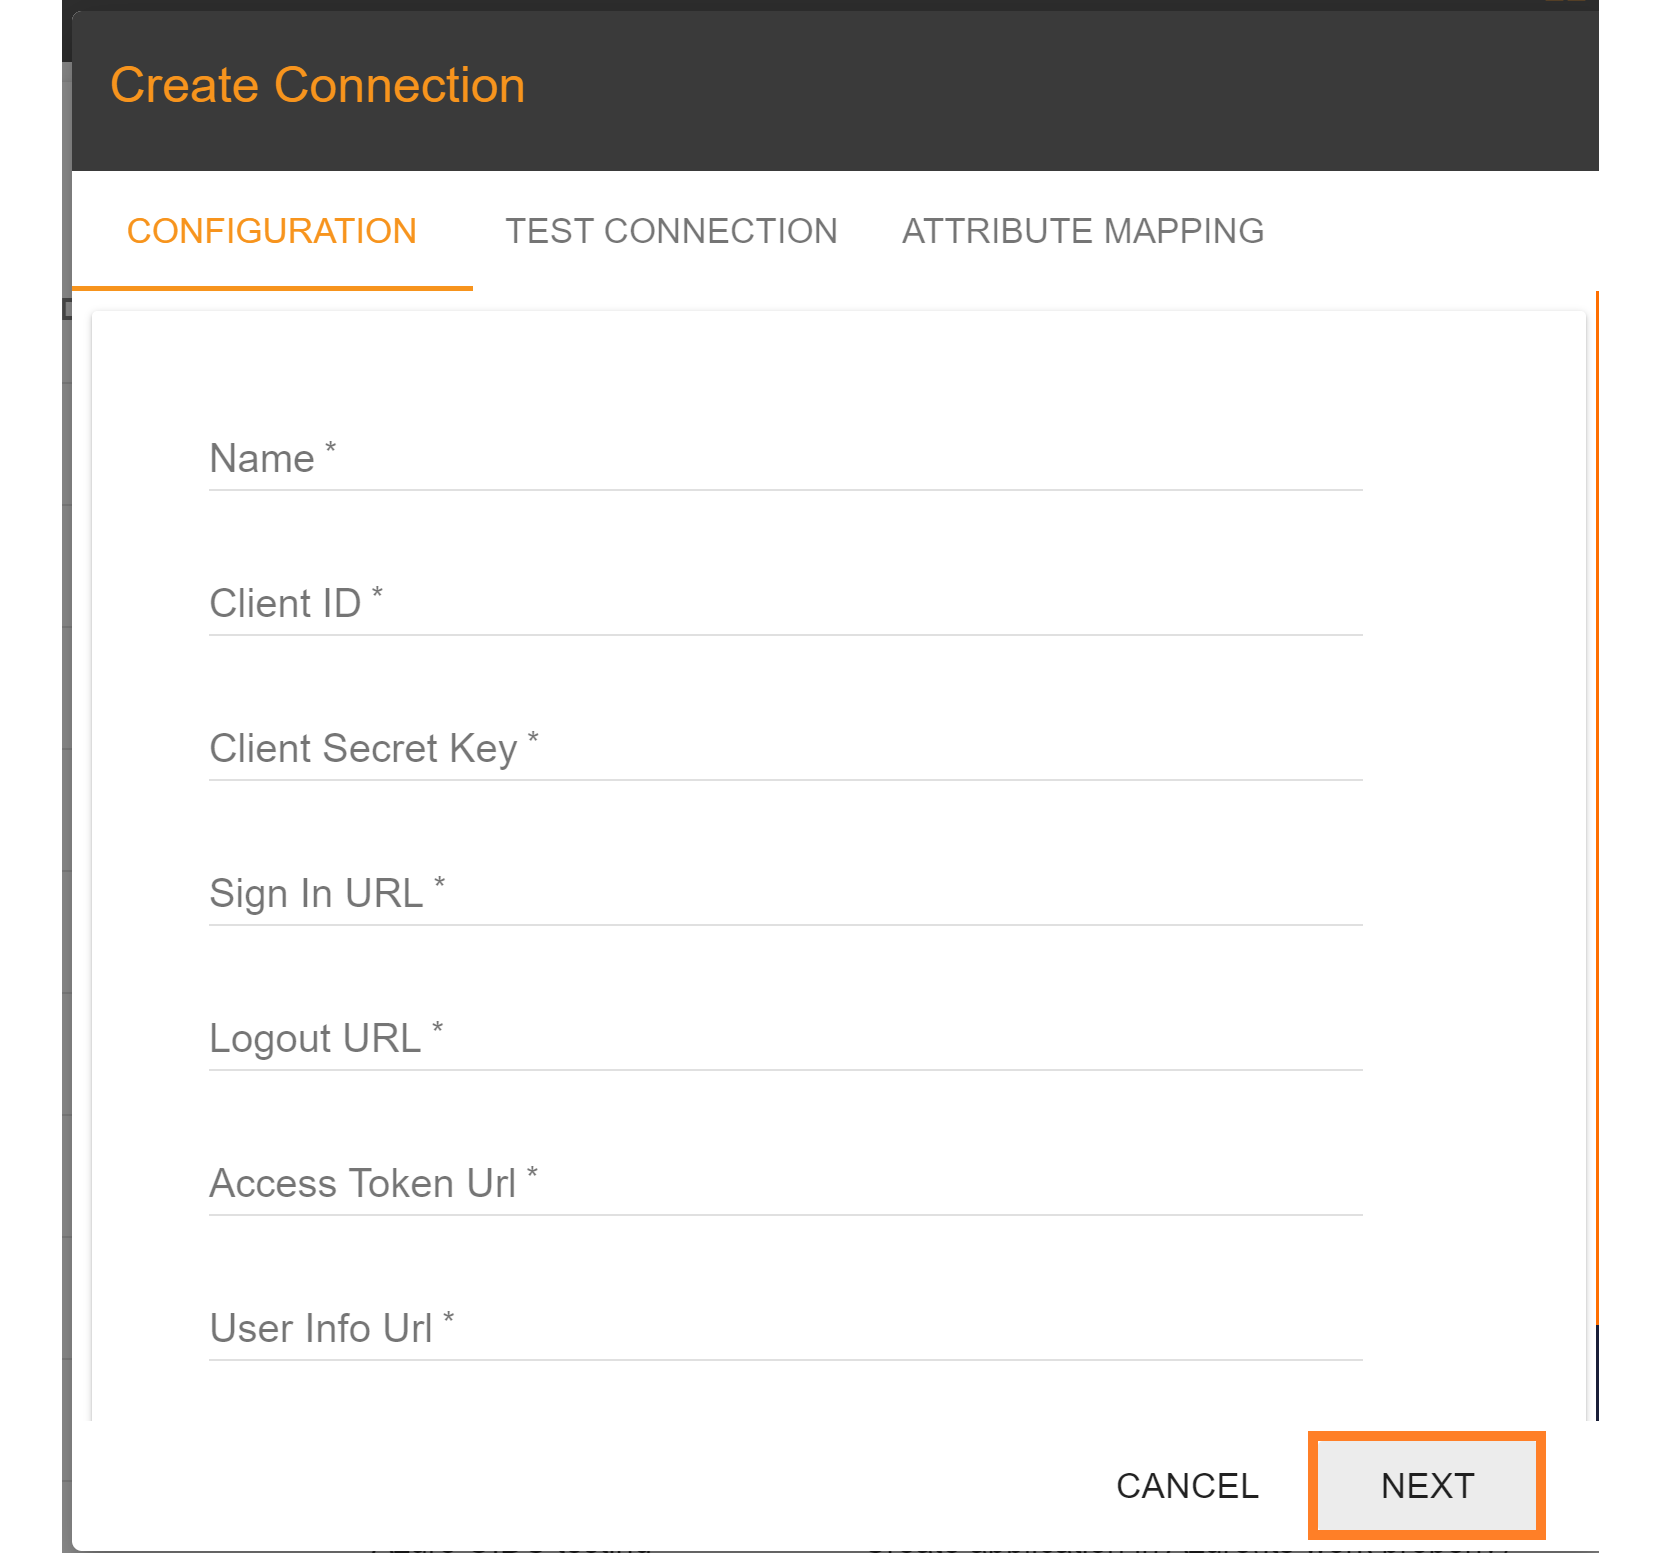
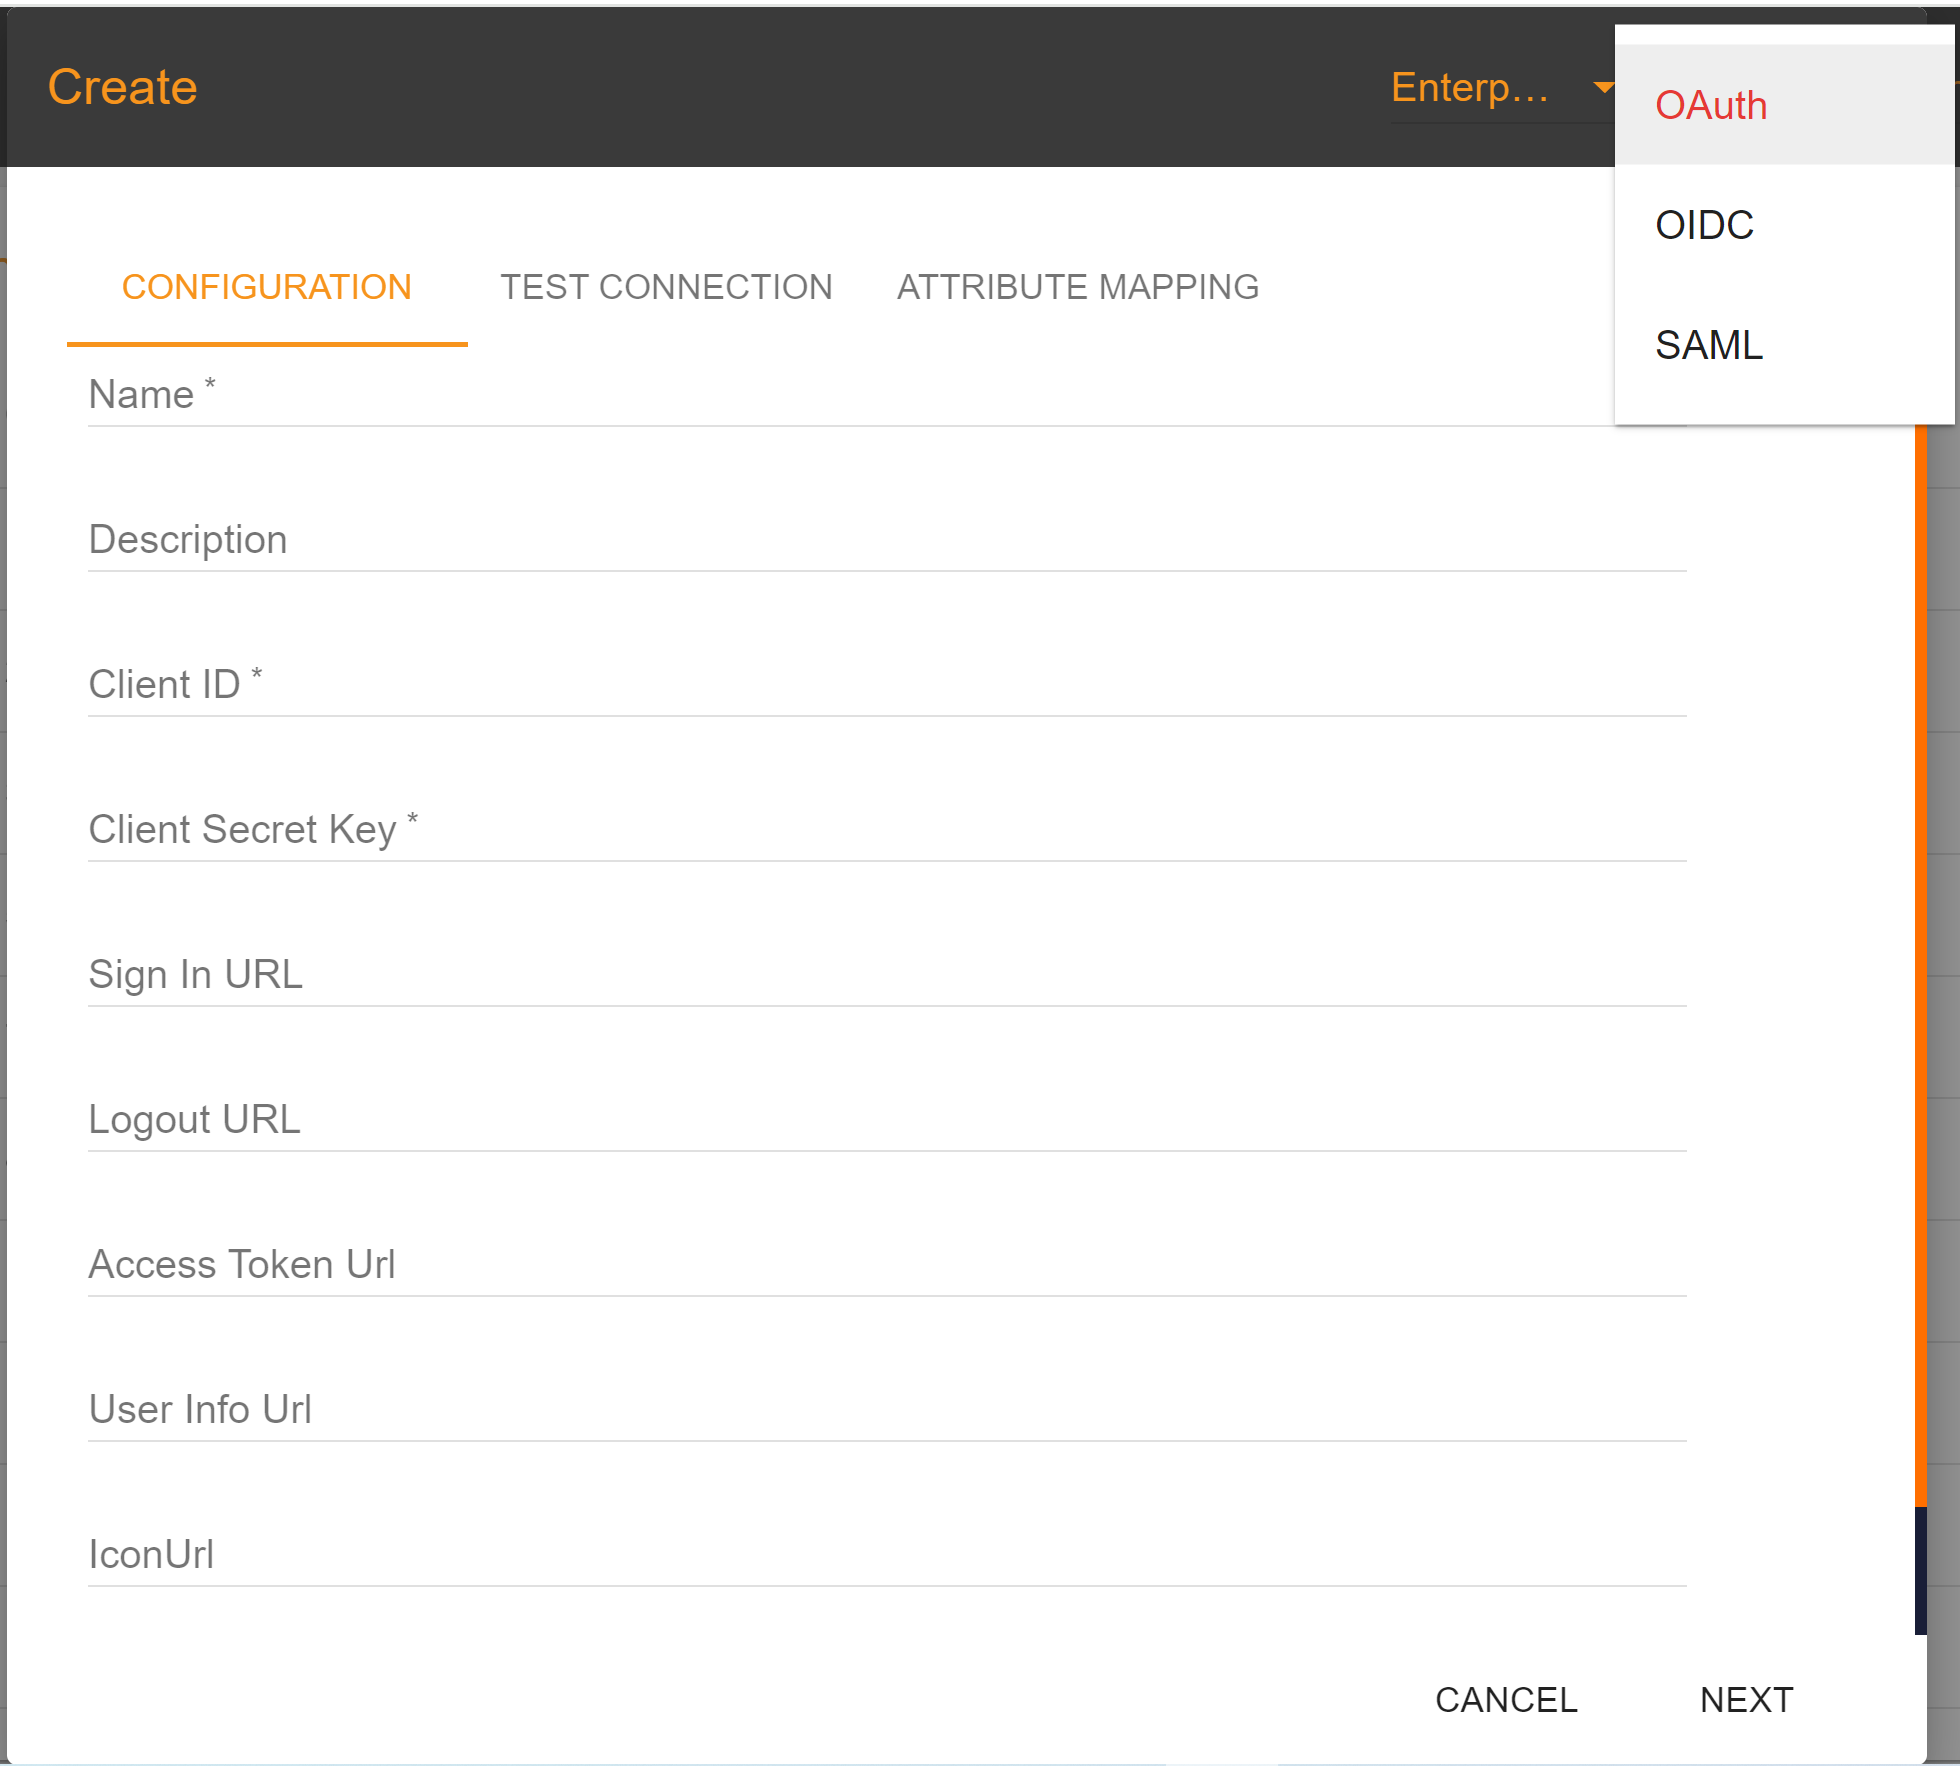
If you wish to set up an enterprise connection, you should provide the following basic information.
- Name: Please provide the full name of your enterprise.
- Description: You can include additional details about your enterprise in the description section.
- Client ID: The crucial and primary component for establishing a connection is to provide your enterprise's Client ID.
- Client Secret Key: Enter your enterprise's valid Client Secret Key.
- Sign In URL For the OAuth sign-in, you typically construct a URL that redirects users to sign-in page. The URL contains parameters specifying details such as the client ID, redirect URI, requested permissions, and response type.
- Logout URL OAuth protocol, logging out typically involves redirecting the user to a specific logout endpoint. After logging out, users may also be redirected to a URL specified by the application for further actions, such as returning to the home page.
- Access Token URL Access Token URL is the endpoint where a client application can exchange an authorization grant (such as a code obtained from the authorization server) for an access token. This access token is then used to authenticate the client when accessing protected resources on behalf of the user.
- User Info URL User Info URL is an endpoint provided by the identity provider (IDP) or authorization server where client applications can retrieve information about the authenticated user. This endpoint typically returns a JSON or XML response containing user attributes such as username, email address, name, and any other relevant information associated with the authenticated user.
Enterprise connection
An Enterprise connection in Single Sign-On Identity (SSO.ID) refers to a method of authentication and user management that allows organizations to integrate their existing identity systems with third-party applications or services. This integration typically involves using protocols like OAuth 2.0 or SAML (Security Assertion Markup Language) to authenticate users against an organization's identity provider (IDP) or directory service. Enterprise connections are designed to enable seamless access to applications and services while centralizing user management and authentication processes within the organization. Instead of users having separate credentials for each application, they can use their existing corporate credentials to sign in to multiple services, reducing the need for multiple logins and improving overall security.
Create enterprise connection
To establish an enterprise connection, follow these steps: Click on the "Create New Connection" button located in the connection section. Then, click on the "Select" button. Choose "Enterprise Connection" from the options available.
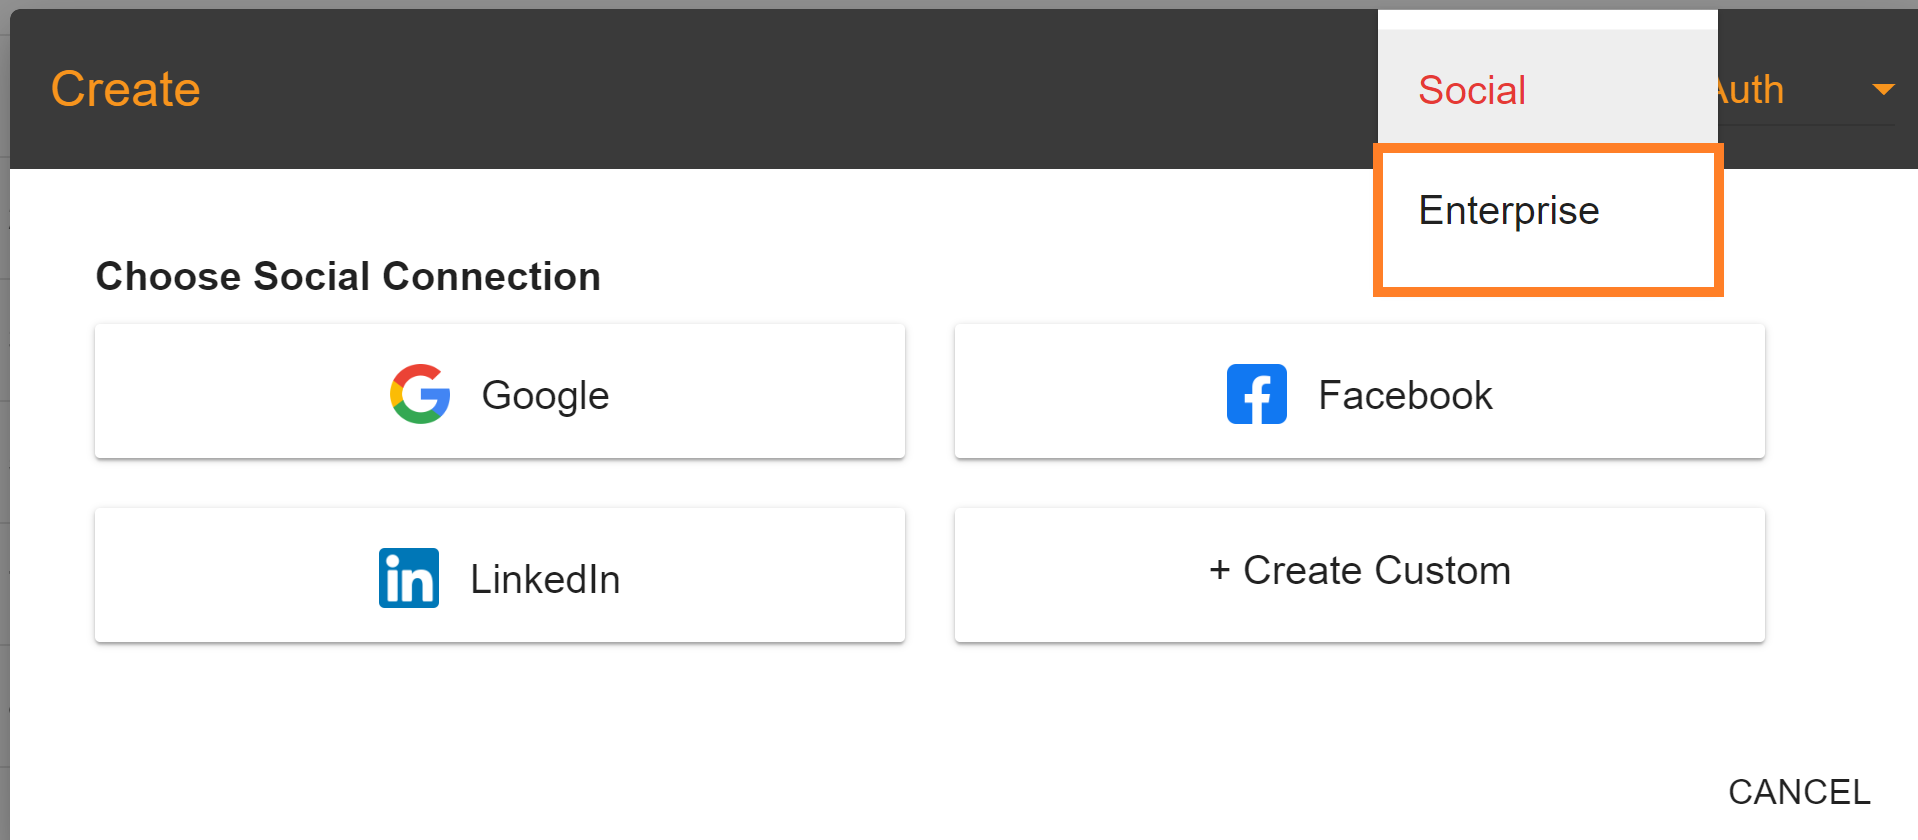
In the "Enterprise Connection" tab, you can create three types of connections.
After establishing a connection, navigate to the application configuration settings and enable the social connection you created in the connection section. To verify whether your connection was successfully established, open a web browser (e.g., Google Chrome) and enter the redirect URI you provided during the application creation process. Then, click the "Login with SSO" button, and your social connection will be displayed and available for verification.