Introduction to SAML
SAML (Security Assertion Markup Language) is an XML-based standard protocol used for exchanging authentication and authorization data between identity providers (IdPs) and service providers (SPs) in Single Sign-On (SSO) systems. In SAML, when a user tries to access a service, the service provider requests authentication from the identity provider. The identity provider then authenticates the user and generates a SAML assertion, which contains information about the user's identity and permissions. This assertion is digitally signed by the identity provider and sent back to the service provider, allowing the user access to the requested service. Overall, SAML facilitates secure SSO by enabling seamless authentication and authorization across different systems and applications.
Create an SAML Connection with Azure
Security Assertion Markup Language (SAML) is an XML-based open standard for exchanging authentication and authorization data between parties between an identity provider (IdP) and a service provider (SP). Integrating SAML with Azure involves configuring Azure Active Directory (Azure AD) as the identity provider or service provider, depending on your specific use case.
SSO.ID Endpoint for Azure configuration with SAML
- Name: Enter the valid and complete name of your newly generated connection.
- Description: Write a short description of your connection.
-
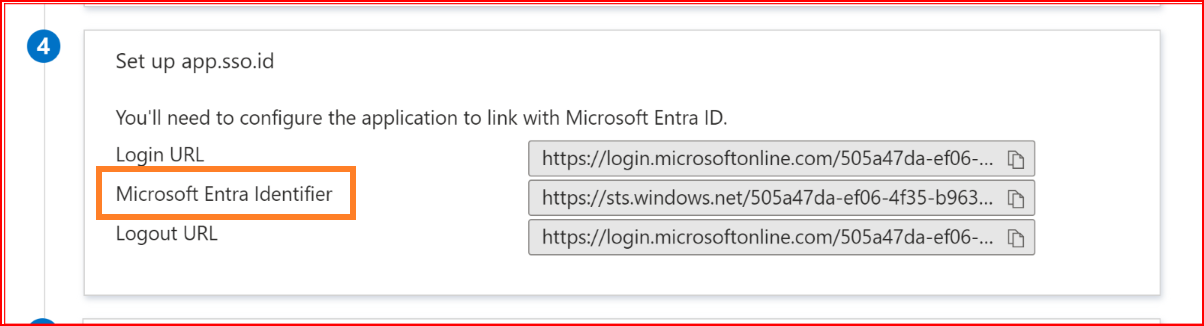
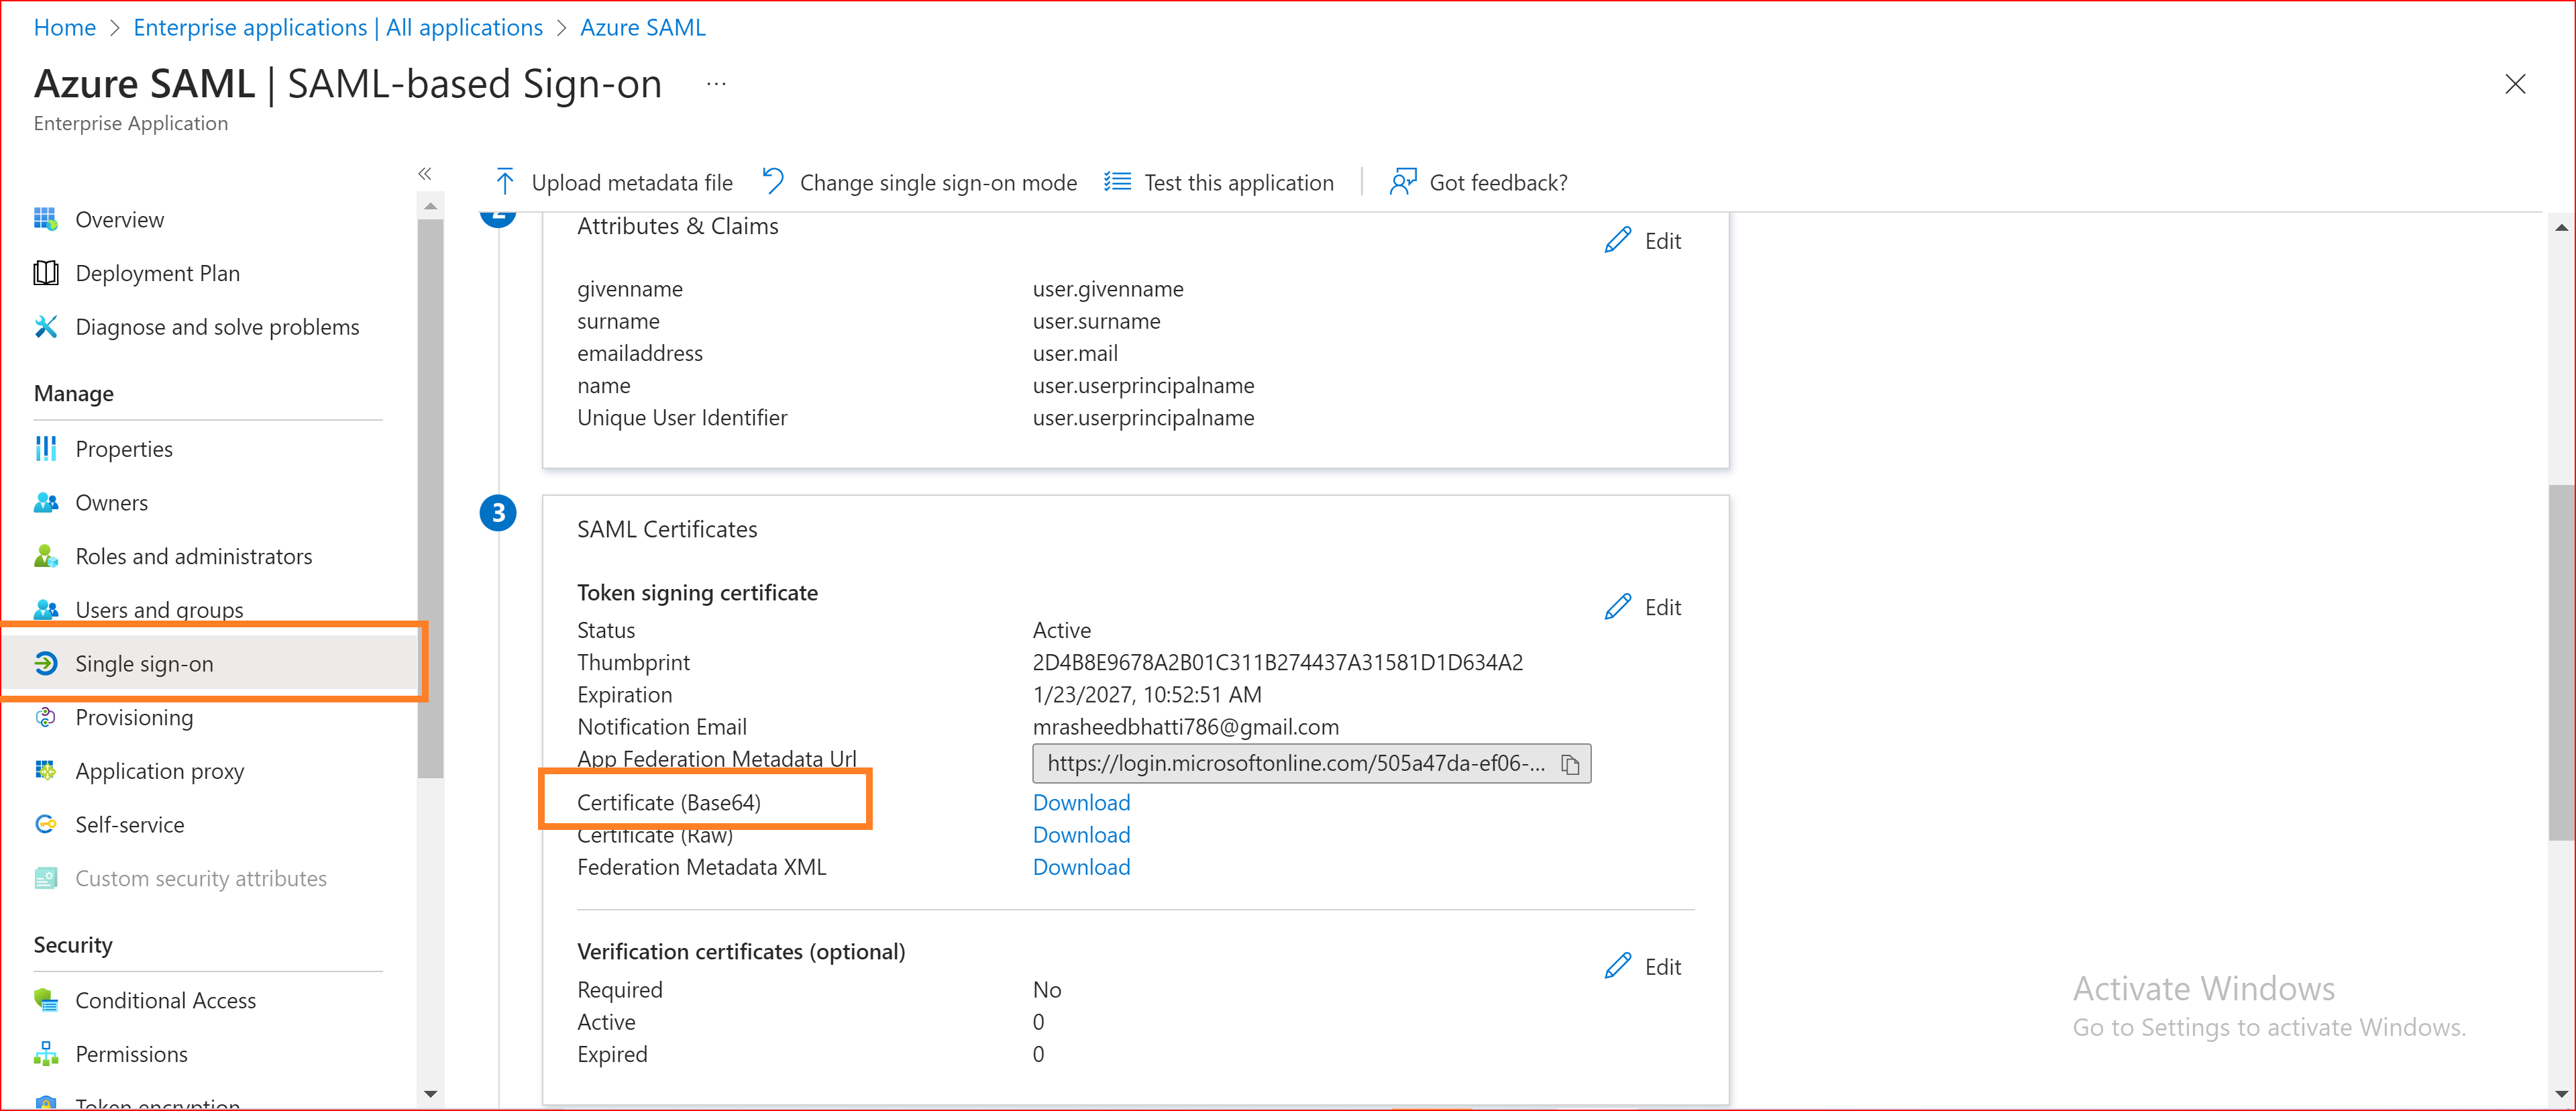
Identifier (Entity ID): Navigate to the "Azure Application Manager" section, click on the "Single Sign-On" tab,
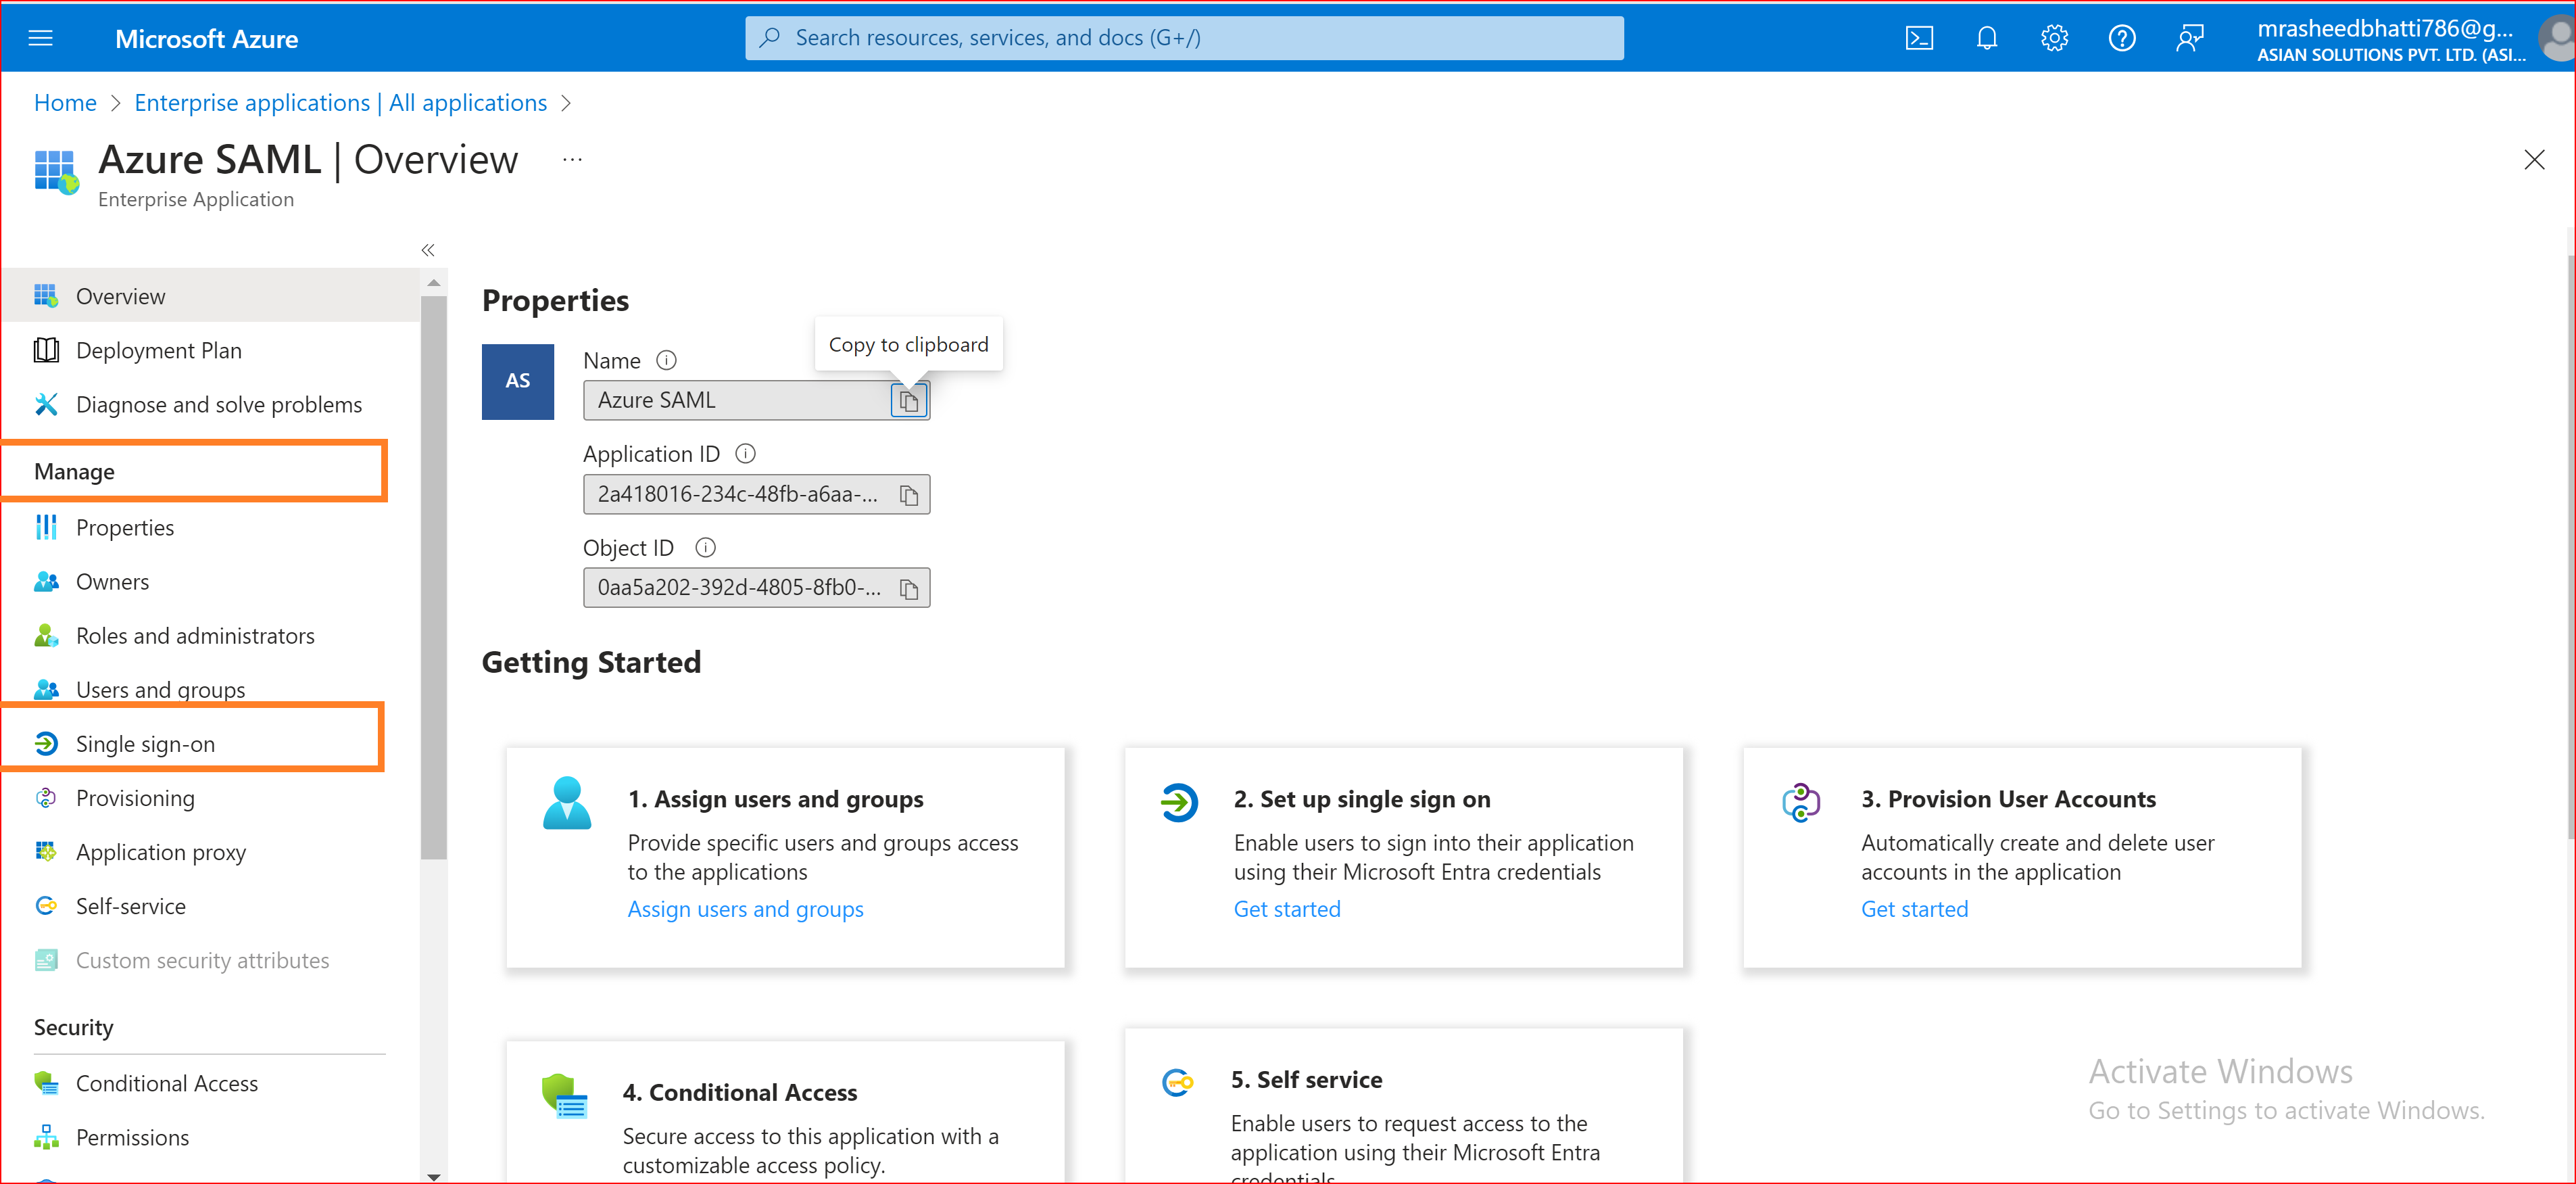
and copy the Microsoft Entra Identifier of your application. Then, paste it into the "SSO.ID Identifier" field.
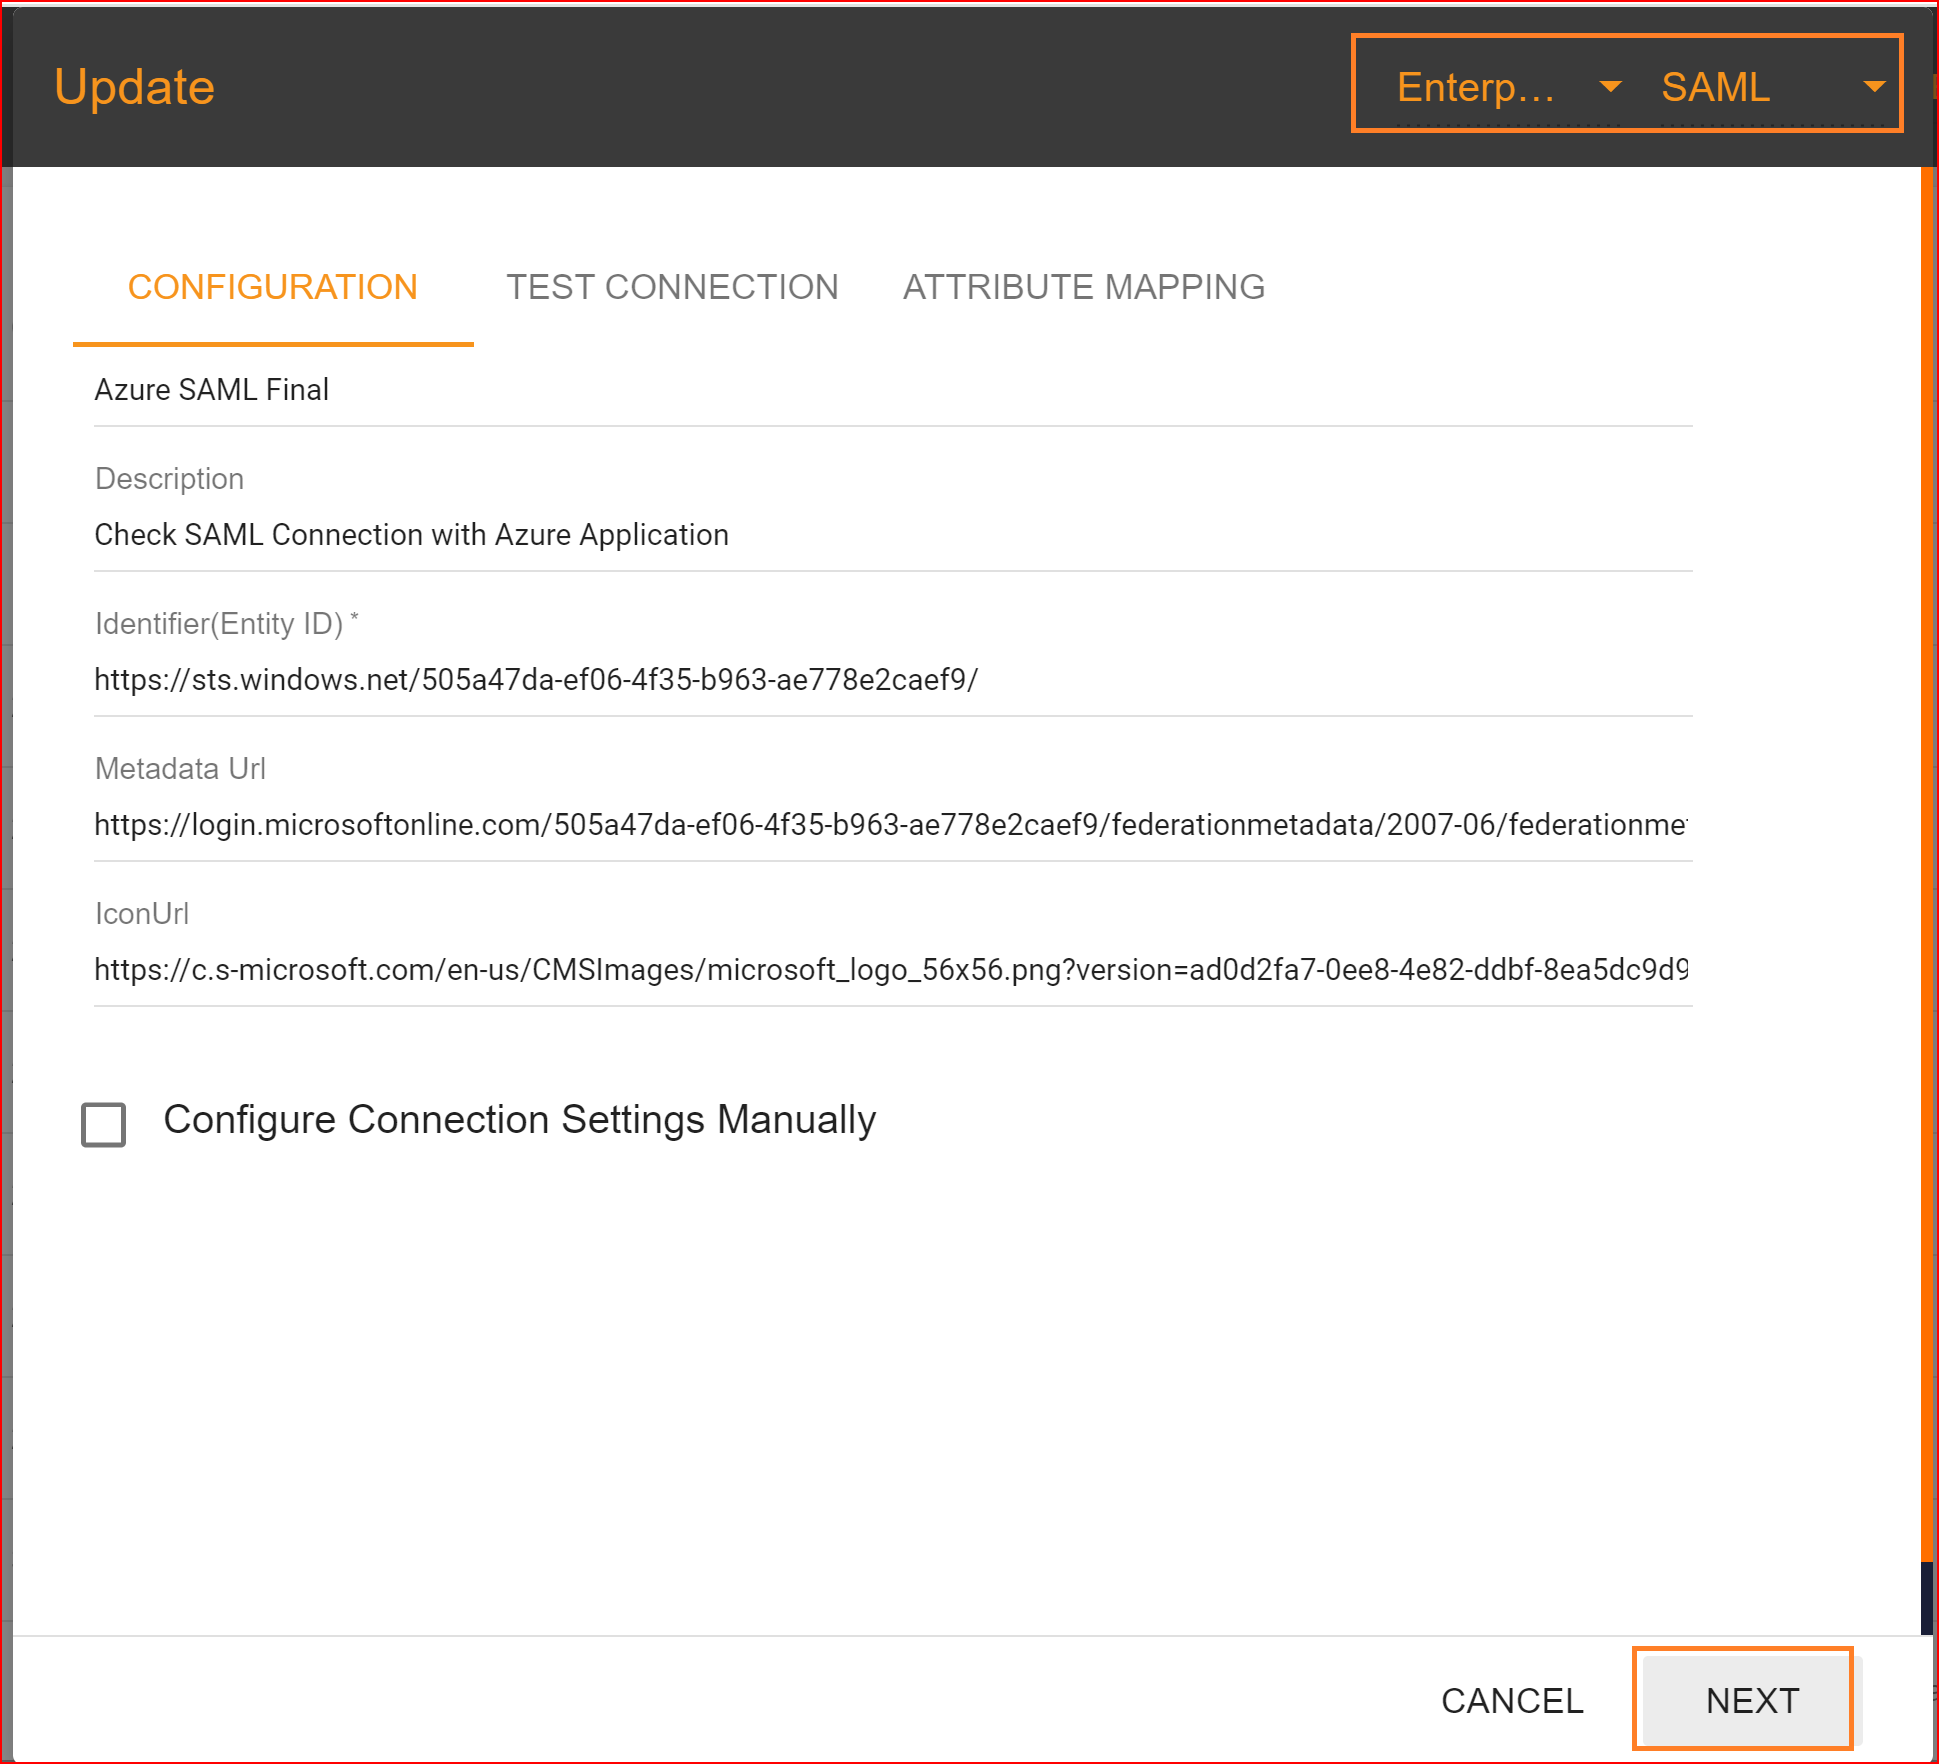
If you enter the valid Identifier (Entity ID) and then click on the save button, the remaining fields will be automatically filled or can be manually set.
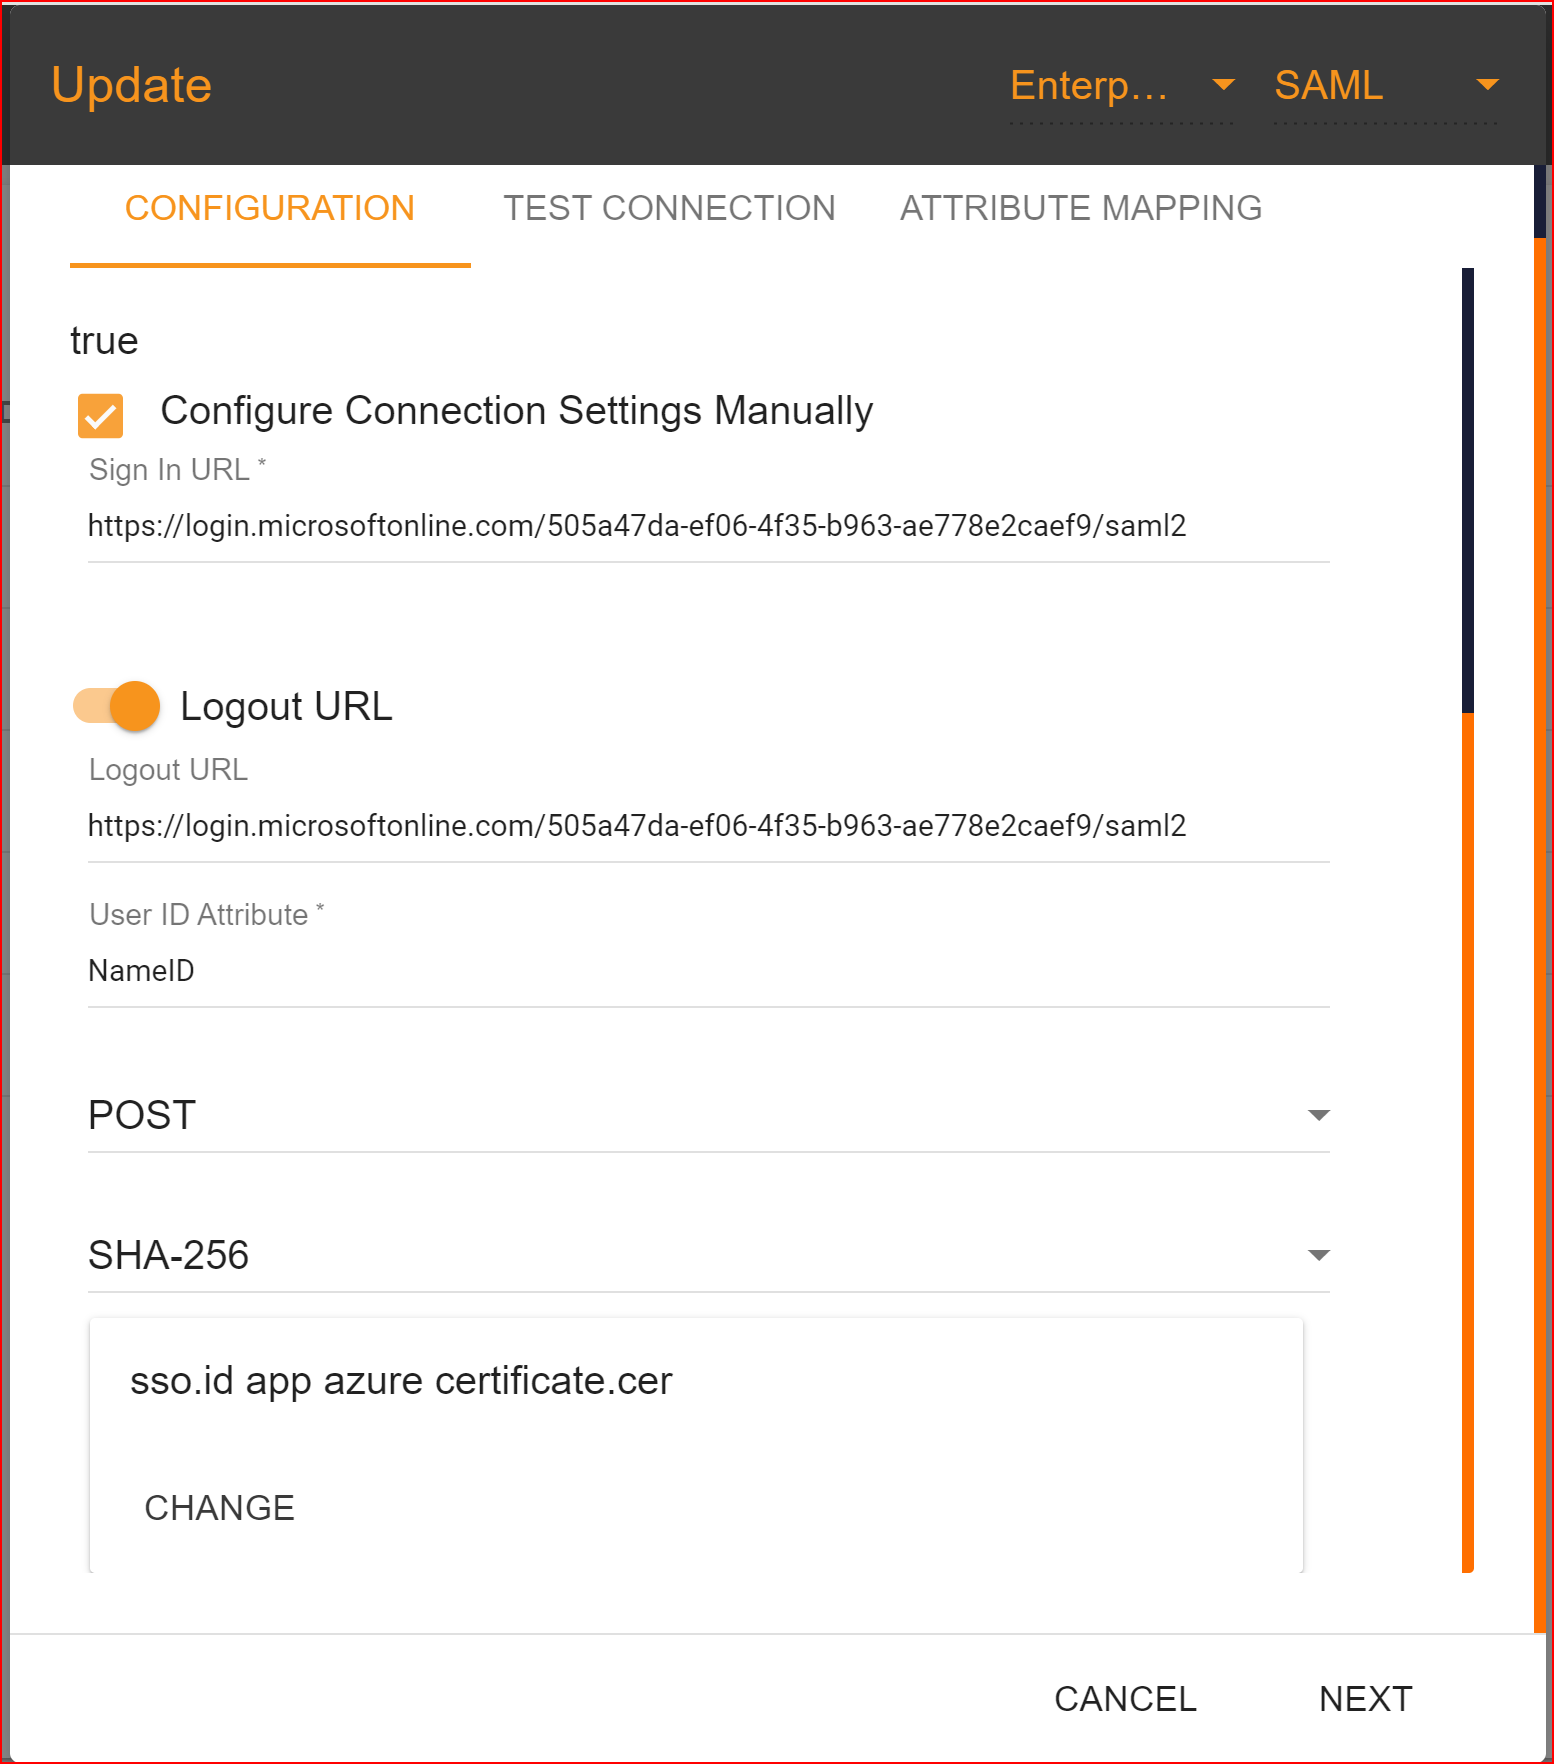
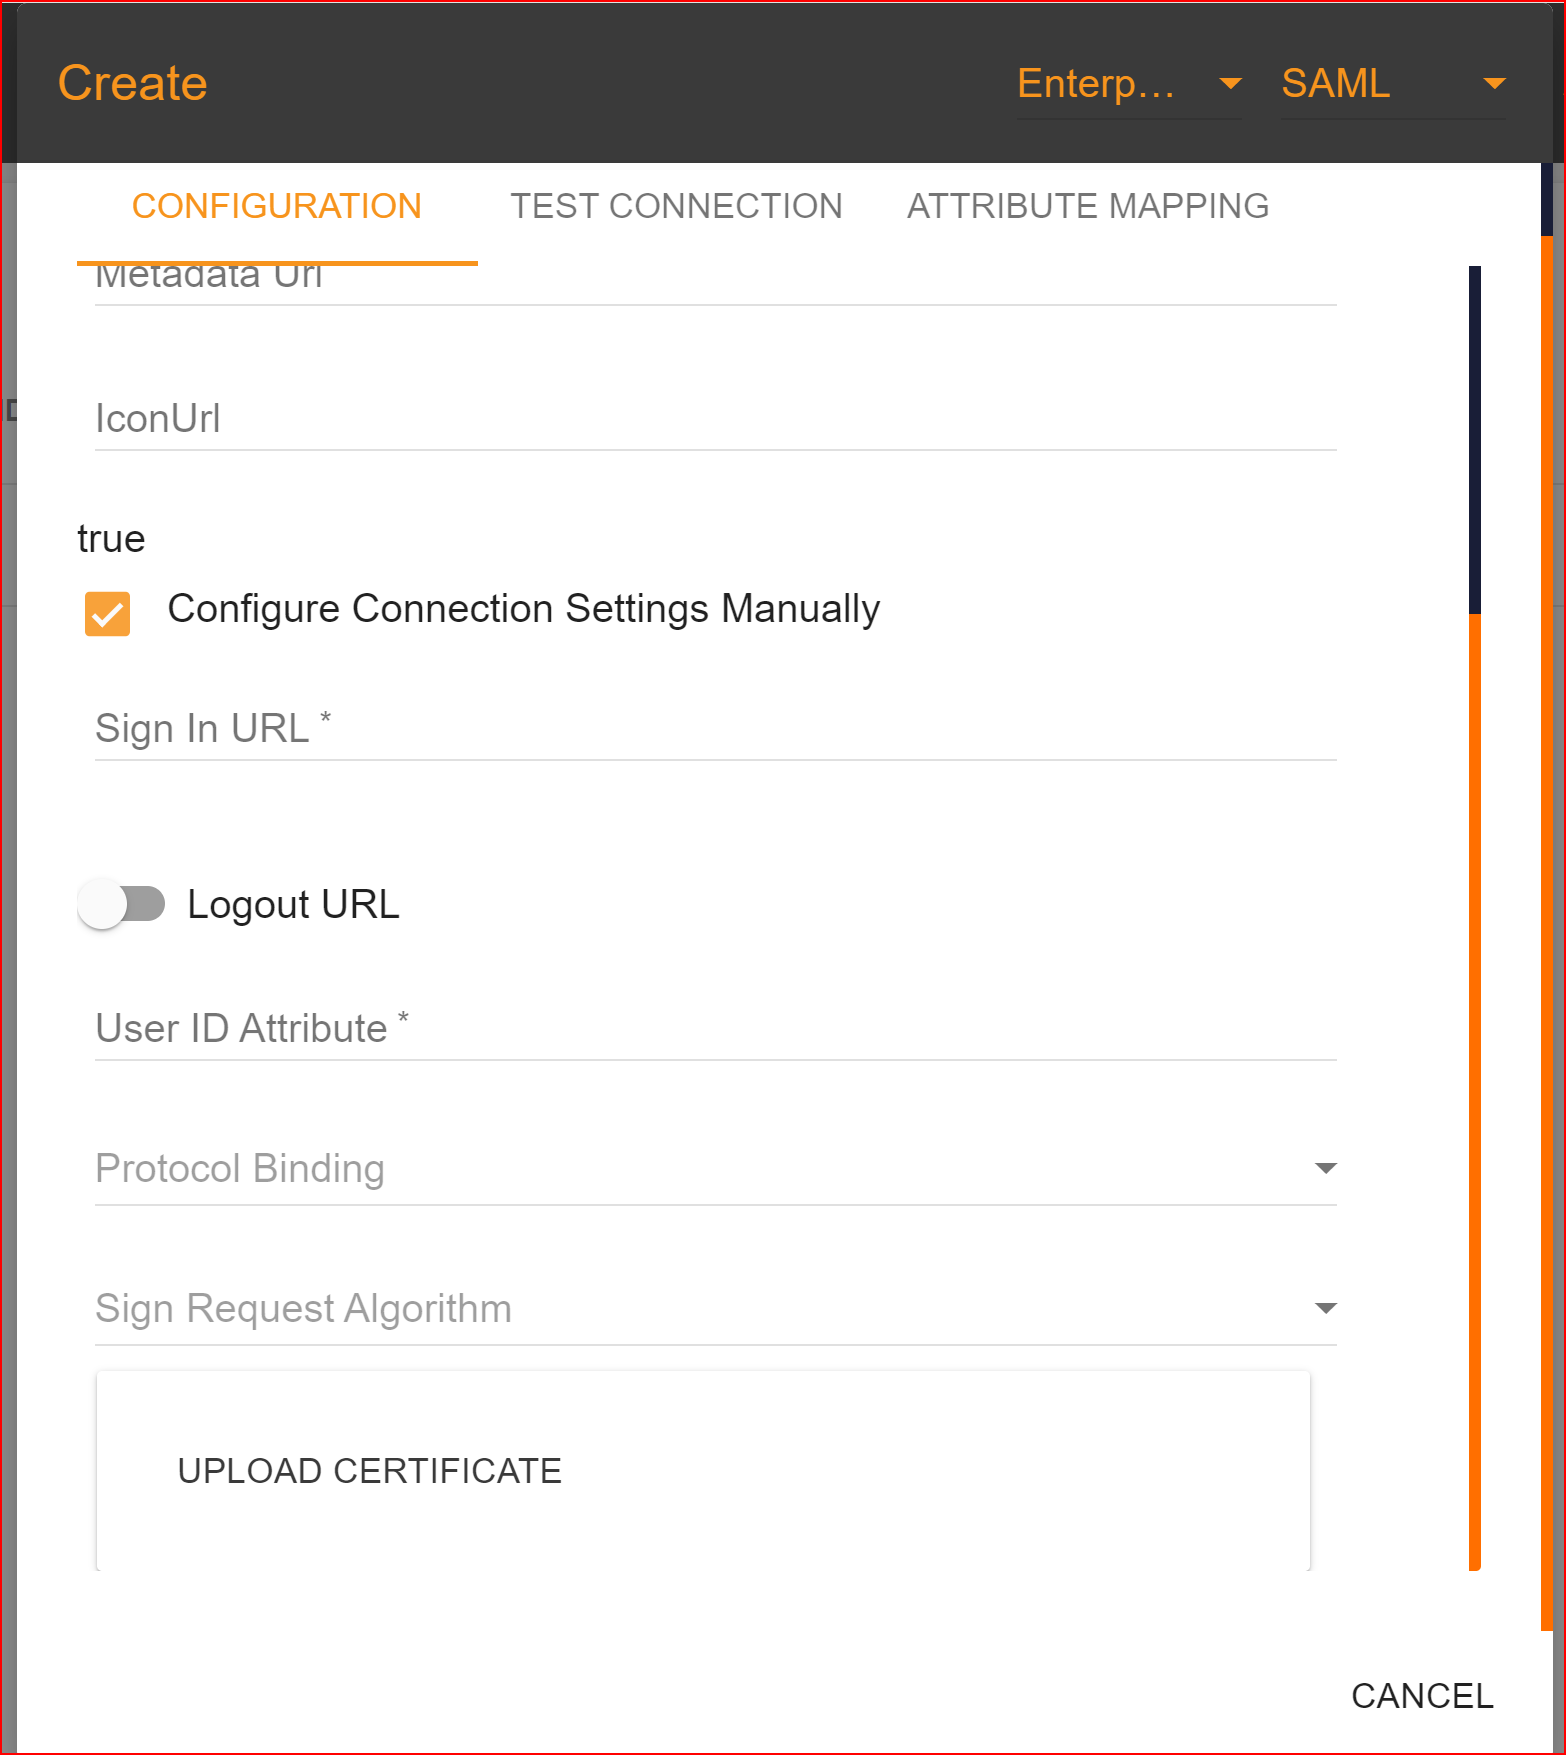
Upload Certificate
In Azure, you can configure a SAML (Security Assertion Markup Language) authentication setup for various applications, allowing users to sign in using their Azure AD credentials. Uploading a certificate is a key part of securing this communication.
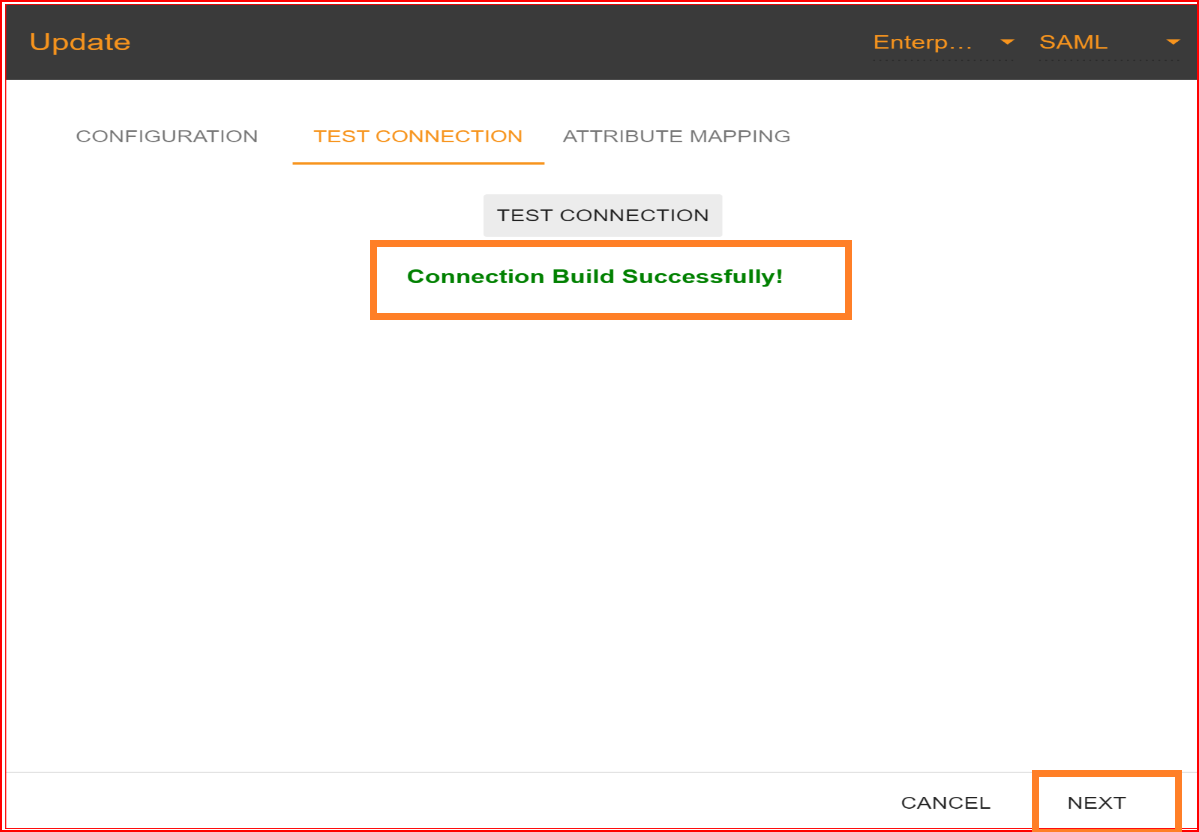
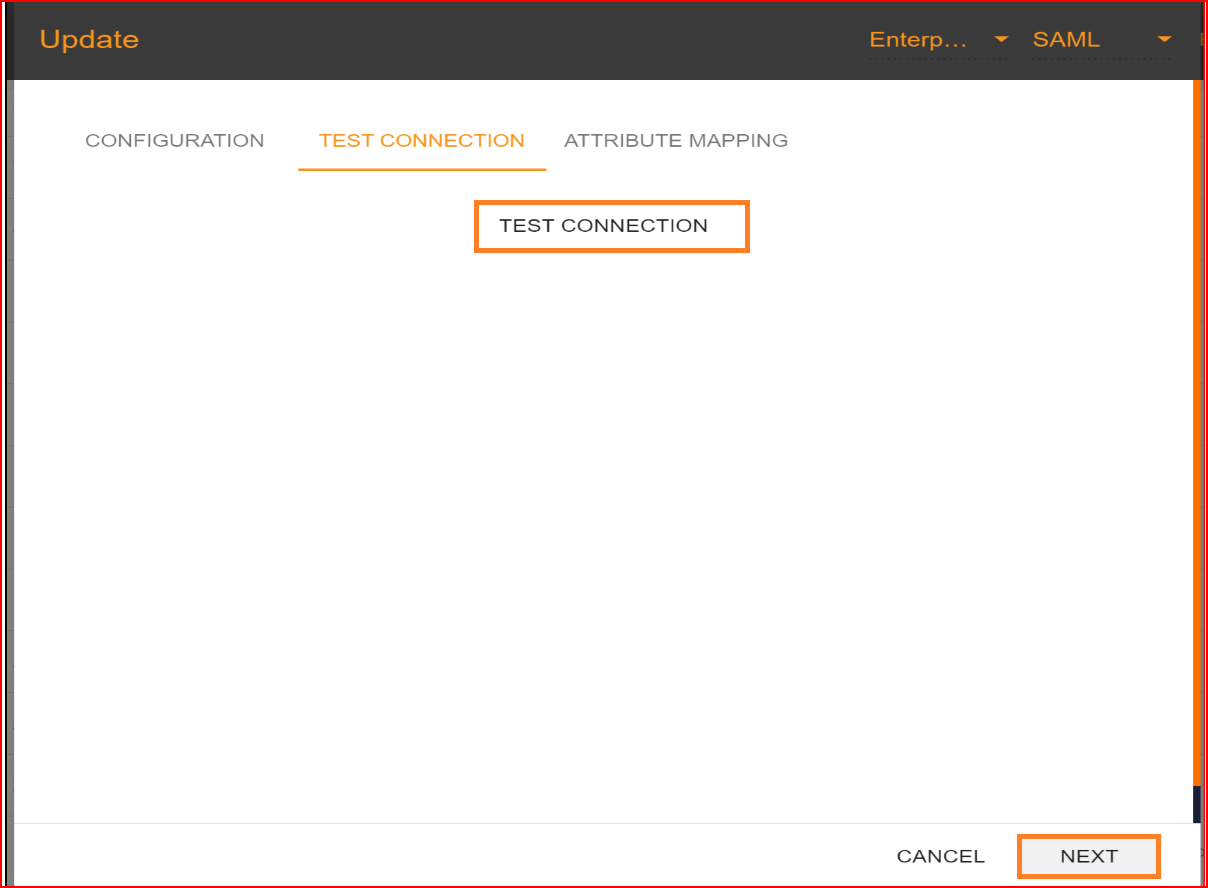
Test Connection
After uploading the certificate, you should click on “NEXT” button to test connection. In the test connection section SSO.ID provides you with a facility to check your connection, whether your connection builds up successfully or not. To test your connection, click on “TEST CONNECTION” button.
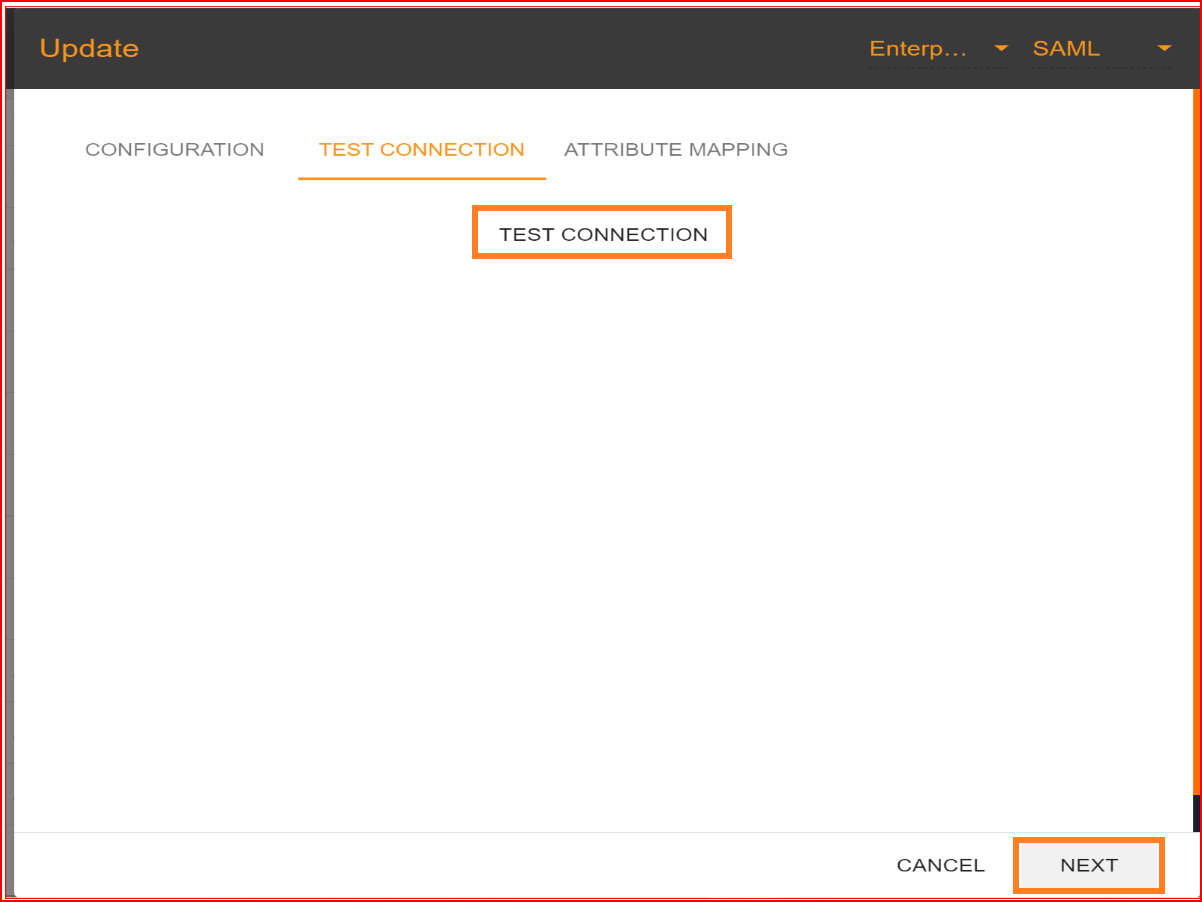
If all your configuration parameters are correct with valid signature this will display a message “Connection build successfully” and then click on “NEXT” button for attribute mapping.
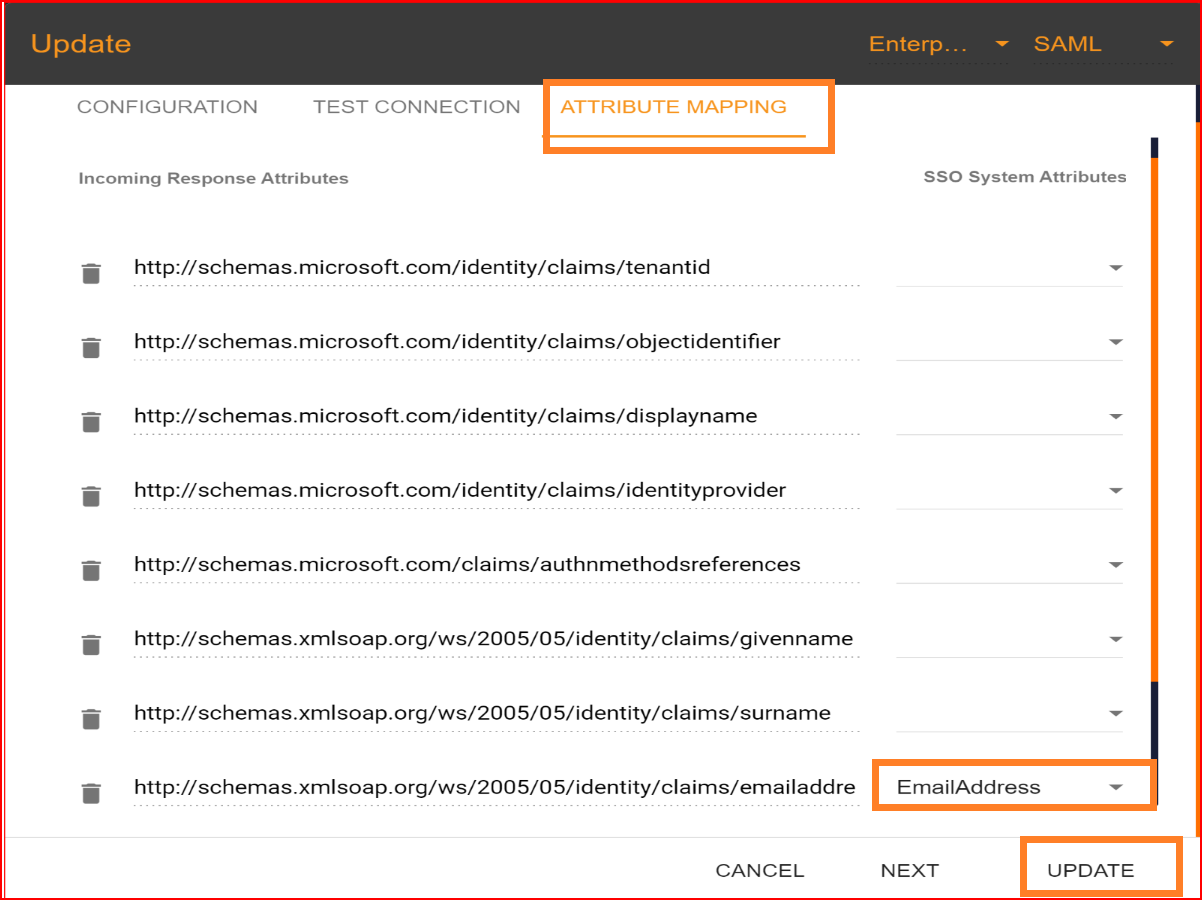
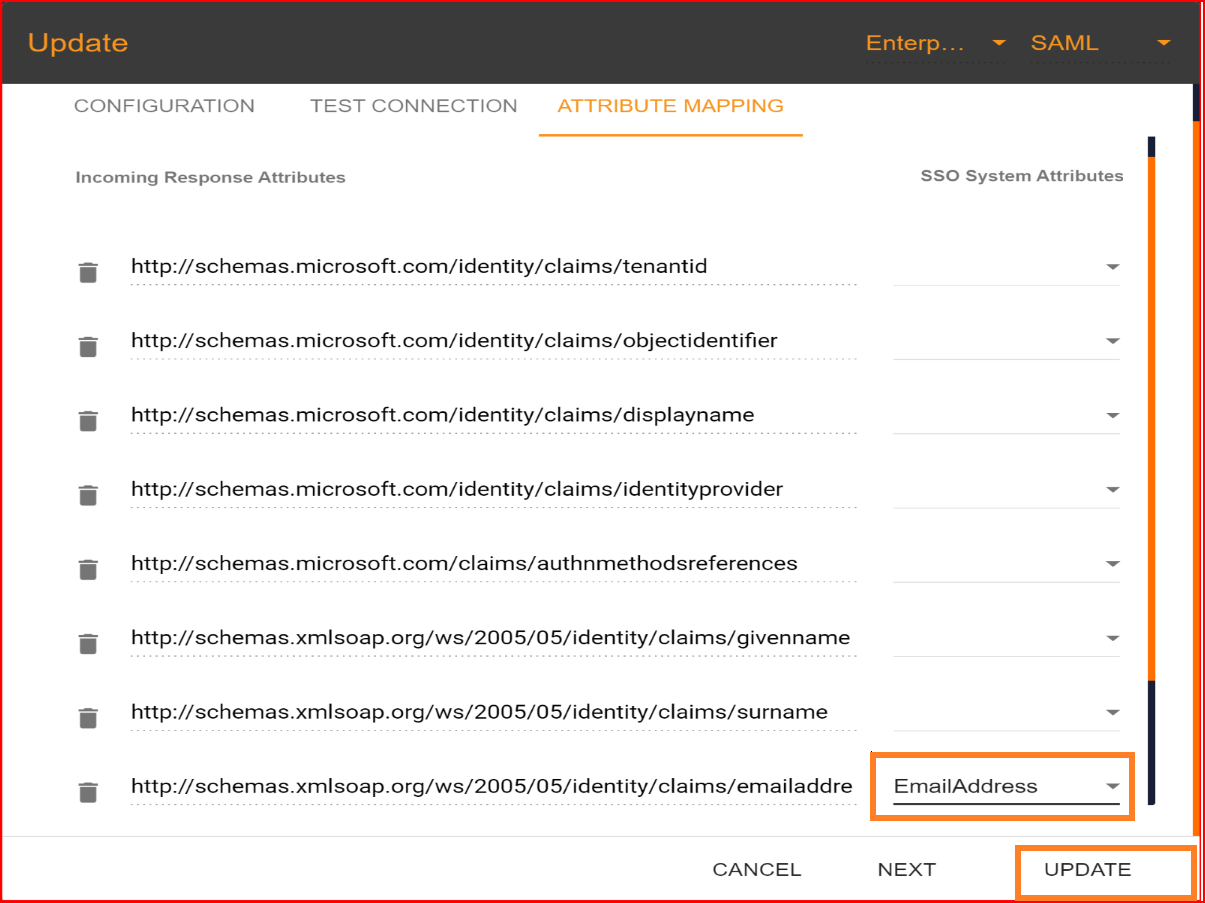
Attribute Mapping
In Single Sign-On Identity (SSO.ID), attribute mapping involves linking attributes or user information from the identity provider (IdP) with corresponding attributes in the service provider (SP) system. This ensures that relevant user data is accurately transferred between the IdP and SP during authentication. In the attribute mapping section, the "Email Address" attribute is mandatory, while other attributes are optional. After completing the attribute mapping, click the "Update" button to finalize the connection establishment process, which is now successfully completed.
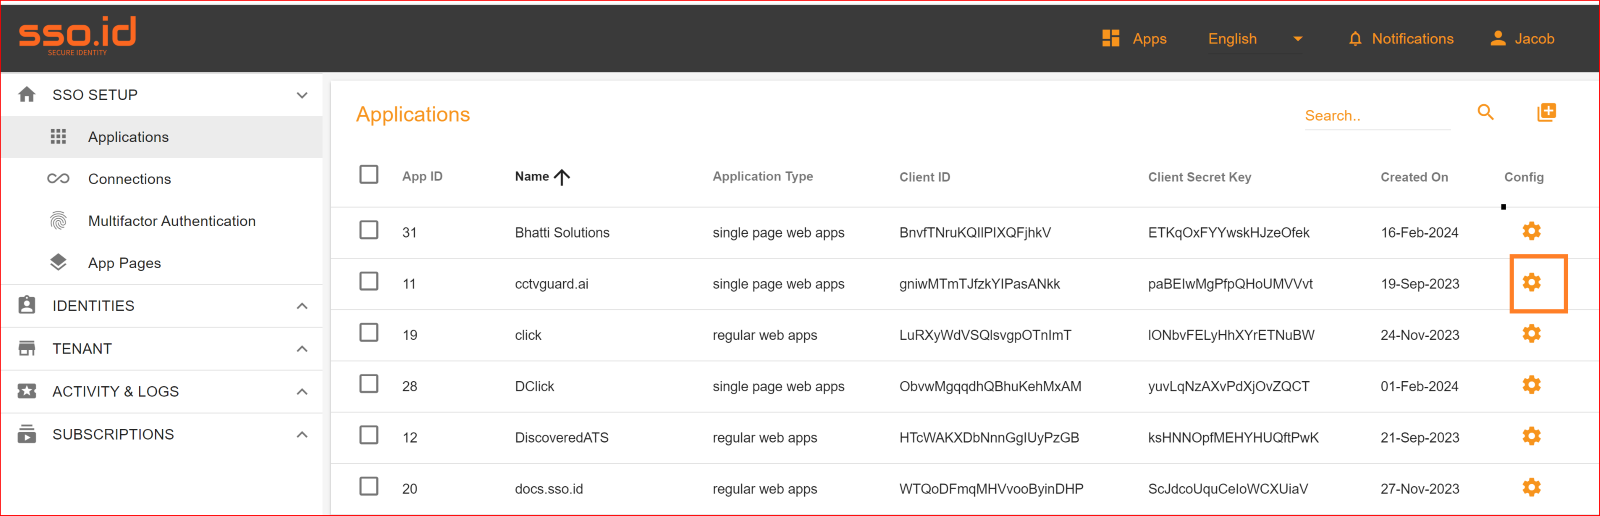
Check Attribute mapping correctly
To check the attribute mapping process in the SSO.ID, navigate your application configuration setting.
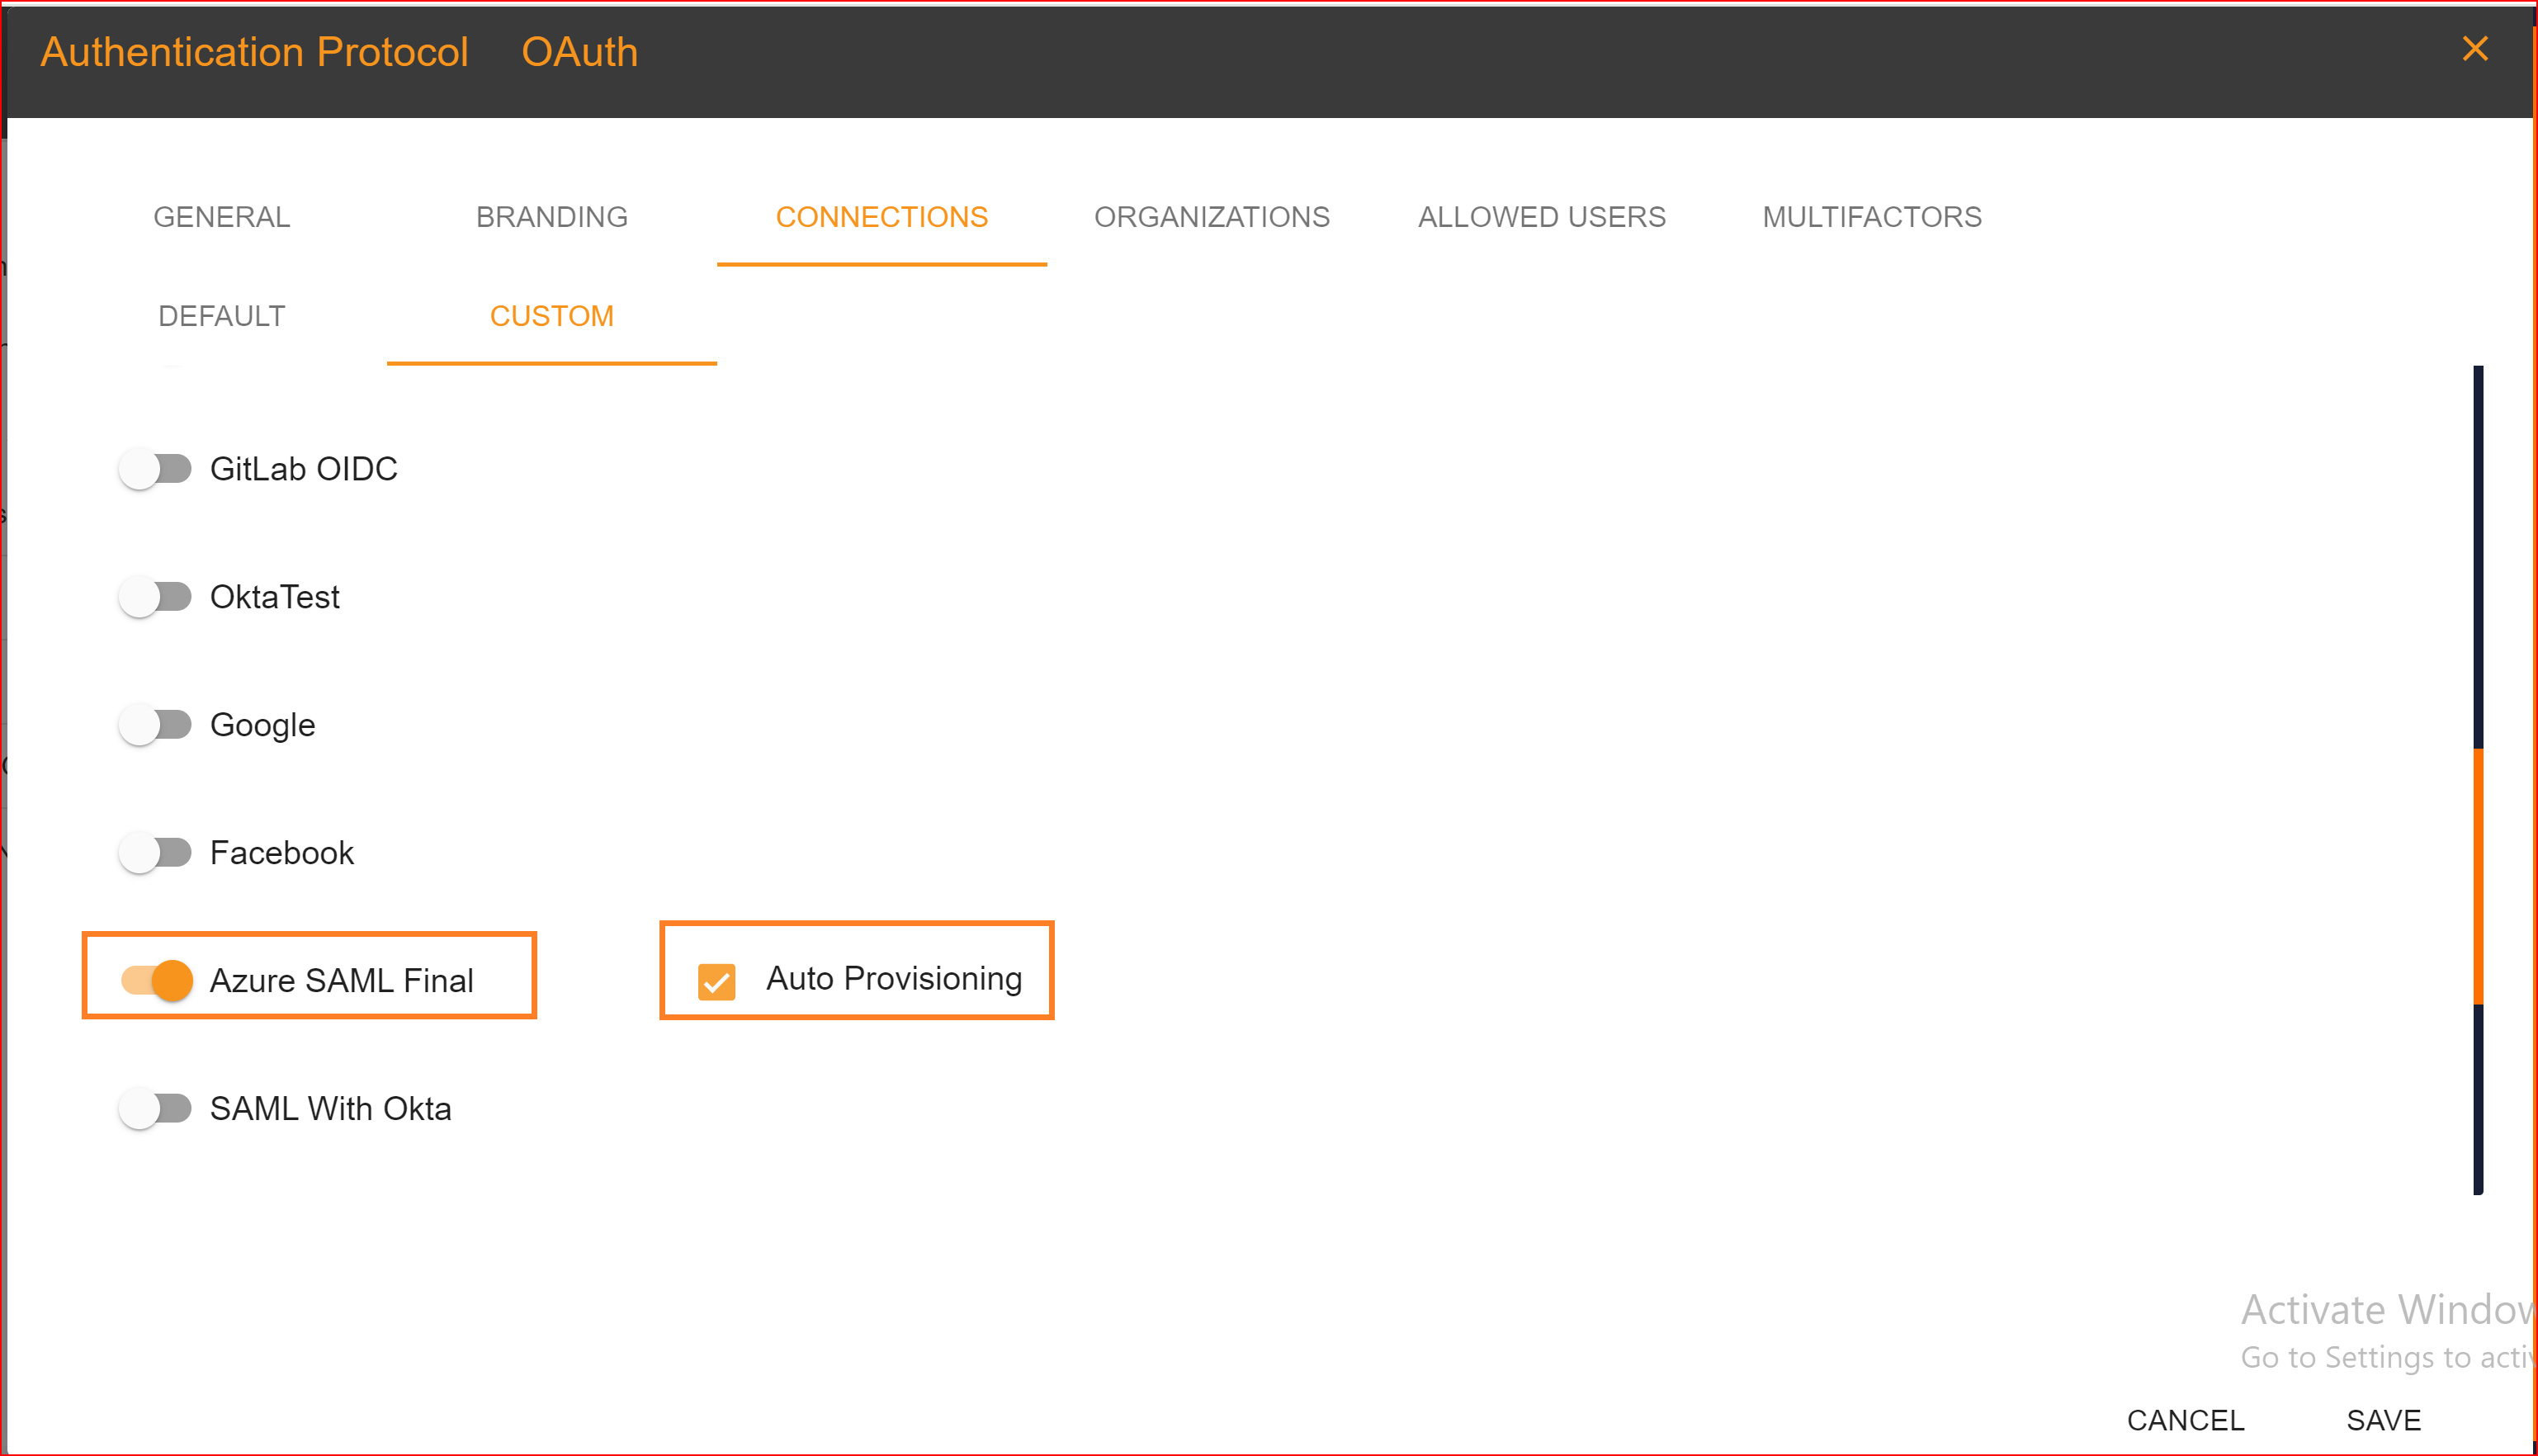
After configuration setting, go to Connection section and enable both Azure SAML Final connection and auto provisioning. What is Auto Provisioning: Auto-provisioning in Single Sign-On Identity (SSO.ID) refers to the automatic creation and management of user accounts within applications or services based on the user's authentication through the SSO system. Note: To verify the attribute mapping process, please ensure that when Auto Provisioning is enabled, the user has not already registered in the SSO system. After enabling it, you'll see the Azure SAML Final connection details in the redirect Uniform Resource Identifier (URI) of your application.
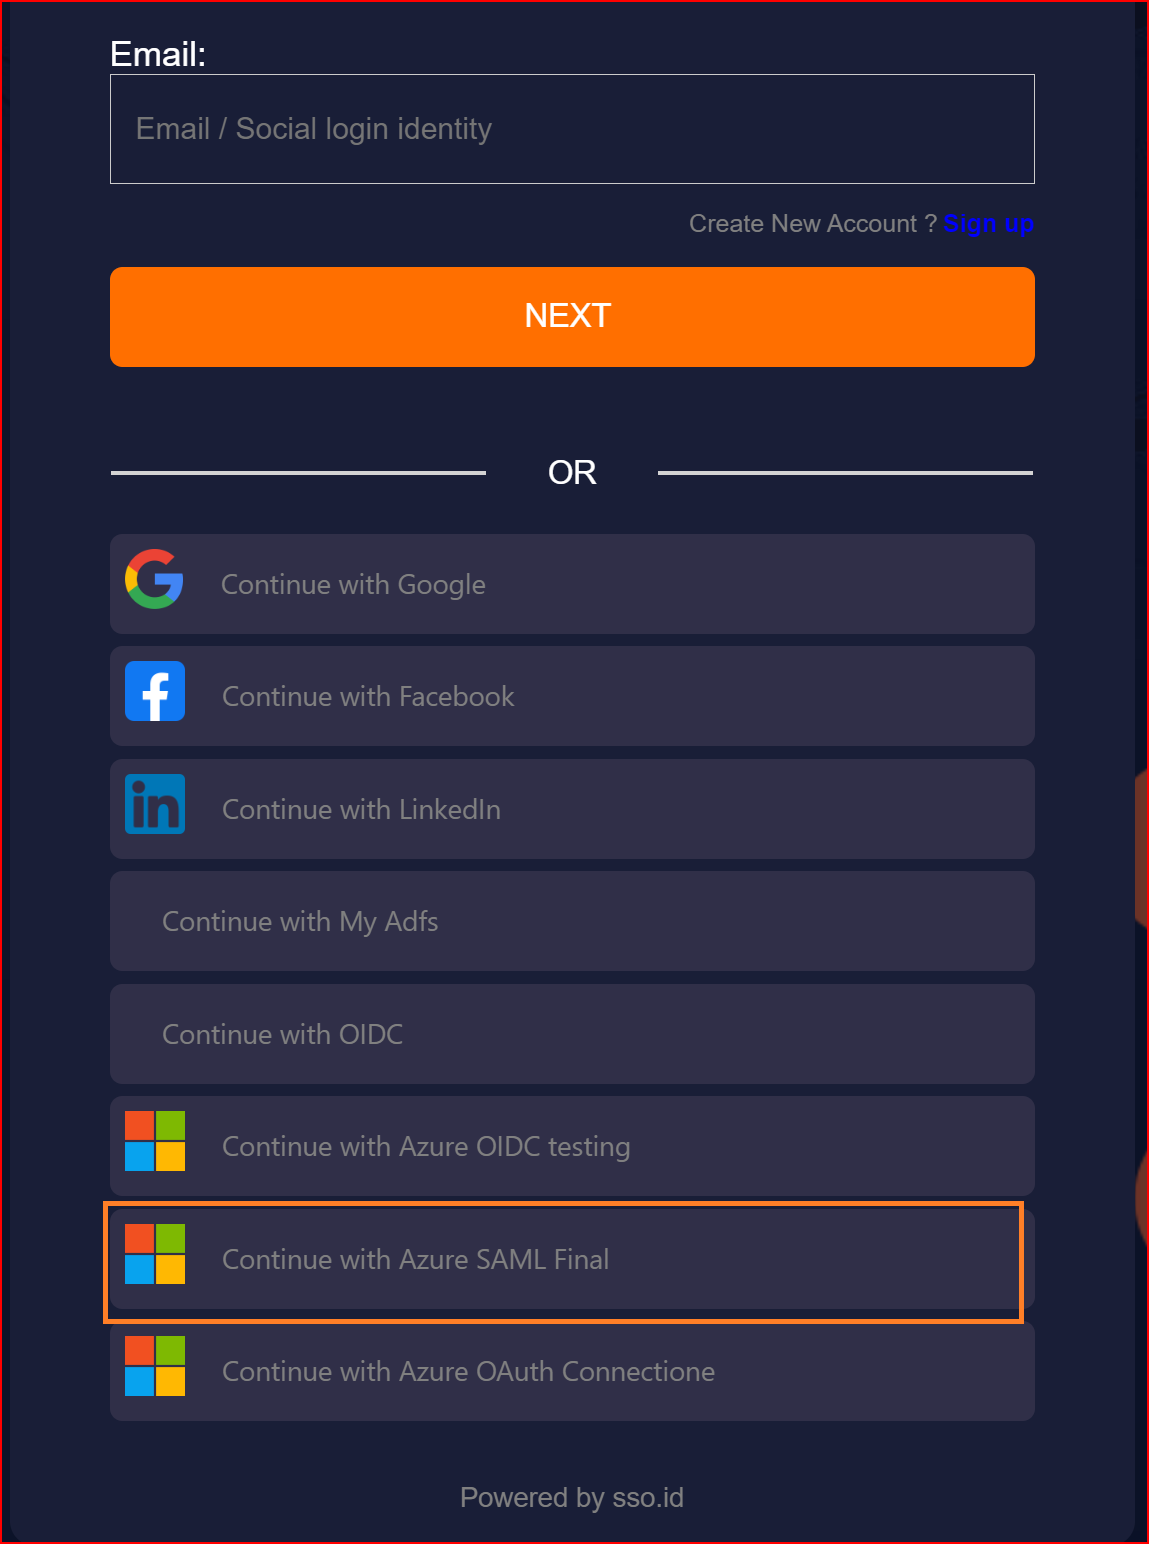
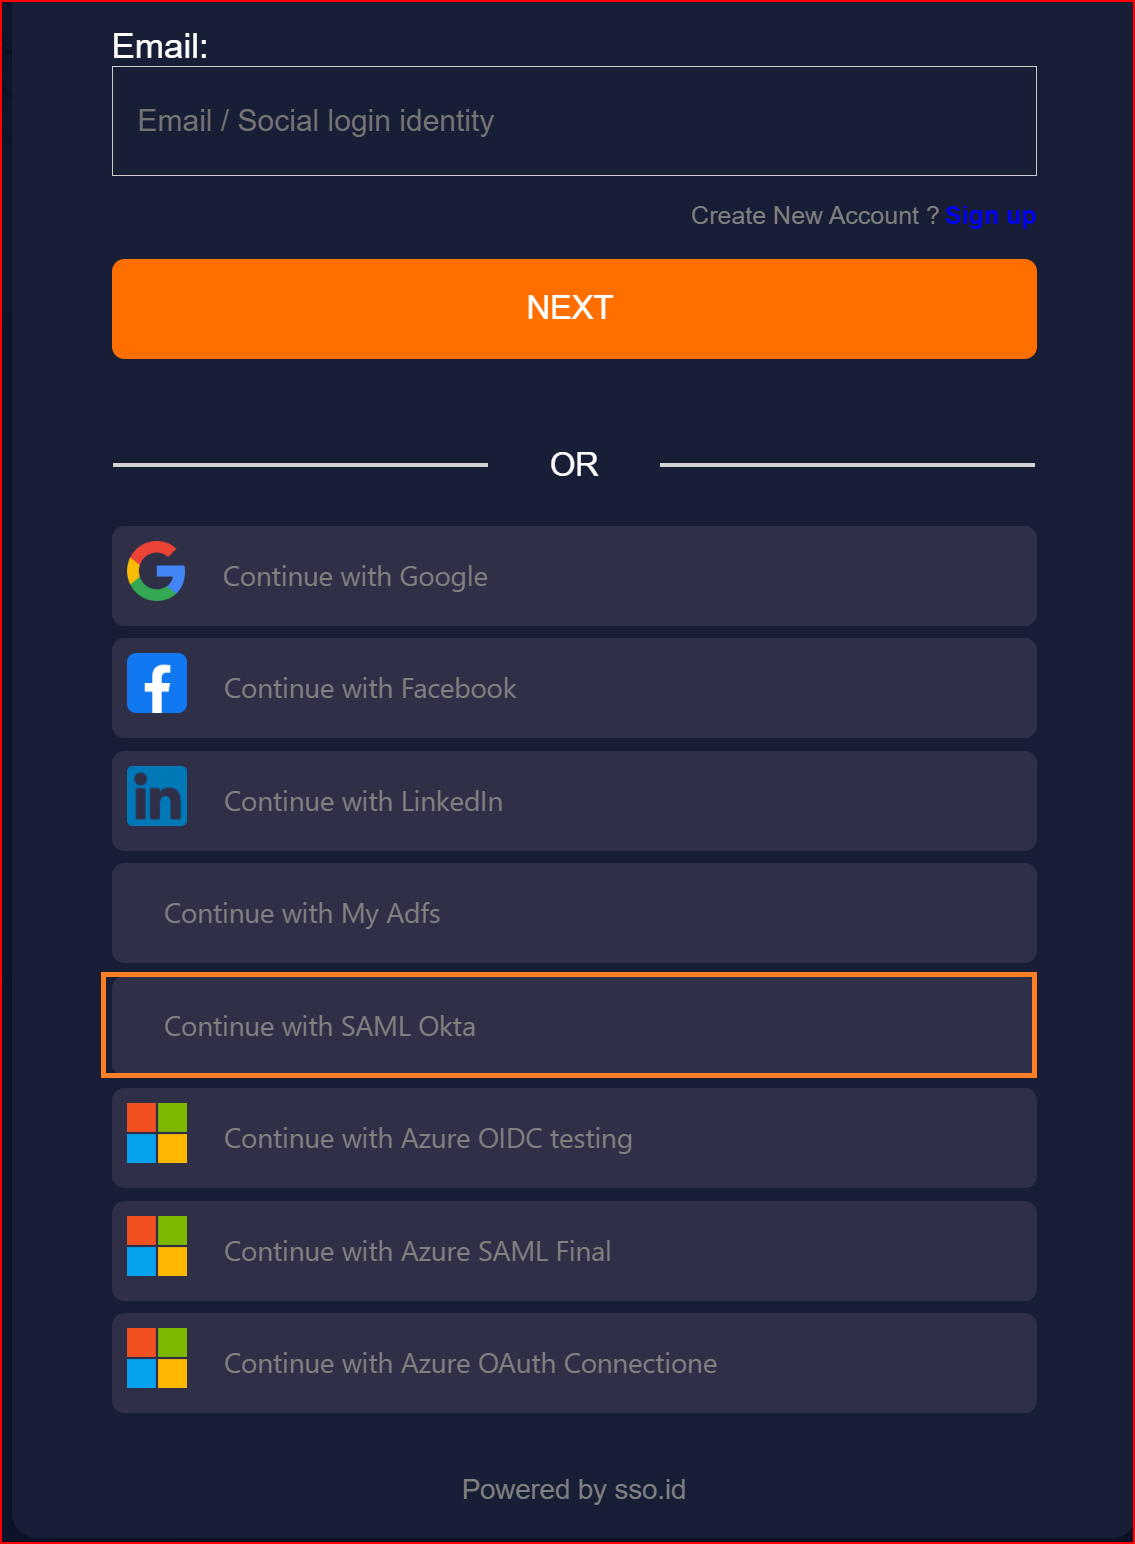
To confirm that the connection is properly set up, look for the "Sign in with SSO" button on the redirect URI of your application.

Here, you will find all the established connections that you allowed within the application. Now, you should click on the "Continue with Azure SAML Final " connection, which represents our newly established connection.
Finally, we have successfully logged into our application using the SAML protocol with the Azure application.
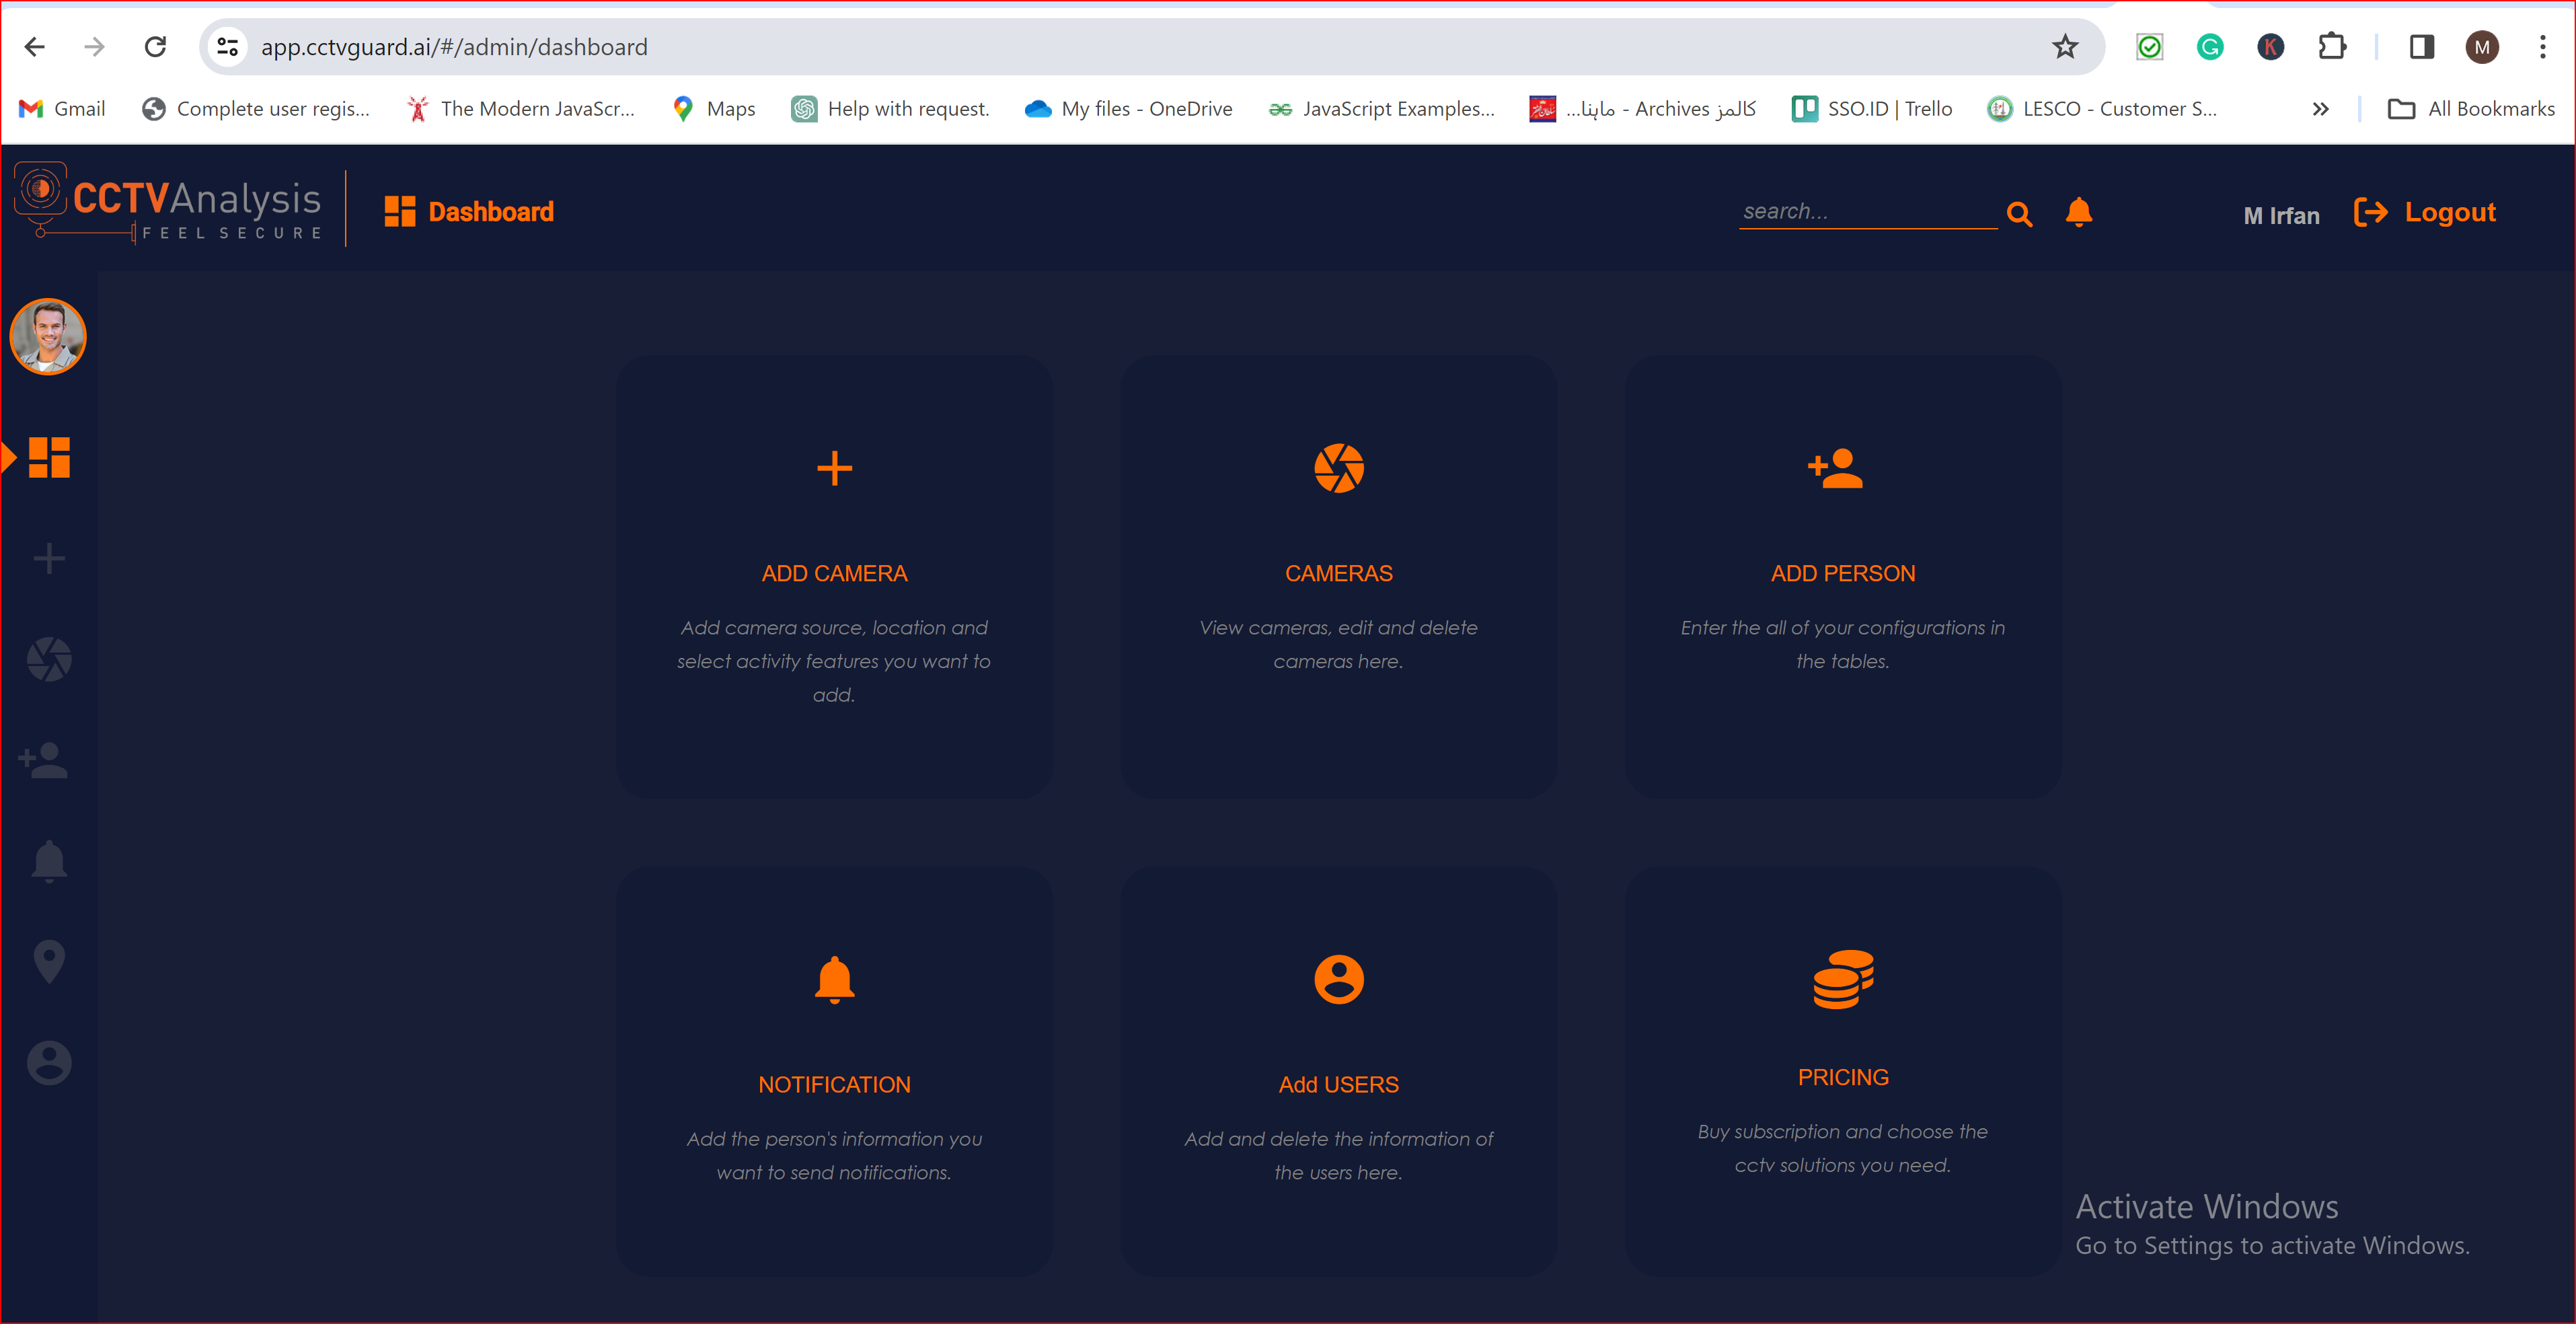
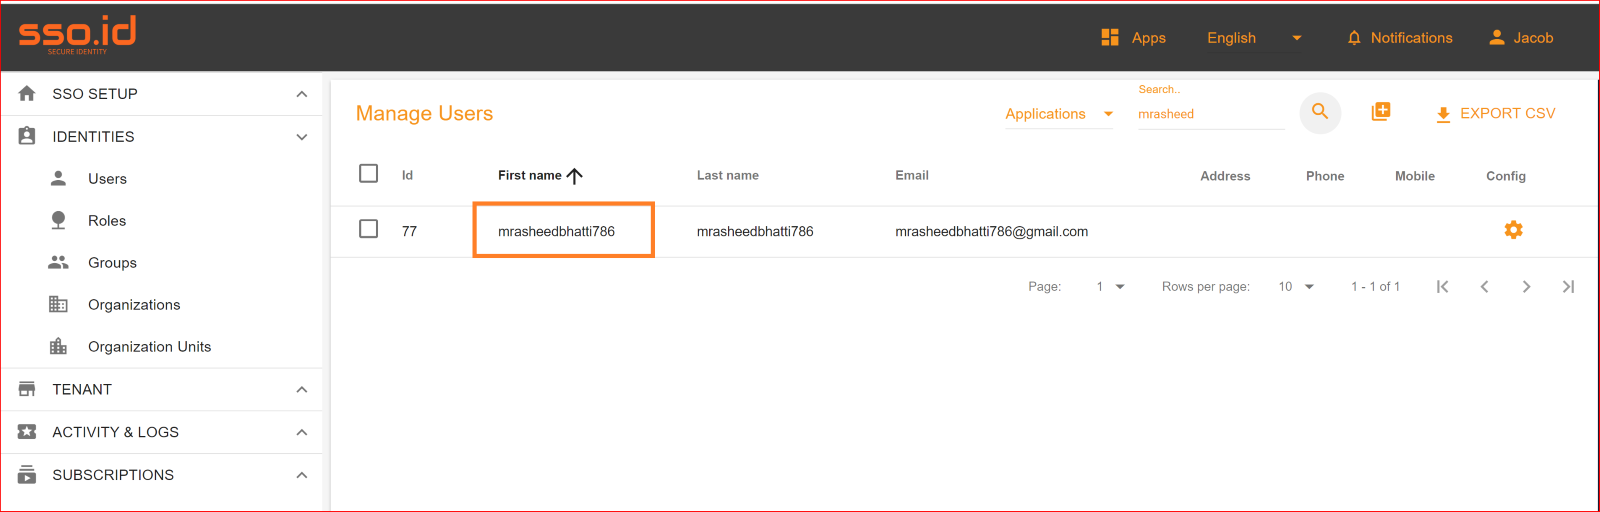
To check the auto-provisioning and attribute mapping process, you should navigate to the user management section of your SSO.ID provider's dashboard. Ensure that the user is successfully created through the Azure SAML Final with the attributes you have specified in the attribute mapping settings.
Pre-requisites
You need an SSO.ID account with admin permissions and an Azure account that has an active Azure Active Directory. Additionally, you must have the necessary permissions to create an App Registration within your Azure AD.
In Azure AD, make an App Registration
On the sidebar, under Manage, select Enterprise applications. Click on New application.

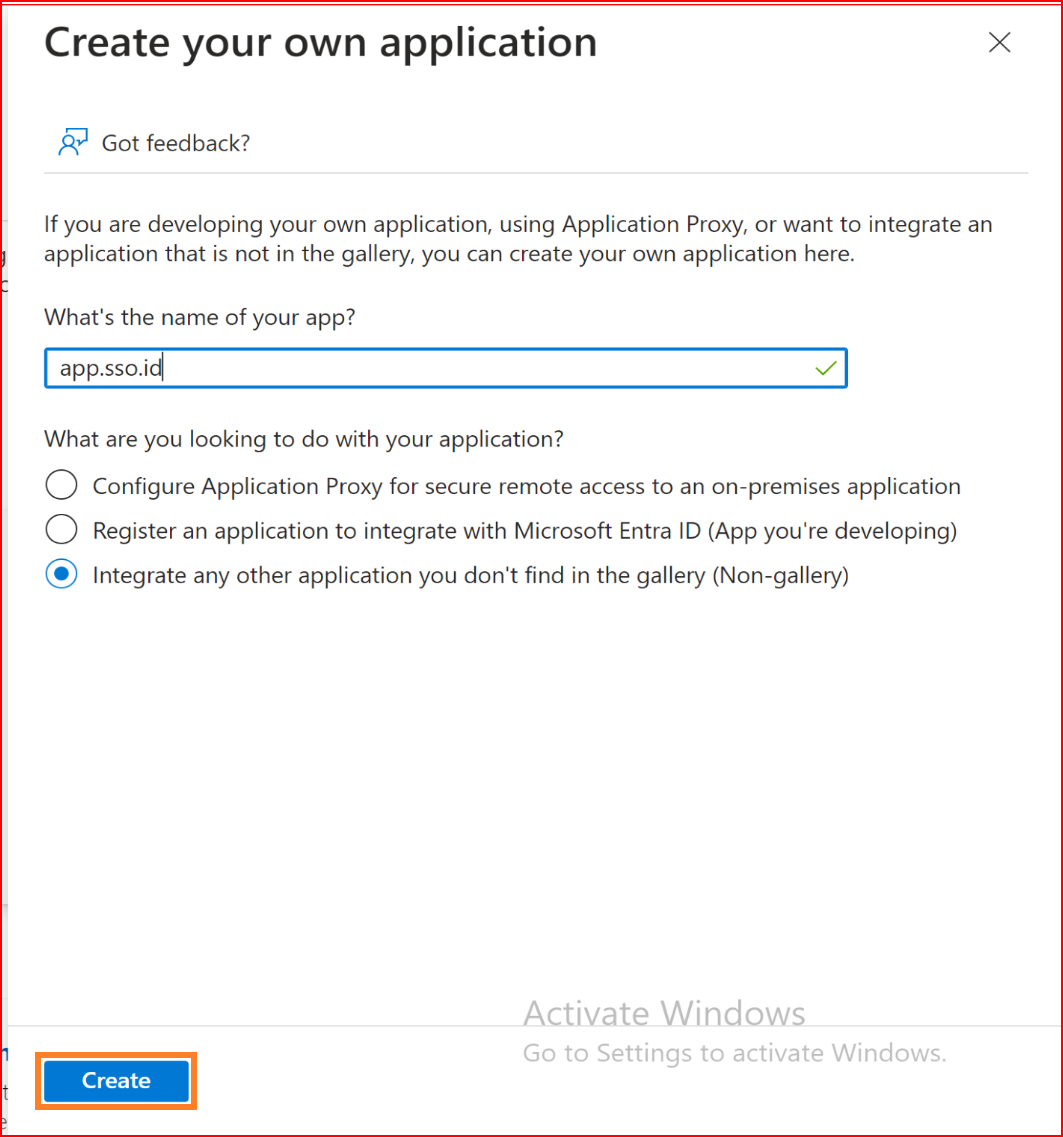
Create your own application
On the app browser, select 'Create your application.' Give it a name (e.g., app.sso.id) and choose to integrate with any other application that you don't find in the gallery.
After creating the app, let's configure its properties. Afterward, on the app sidebar, choose 'Properties,' and under 'Logo,' browse for the downloaded logo. Then, save your changes.

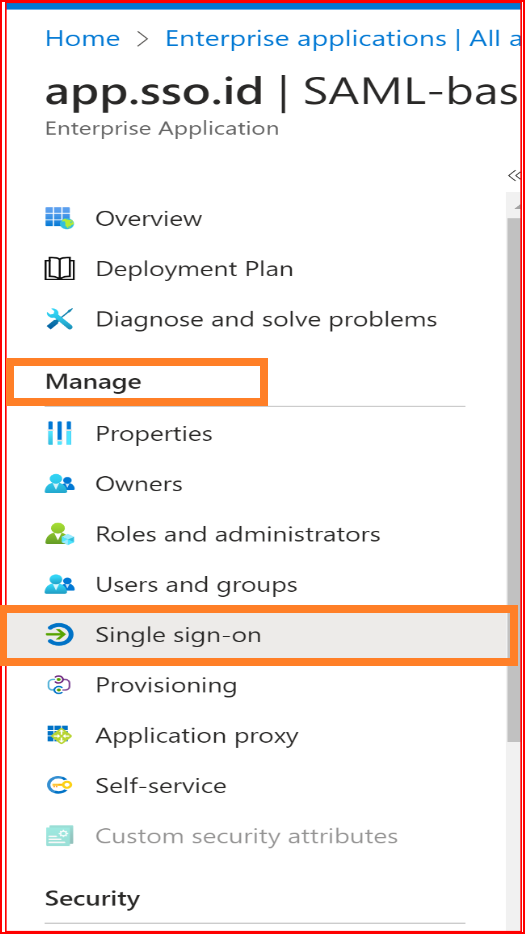
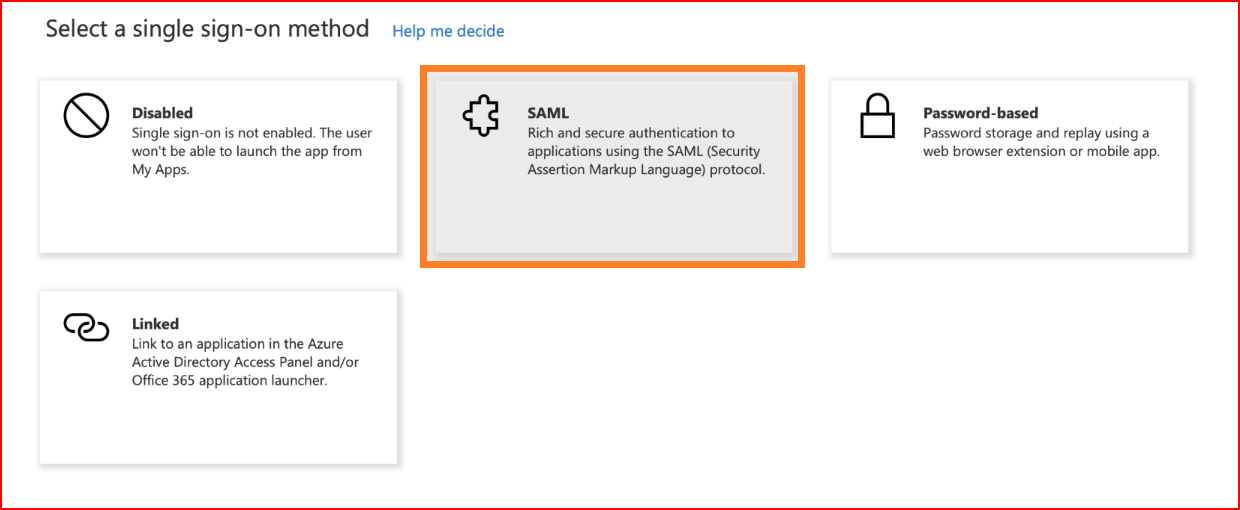
Now, let's configure SAML SSO. On the app sidebar, go to 'Manage,' and select 'Single sign-on.
Choose SAML as the sign-on method.
Complete the Basic SAML Configuration as illustrated below and ensure that the two checkboxes circled on the right are selected.
Note: Do not include a trailing slash at the end of the URLs. Create them exactly as shown below.
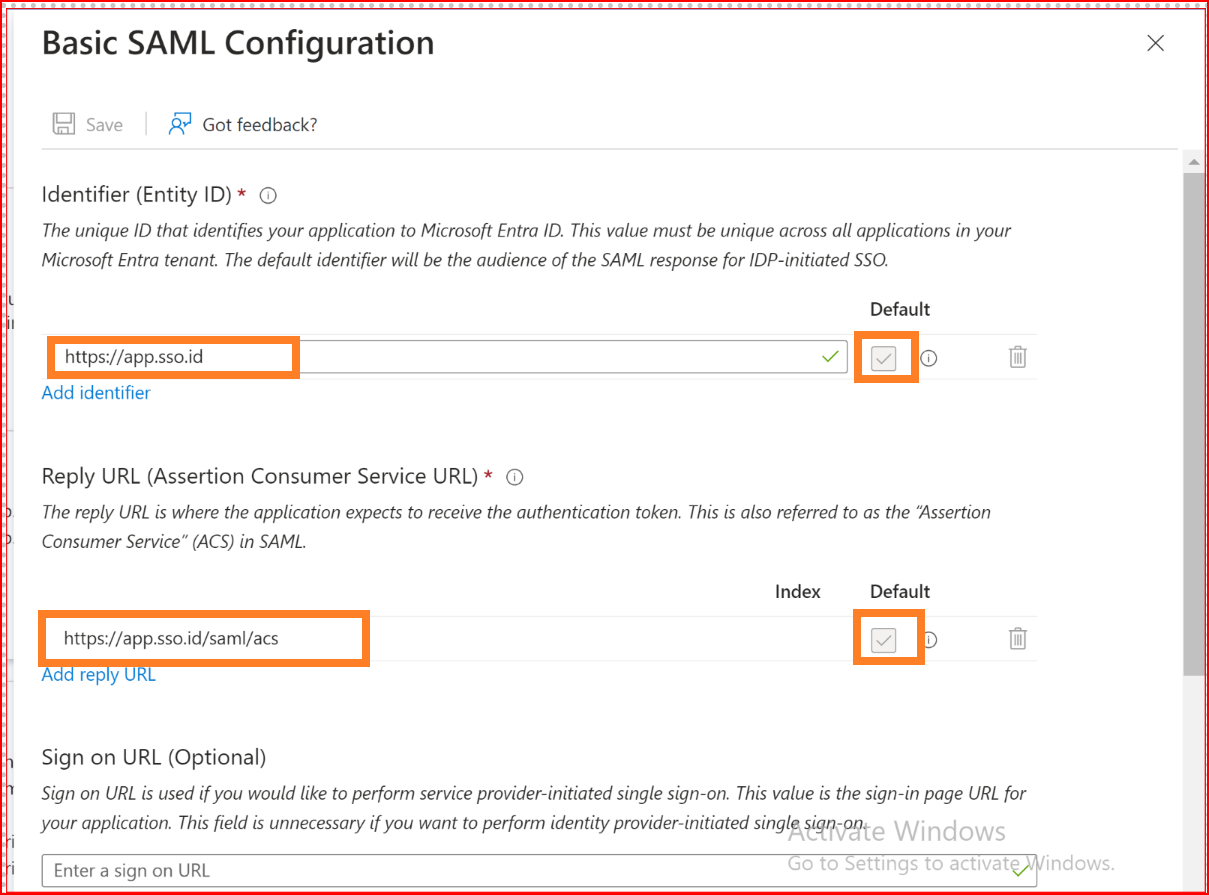
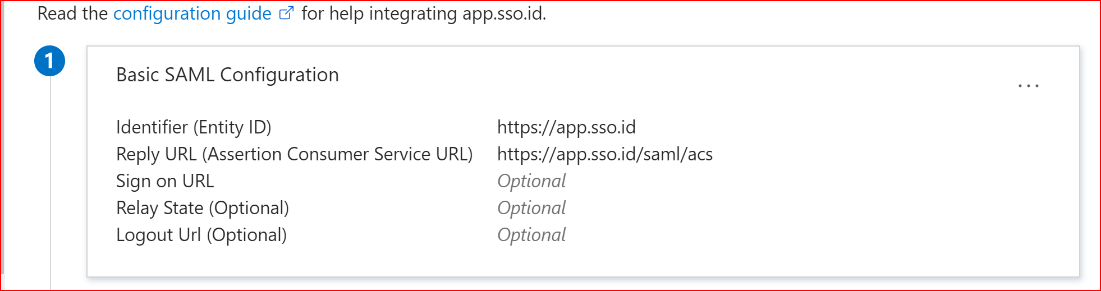
Click on Save. It should resemble the screenshot below.
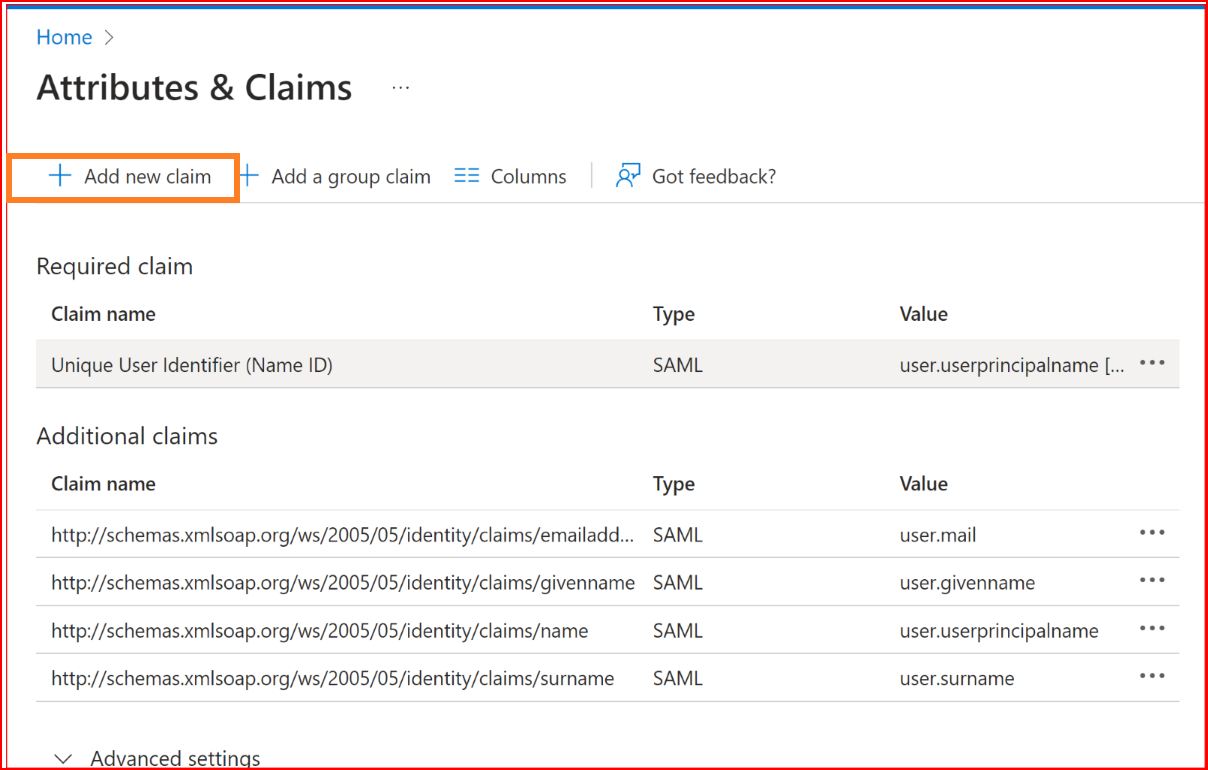
Click to edit User Attributes & Claims.
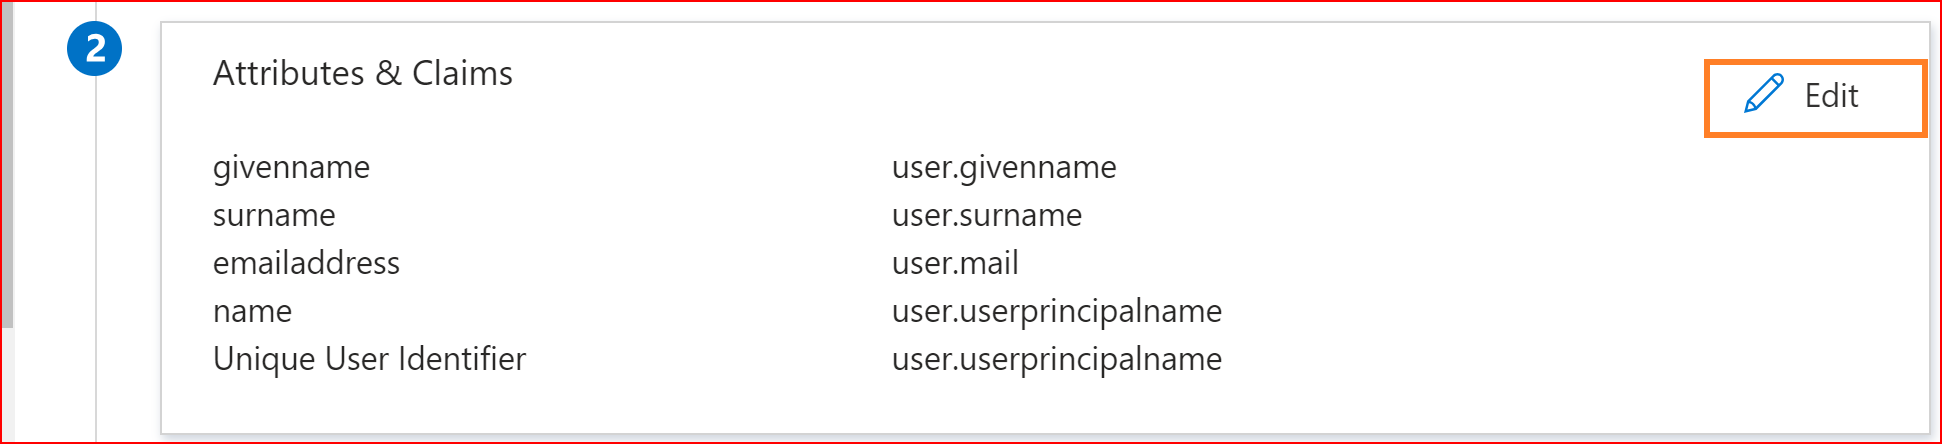
Click Add new claim
Create an SAML Connection with Okta
Security Assertion Markup Language (SAML) allows users to log in to enterprise cloud applications using their managed account credentials through Single Sign-On (SSO). An Identity Provider (IDP) service offers administrators a centralized platform to oversee all users and cloud applications. You don't need to handle separate user IDs and passwords for each of your users connected to individual cloud applications. An Identity Provider (IDP) service allows your users to have a single sign-on experience across all their enterprise cloud applications.
Endpoint of Okta with Saml
- Name Enter the valid and complete name of your newly generated connection.
- Description: Write a short description of your connection.
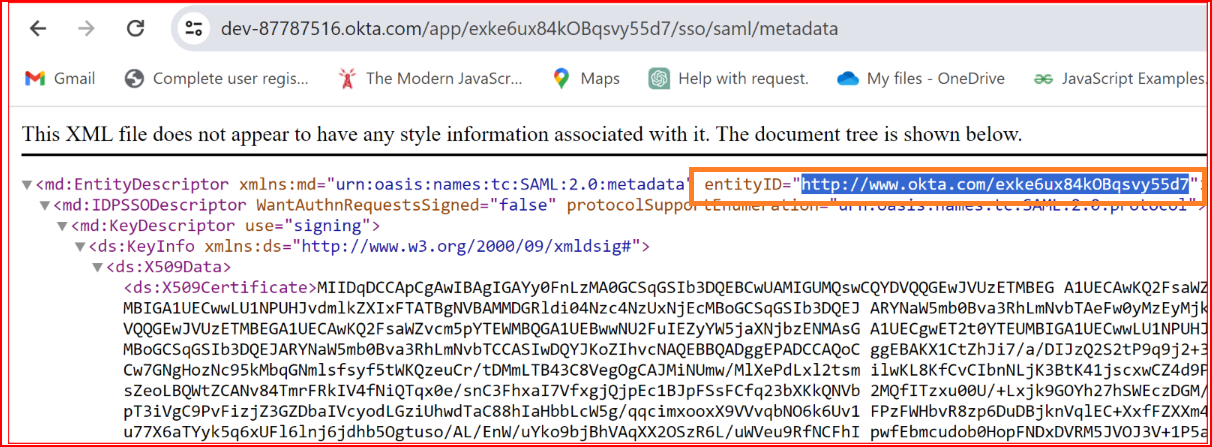
- Identifier (Entity ID): Go to the 'Okta Application' section, click on the 'Single Sign-On' tab, copy the Metadata URL, and paste it into Google Chrome.
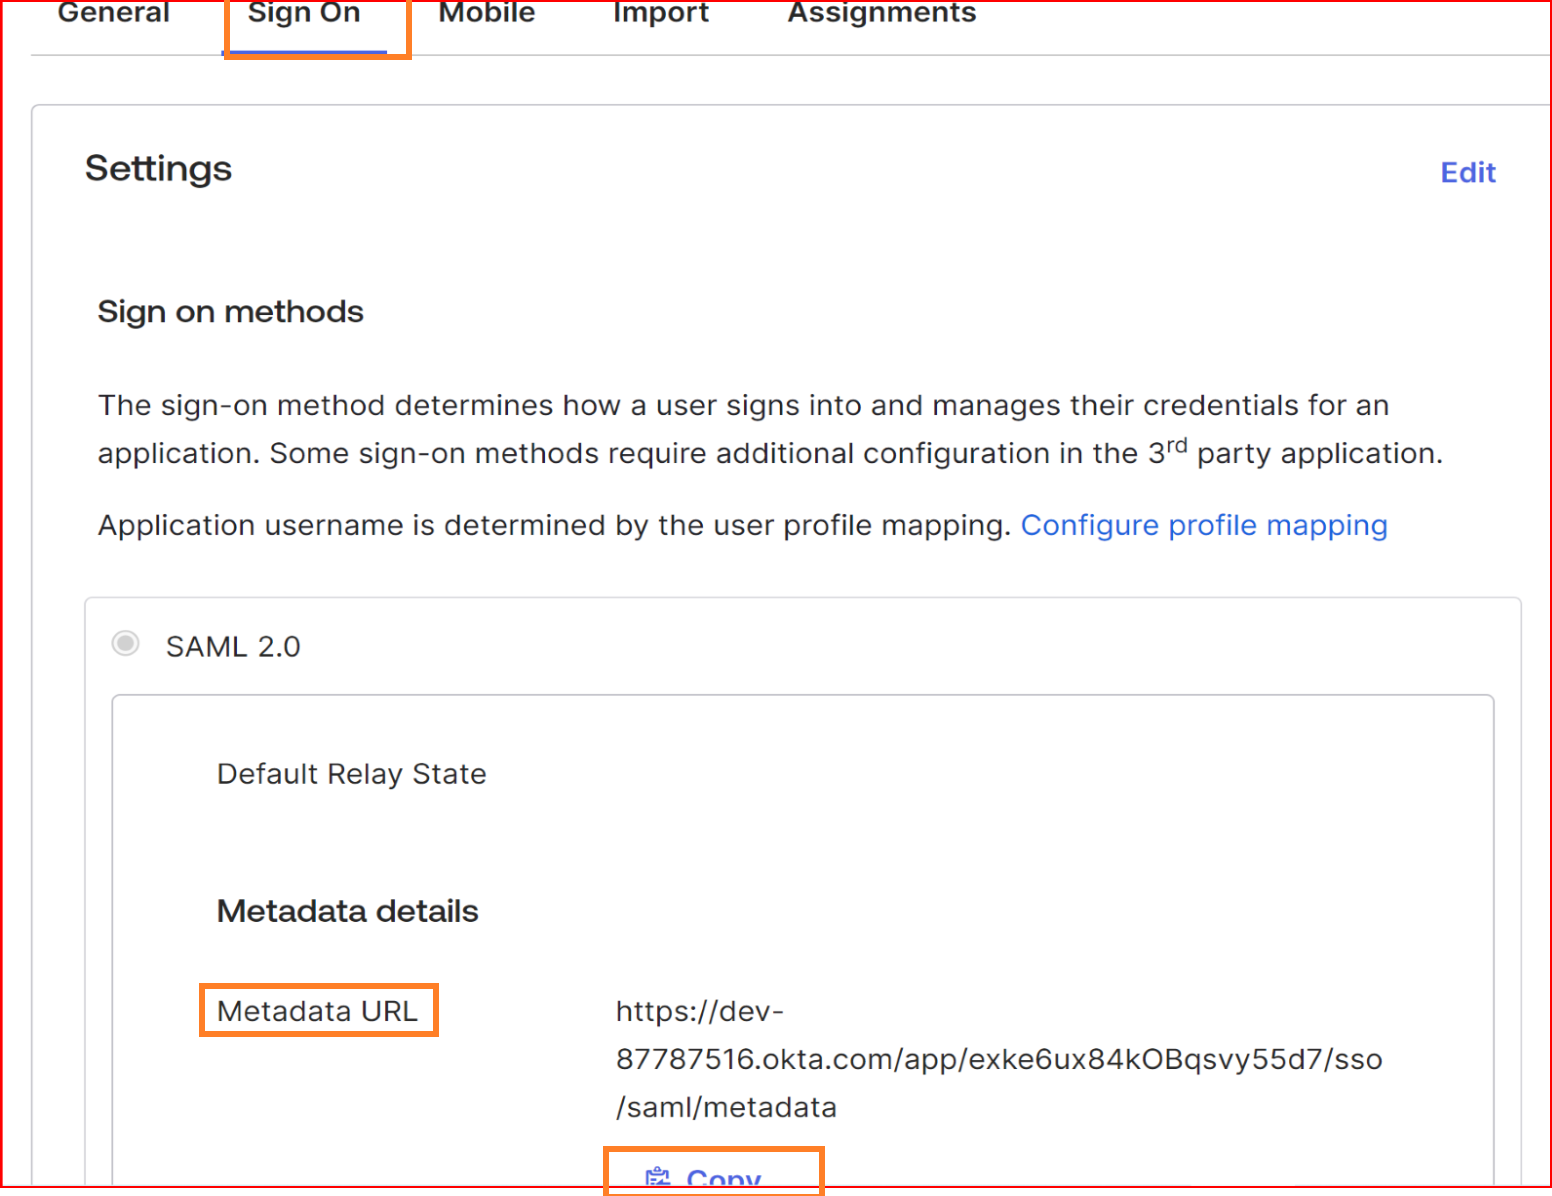
Metadata URL typically refers to a Uniform Resource Locator (URL) that points to metadata associated with a particular resource on the internet. Metadata is information about data, and in the context of the web, it often describes details about a webpage, document, or other online content. Please copy the entity Id from the metadata URL and Then, paste it into the "SSO.ID Identifier" field.
If you enter the valid Identifier (Entity ID) and then click on the save button, the remaining fields will be automatically filled or can be manually set.
Upload certificate
In Okta, you can configure a SAML (Security Assertion Markup Language) authentication setup for various applications, allowing users to sign in using their Okta credentials. Uploading a certificate is a key part of securing this communication.

Test Connection
After uploading the certificate, you should click on “NEXT” button to test connection. In the test connection section SSO.ID provides you with a facility to check your connection, whether your connection builds up successfully or not. To test your connection, click on “TEST CONNECTION” button.
If all your configuration parameters are correct with valid signature this will display a message “Connection build successfully” and then click on “NEXT” button for attribute mapping.
Attribute Mapping
This ensures that relevant user data is accurately transferred between the IdP and SP during authentication. In the attribute mapping section, the "Email Address" attribute is mandatory, while other attributes are optional. After completing the attribute mapping, click the "Update" button to finalize the connection establishment process, which is now successfully completed.
Check Attribute Mapping Correctly
To check the attribute mapping process in the SSO.ID, navigate your application configuration setting.
After configuration setting, go to Connection section and enable both SAML Okta connection and auto provisioning. What is Auto Provisioning: Auto-provisioning in Single Sign-On Identity (SSO.ID) refers to the automatic creation and management of user accounts within applications or services based on the user's authentication through the SSO system. Note: To verify the attribute mapping process, please ensure that when Auto Provisioning is enabled, the user has not already registered in the SSO system. After enabling it, you'll see the SAML Okta connection details in the redirect Uniform Resource Identifier (URI) of your application.

To confirm that the connection is properly set up, look for the "Sign in with SSO" button on the redirect URI of your application.
Here, you will find all the established connections that you allowed within the application. Now, you should click on the "Continue with SAML Okta " connection, which represents our newly established connection.
Finally, we have successfully logged into our application using the SAML protocol with the Okta application.
To check the auto-provisioning and attribute mapping process, you should navigate to the user management section of your SSO.ID provider's dashboard. Ensure that the user is successfully created through the SAML connection with the attributes you have specified in the attribute mapping settings.
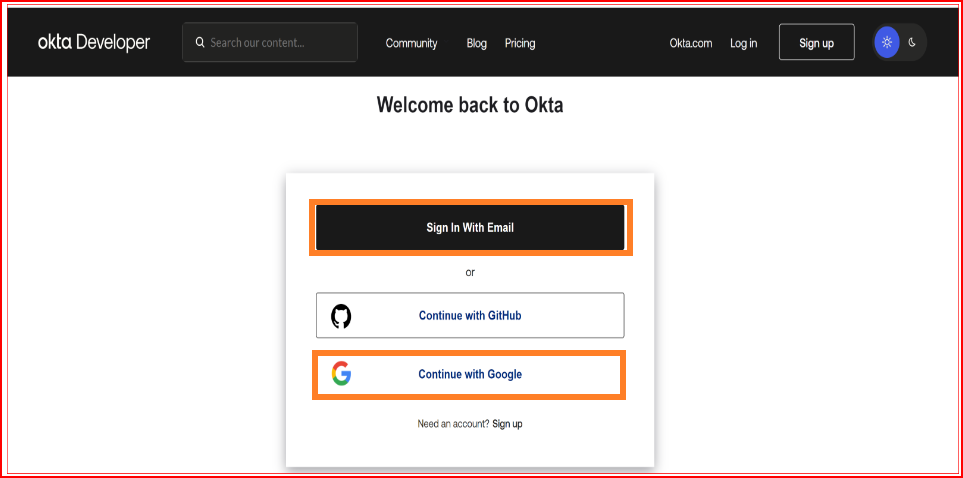
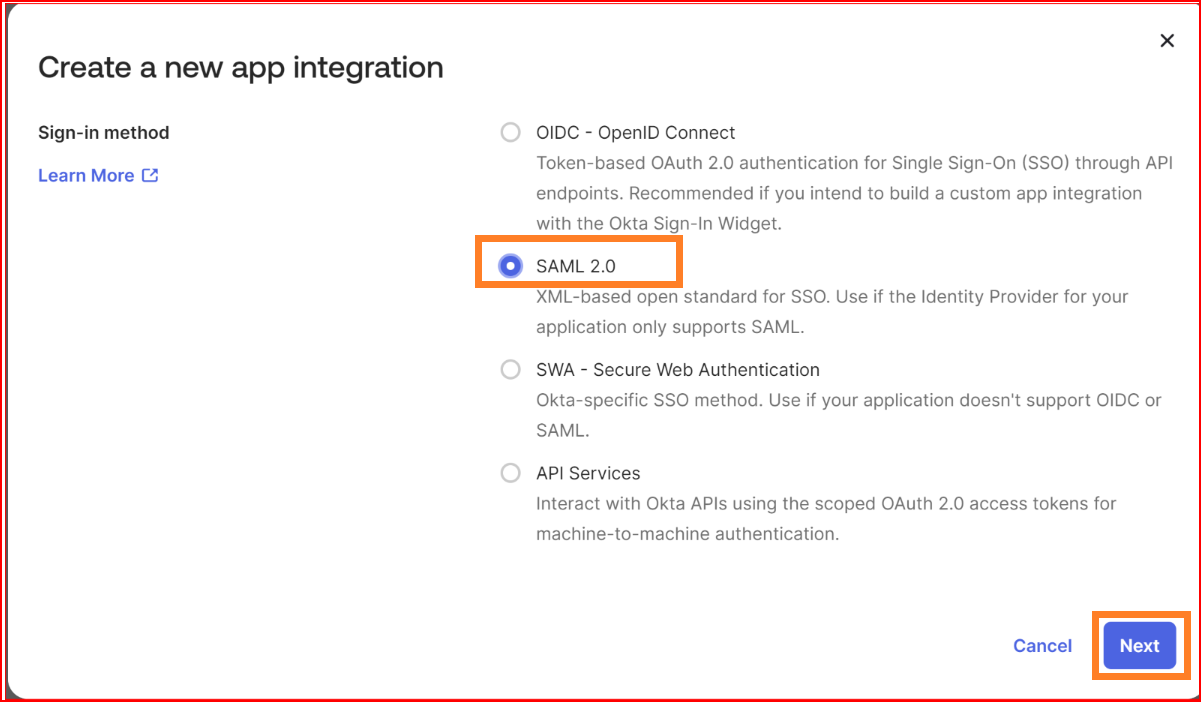
Access the Okta Developer Console
Log in to your Okta Developer account at Create a new SAML Application.
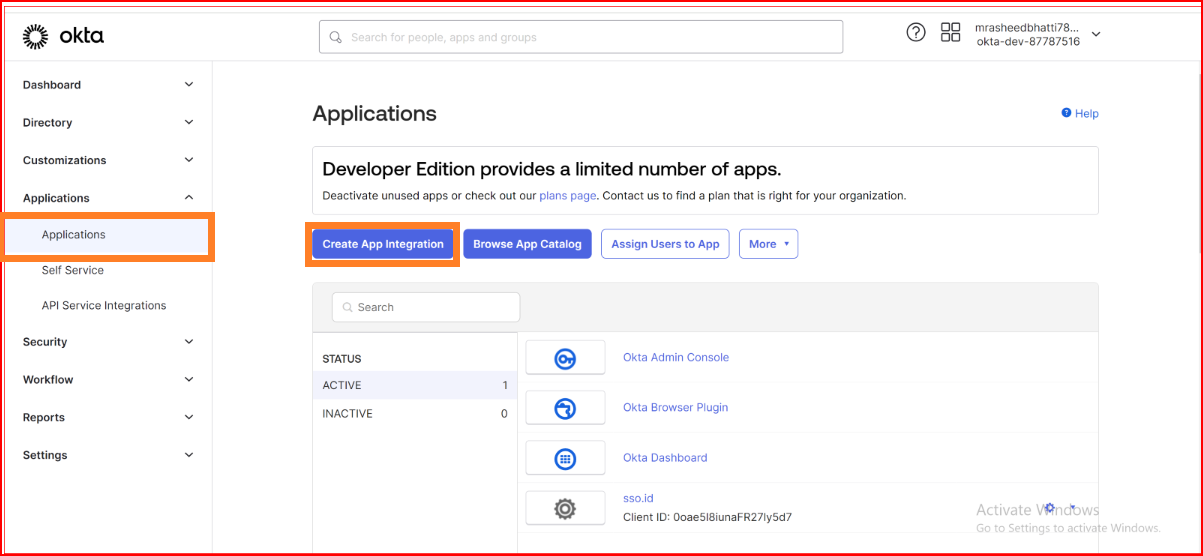
Create new SAML Application
Once logged in, navigate to the "Applications" tab. Click on "Add Application" to start the process of creating a new application.
Choose Application Type
Select "Web" as the application type since you're setting up an SAML application for web-based authentication.
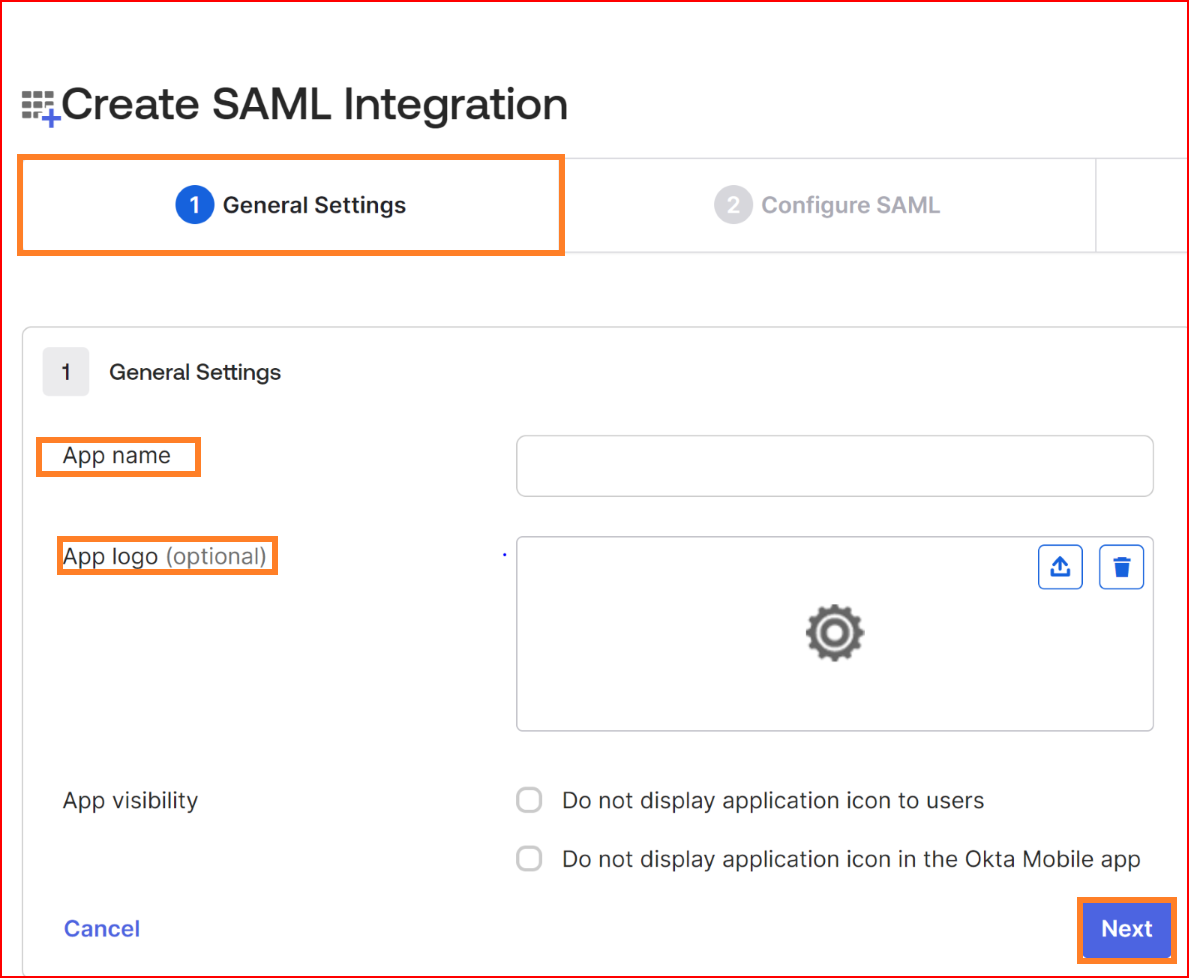
In General Settings
- App name: Specify a name for your app integration.
- App logo: Add a logo to accompany your app integration. The image file should be in either. Png, .jpg, or .gif format and should have a file size smaller than 1 MB. For optimal results, it is recommended to use a PNG image with a transparent background and landscape orientation. Ensure a minimum resolution of 420 x 120 pixels to prevent the need for upscaling the image.
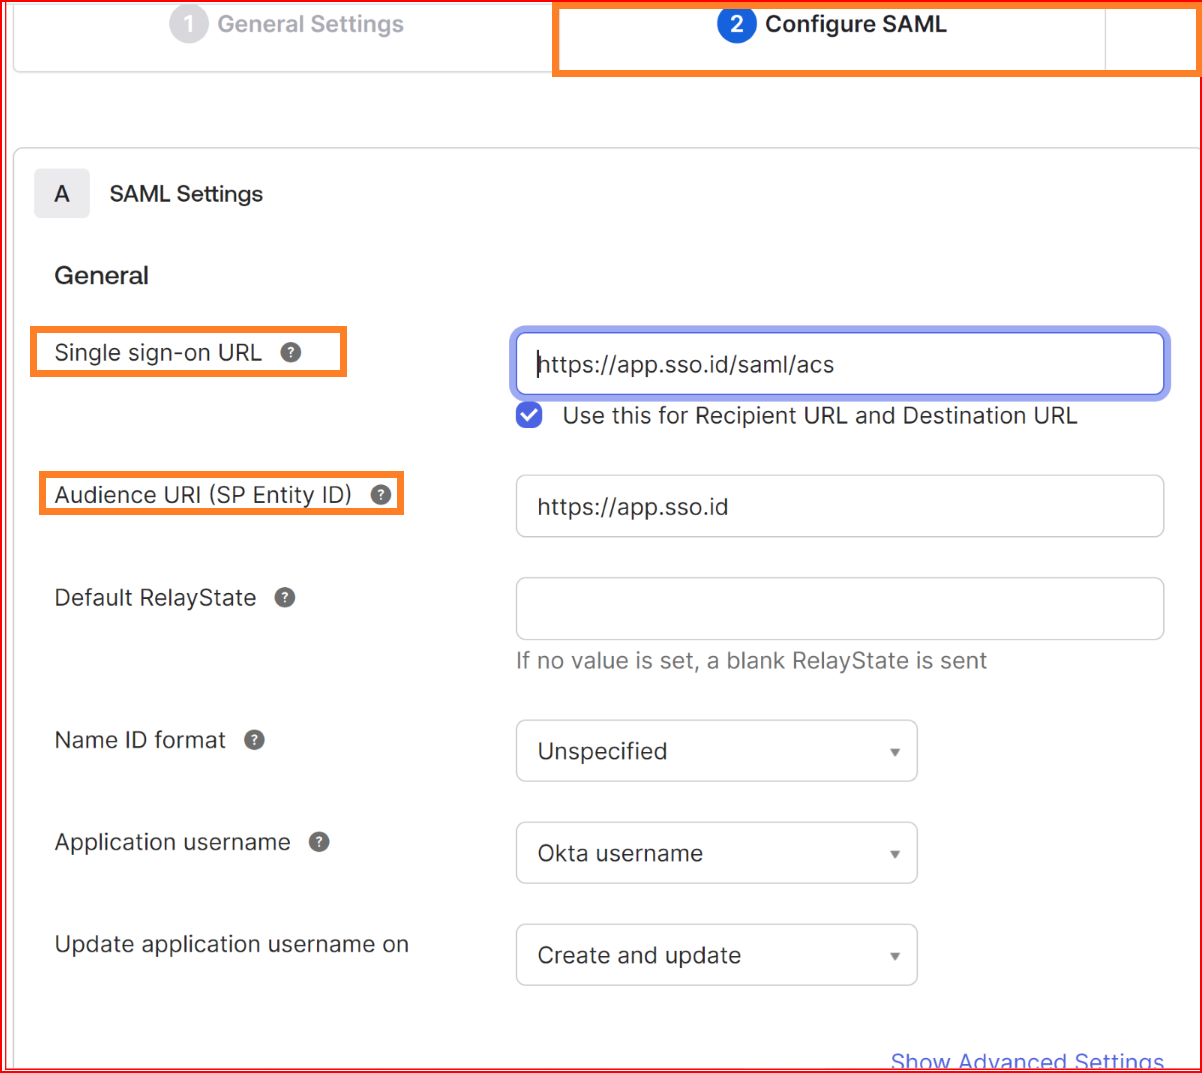
Configure SAML
- Single Sign-on URL: Single Sign-On (SSO) is a mechanism that allows users to access multiple applications with a single set of credentials. The Single Sign-On URL is a crucial component in the SSO process as it is the URL where users are redirected to authenticate and obtain a token that grants them access to multiple services.
- Audience URI (SP Entity ID): In Single Sign-On (SSO) scenarios, the Audience URI, also known as the Service Provider Entity ID (SP Entity ID), is an identifier that uniquely identifies the service provider to the identity provider during the SSO process. This identifier helps the identity provider understand which service provider is making the authentication request. Here's what the Audience URI might look like.
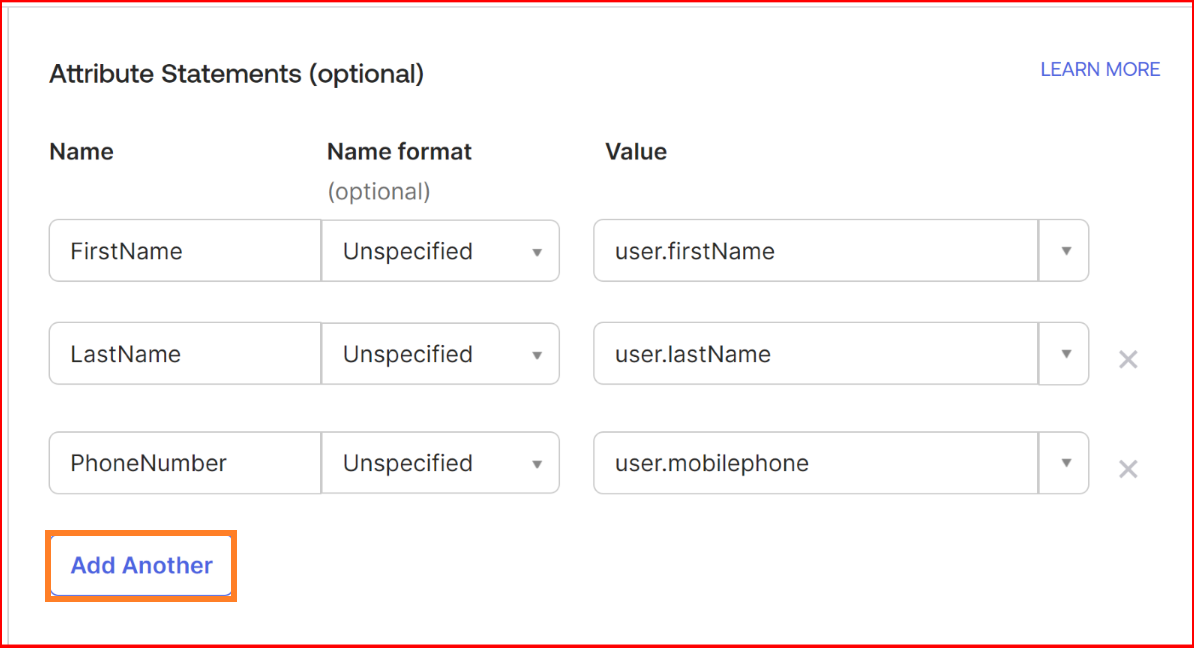
- Attribute Statements: In Single Sign-On (SSO) using Security Assertion Markup Language (SAML), Attribute Statements are pieces of information about the user that is sent from the Identity Provider (IdP) to the Service Provider (SP) as part of the SAML assertion. These attributes provide additional details about the authenticated user and are used by the service provider to make authorization and access control decisions.

This identifier helps the identity provider understand which service provider is making the authentication request.